Ga door naar hoofdinhoud

Lenovo IdeaPad U410 Solid State Drive Replacement

Wat je nodig hebt

  1. Lenovo IdeaPad U410 Solid State Drive  Replacement, Bottom Cover: stap 1, afbeelding 1 van 2 Lenovo IdeaPad U410 Solid State Drive  Replacement, Bottom Cover: stap 1, afbeelding 2 van 2
    • Using the metal spudger, remove all the rubber squares on the bottom of the laptop.

  2. Lenovo IdeaPad U410 Solid State Drive  Replacement: stap 2, afbeelding 1 van 3 Lenovo IdeaPad U410 Solid State Drive  Replacement: stap 2, afbeelding 2 van 3 Lenovo IdeaPad U410 Solid State Drive  Replacement: stap 2, afbeelding 3 van 3
    • Remove the three 6 mm Phillips #1 screws holding the panel on the laptop.

    • Pry the panel from the laptop using your hands or the metal spudger if necessary.

  3. Lenovo IdeaPad U410 Solid State Drive  Replacement, Solid State Drive: stap 3, afbeelding 1 van 3 Lenovo IdeaPad U410 Solid State Drive  Replacement, Solid State Drive: stap 3, afbeelding 2 van 3 Lenovo IdeaPad U410 Solid State Drive  Replacement, Solid State Drive: stap 3, afbeelding 3 van 3
    • Make sure your laptop is powered off.

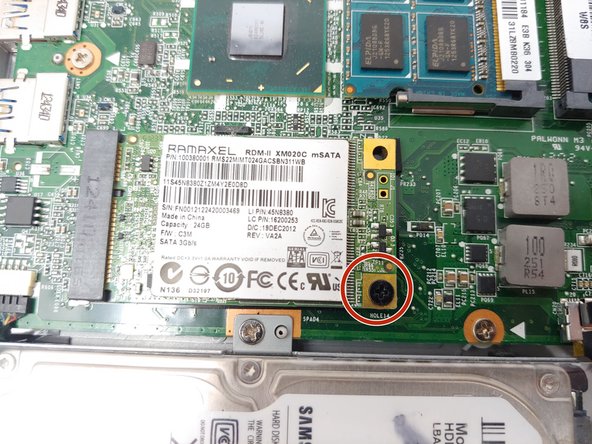
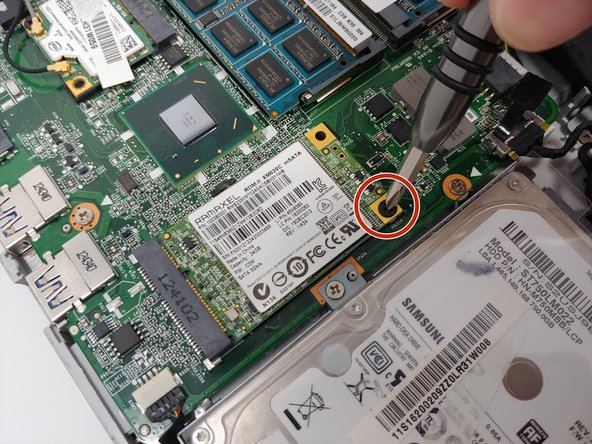
    • Use a Phillips #1 screwdriver to remove the 3 mm screw holding the SSD in place.

  4. Lenovo IdeaPad U410 Solid State Drive  Replacement: stap 4, afbeelding 1 van 1
    • Grab the SSD and pull it out from the mSATA slot.

Conclusie

To reassemble your device, follow these instructions in reverse order.

Één andere persoon heeft deze handleiding voltooid.

Edric An

Lid sinds: 09/18/18

433 Reputatie

3 handleidingen geschreven

0 opmerkingen

Voeg opmerking toe

Weergavestatistieken:

Afgelopen 24 uren: 1

Afgelopen 7 dagen: 2

Afgelopen 30 dagen: 3

Altijd: 673