Inleiding
If your Lenovo IdeaPad A1-07 constantly loses a charge and won't turn back on, it may have a faulty battery. If the troubleshooting page options were proven unsuccessful then the battery may need to be replaced. This guide will walk you through how to carefully take the tablet apart to access and remove the battery from the device.
Wat je nodig hebt
-
-
With the blue plastic opening tool, use the lock screen switch by the volume button as an access point to gently lift the back cover off.
-
Wedge the opening tool until you start hearing the back cover popping off the body of the device.
-
Slide the opening tool down the length of the device.
-
-
-
Using a Phillips #000 screwdriver, remove all 18 of the 4mm screws.
-
With the blue plastic opening tool, gently wedge the tool between the screen and the gray frame until you feel resistance.
-
Push in the teeth with the blue plastic opening tool, towards the center of the device, and gently pull off the frame.
-
-
-
-
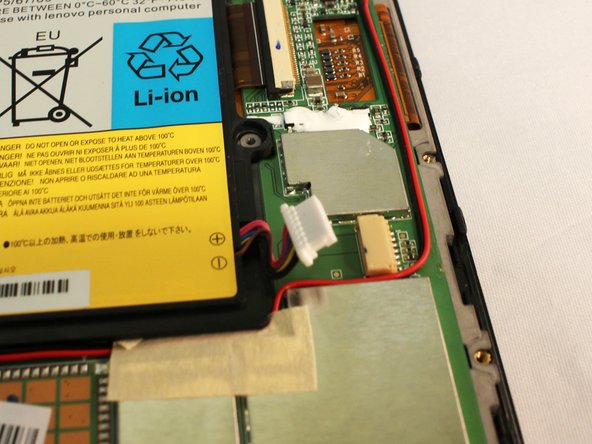
Use a plastic opening tool to push the white battery connector out of its socket on the motherboard.
-
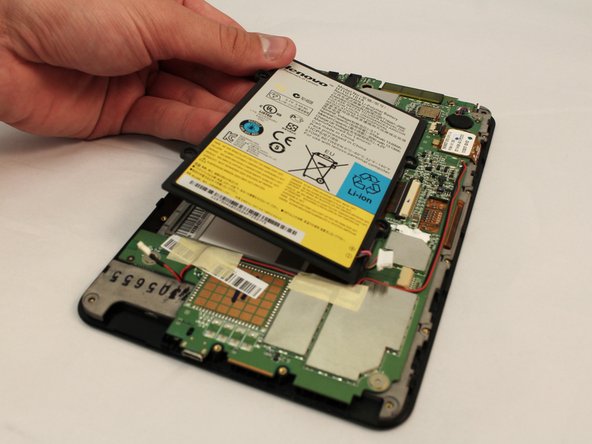
Lift the battery away from the device.
-


To reassemble your device, follow these instructions in reverse order.
To reassemble your device, follow these instructions in reverse order.
Annuleren: ik heb deze handleiding niet afgemaakt.
2 andere personen hebben deze handleiding voltooid.

Team

Eastern Washington University, Team S1-G4, Crane Spring 2017 Lid van Eastern Washington University, Team S1-G4, Crane Spring 2017
EWU-CRANE-S17S1G4
4 Leden
4 handleidingen geschreven