Ga door naar hoofdinhoud

Lenovo IdeaPad 110-15IBR Display Replacement

Wat je nodig hebt

  1. Lenovo IdeaPad 110-15IBR Display Replacement, Display: stap 1, afbeelding 1 van 3 Lenovo IdeaPad 110-15IBR Display Replacement, Display: stap 1, afbeelding 2 van 3 Lenovo IdeaPad 110-15IBR Display Replacement, Display: stap 1, afbeelding 3 van 3
    • Before you proceed, make sure your computer is turned off and it's not connected to any power source.

    • Using a plastic opening tool, gently pry the cover off of the display.

    • Lay screen flat down to remove the tabs from each corner.

  2. Lenovo IdeaPad 110-15IBR Display Replacement: stap 2, afbeelding 1 van 1
    • Using the #1 Phillips head screwdriver unscrew the 4 (9mmx6mm) screws holding the screen in place.

  3. Lenovo IdeaPad 110-15IBR Display Replacement: stap 3, afbeelding 1 van 2 Lenovo IdeaPad 110-15IBR Display Replacement: stap 3, afbeelding 2 van 2
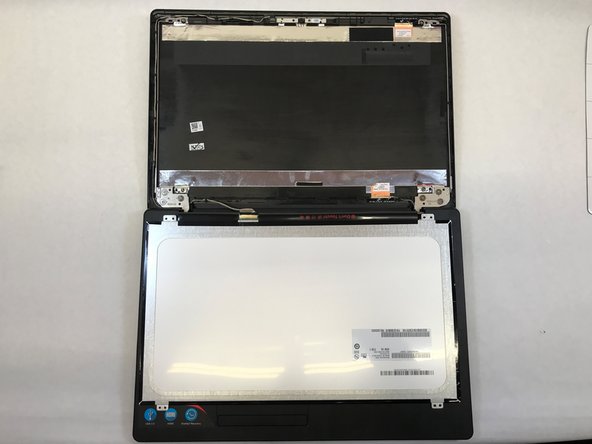
    • Carefully lay the screen facing down on the keyboard.

    • Careful not to lift the screen to high up or tug on the screen due to a wire still being connected to the screen and display.

  4. Lenovo IdeaPad 110-15IBR Display Replacement: stap 4, afbeelding 1 van 2 Lenovo IdeaPad 110-15IBR Display Replacement: stap 4, afbeelding 2 van 2
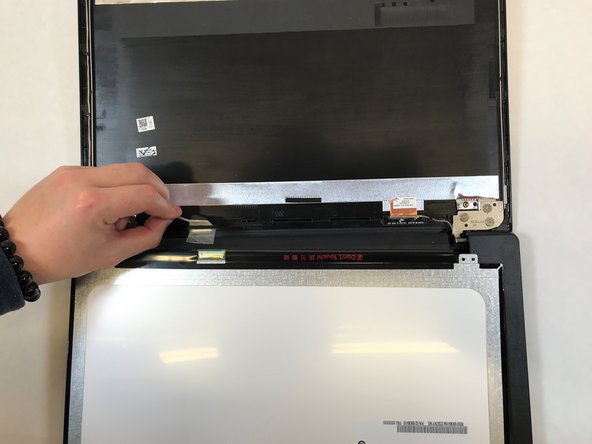
    • Remove the tape holding the connected wire to the display.

    • Gently remove the display wire from the connection.

    • Remove the display from the device.

Conclusie

To reassemble your device, follow these instructions in reverse order.

12 andere personen hebben deze handleiding voltooid.

Saddam Alsinai

Lid sinds: 10/18/17

669 Reputatie

4 handleidingen geschreven

Team

UW Tacoma, Team S3-G4, Liner Fall 2017 Lid van UW Tacoma, Team S3-G4, Liner Fall 2017

UWT-LINER-F17S3G4

4 Leden

14 handleidingen geschreven

0 opmerkingen

Voeg opmerking toe

Weergavestatistieken:

Afgelopen 24 uren: 1

Afgelopen 7 dagen: 10

Afgelopen 30 dagen: 25

Altijd: 5,106