Ga door naar hoofdinhoud

Lenovo IdeaPad 110 Touch-15ACL Motherboard Replacement

Wat je nodig hebt

  1. Lenovo IdeaPad 110 Touch-15ACL Motherboard Replacement, Back Case: stap 1, afbeelding 1 van 1
    • Remove the thirteen 6 mm Phillips #0 screws.

  2. Lenovo IdeaPad 110 Touch-15ACL Motherboard Replacement: stap 2, afbeelding 1 van 2 Lenovo IdeaPad 110 Touch-15ACL Motherboard Replacement: stap 2, afbeelding 2 van 2
    • Use an opening tool to gently disconnect most of the clips on the back panel.

    • DO NOT force the panel out towards the optical disk drive.

  3. Lenovo IdeaPad 110 Touch-15ACL Motherboard Replacement: stap 3, afbeelding 1 van 3 Lenovo IdeaPad 110 Touch-15ACL Motherboard Replacement: stap 3, afbeelding 2 van 3 Lenovo IdeaPad 110 Touch-15ACL Motherboard Replacement: stap 3, afbeelding 3 van 3
    • Pry the disk drive away from the center of the laptop.

    • Don't worry about any screws since we already removed the screws that are associated with the drive.

    • Once the drive is removed, remove the one 2 mm Phillips #0 screw that is now exposed.

  4. Lenovo IdeaPad 110 Touch-15ACL Motherboard Replacement: stap 4, afbeelding 1 van 3 Lenovo IdeaPad 110 Touch-15ACL Motherboard Replacement: stap 4, afbeelding 2 van 3 Lenovo IdeaPad 110 Touch-15ACL Motherboard Replacement: stap 4, afbeelding 3 van 3
    • Unclip any of the remaining clips and remove the back panel.

  5. Lenovo IdeaPad 110 Touch-15ACL Motherboard Replacement, Battery Replacement: stap 5, afbeelding 1 van 1
    • Remove the four 6 mm Phillips #0 mounting screws.

  6. Lenovo IdeaPad 110 Touch-15ACL Motherboard Replacement: stap 6, afbeelding 1 van 3 Lenovo IdeaPad 110 Touch-15ACL Motherboard Replacement: stap 6, afbeelding 2 van 3 Lenovo IdeaPad 110 Touch-15ACL Motherboard Replacement: stap 6, afbeelding 3 van 3
    • Detach the wire connected to the motherboard and remove the battery assembly.

  7. Lenovo IdeaPad 110 Touch-15ACL Motherboard Replacement, Hard Disk Drive Replacement: stap 7, afbeelding 1 van 1
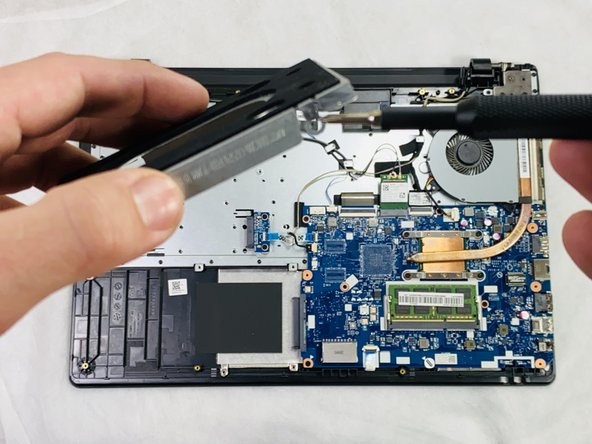
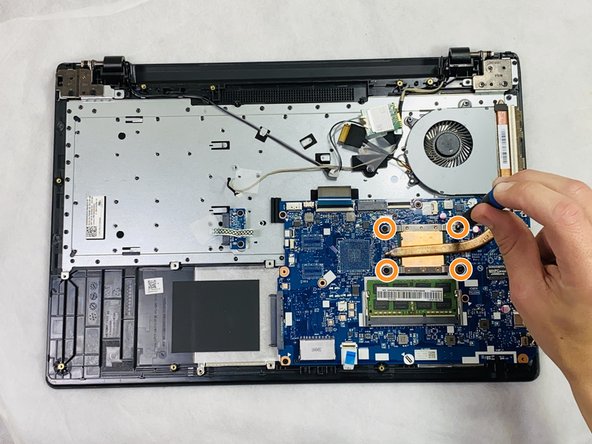
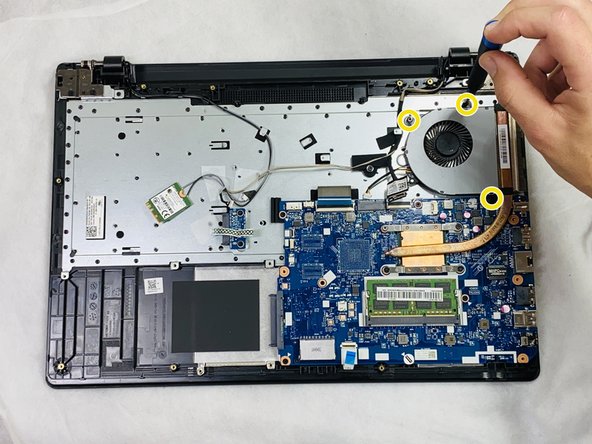
    • Remove the four 4 mm Phillips #0 mounting screws attaching the caddy to the frame.

  8. Lenovo IdeaPad 110 Touch-15ACL Motherboard Replacement: stap 8, afbeelding 1 van 2 Lenovo IdeaPad 110 Touch-15ACL Motherboard Replacement: stap 8, afbeelding 2 van 2
    • Gently remove the caddy away from the motherboard.

    • If you are removing an already existing HDD, unplug the component along with the caddy and remove the four screws mounting the caddy to the HDD.

  9. Lenovo IdeaPad 110 Touch-15ACL Motherboard Replacement, Speaker Replacement: stap 9, afbeelding 1 van 2 Lenovo IdeaPad 110 Touch-15ACL Motherboard Replacement, Speaker Replacement: stap 9, afbeelding 2 van 2
    • Detach the speaker wire from the motherboard.

  10. Lenovo IdeaPad 110 Touch-15ACL Motherboard Replacement: stap 10, afbeelding 1 van 2 Lenovo IdeaPad 110 Touch-15ACL Motherboard Replacement: stap 10, afbeelding 2 van 2
    • Gently pull upwards on the speaker assembly to remove it from the case.

  11. Lenovo IdeaPad 110 Touch-15ACL Motherboard Replacement, Motherboard Replacement: stap 11, afbeelding 1 van 3 Lenovo IdeaPad 110 Touch-15ACL Motherboard Replacement, Motherboard Replacement: stap 11, afbeelding 2 van 3 Lenovo IdeaPad 110 Touch-15ACL Motherboard Replacement, Motherboard Replacement: stap 11, afbeelding 3 van 3
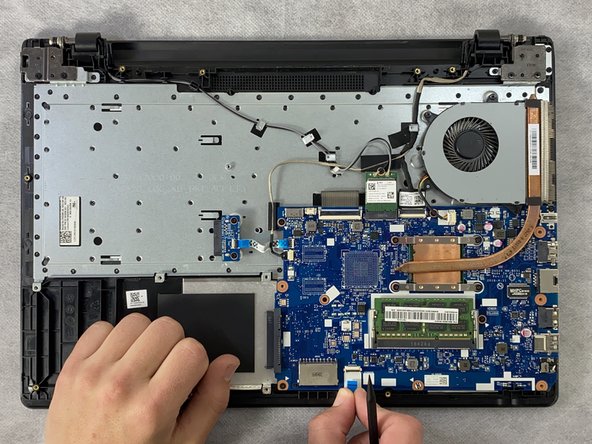
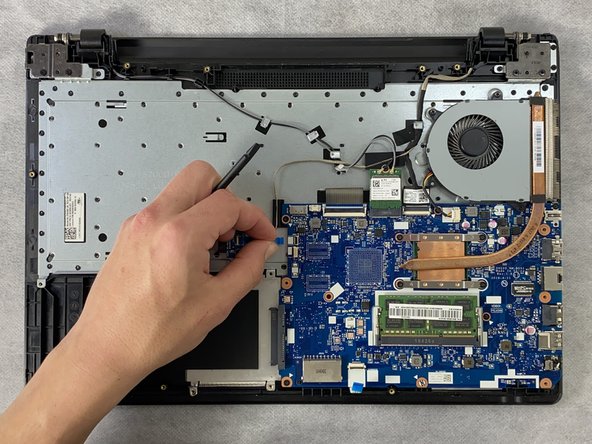
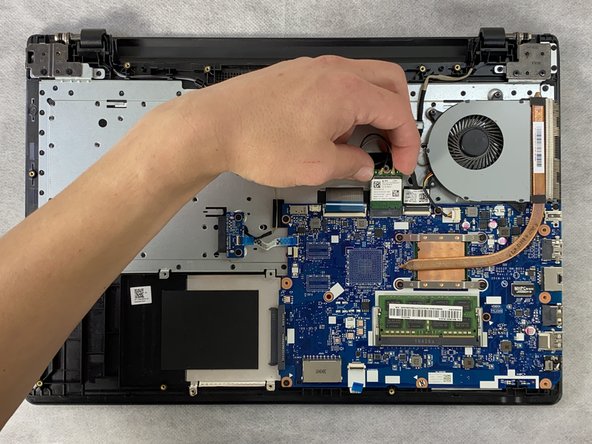
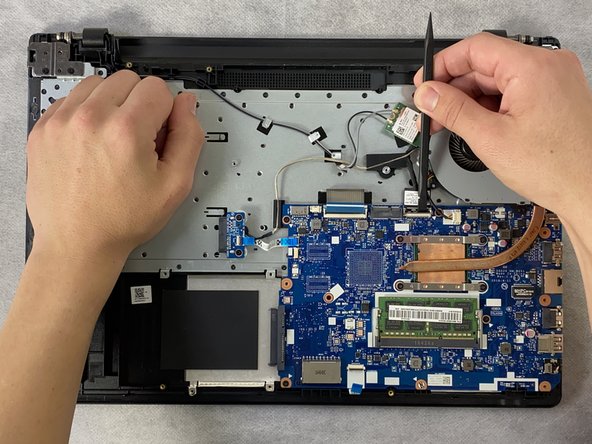
    • Unlock the ZIF connector and remove the wire connected at the bottom of the motherboard.

    • For the wires with the blue plastic, you must undo the clip before pulling out the wire.

  12. Lenovo IdeaPad 110 Touch-15ACL Motherboard Replacement: stap 12, afbeelding 1 van 3 Lenovo IdeaPad 110 Touch-15ACL Motherboard Replacement: stap 12, afbeelding 2 van 3 Lenovo IdeaPad 110 Touch-15ACL Motherboard Replacement: stap 12, afbeelding 3 van 3
    • Disconnect the wires attached on the "left" side.

    • Use the spudger to unlock the clip to remove the blue ribbon cable.

  13. Lenovo IdeaPad 110 Touch-15ACL Motherboard Replacement: stap 13, afbeelding 1 van 3 Lenovo IdeaPad 110 Touch-15ACL Motherboard Replacement: stap 13, afbeelding 2 van 3 Lenovo IdeaPad 110 Touch-15ACL Motherboard Replacement: stap 13, afbeelding 3 van 3
    • Unlock the ZIF connector at the top-left of the motherboard.

    • Remove the ribbon cable.

  14. Lenovo IdeaPad 110 Touch-15ACL Motherboard Replacement: stap 14, afbeelding 1 van 3 Lenovo IdeaPad 110 Touch-15ACL Motherboard Replacement: stap 14, afbeelding 2 van 3 Lenovo IdeaPad 110 Touch-15ACL Motherboard Replacement: stap 14, afbeelding 3 van 3
    • Remove the single 4 mm Philips #0 screw from the Wi-Fi card.

    • Slide the Wi-Fi card out of the socket.

  15. Lenovo IdeaPad 110 Touch-15ACL Motherboard Replacement: stap 15, afbeelding 1 van 3 Lenovo IdeaPad 110 Touch-15ACL Motherboard Replacement: stap 15, afbeelding 2 van 3 Lenovo IdeaPad 110 Touch-15ACL Motherboard Replacement: stap 15, afbeelding 3 van 3
    • Unlock the remaining ZIF connector with a spudger.

    • Remove the ribbon cable.

  16. Lenovo IdeaPad 110 Touch-15ACL Motherboard Replacement: stap 16, afbeelding 1 van 3 Lenovo IdeaPad 110 Touch-15ACL Motherboard Replacement: stap 16, afbeelding 2 van 3 Lenovo IdeaPad 110 Touch-15ACL Motherboard Replacement: stap 16, afbeelding 3 van 3
    • Disconnect the fan's wire from the motherboard.

    • Remove the four 3 mm Philips #0 screws joining the heatsink to the motherboard

    • Follow the number order when re-installing.

    • Then, remove the three 5 mm Philips #0 screws holding the fan assembly to the frame.

    • Remove the fan and heatsink.

  17. Lenovo IdeaPad 110 Touch-15ACL Motherboard Replacement: stap 17, afbeelding 1 van 3 Lenovo IdeaPad 110 Touch-15ACL Motherboard Replacement: stap 17, afbeelding 2 van 3 Lenovo IdeaPad 110 Touch-15ACL Motherboard Replacement: stap 17, afbeelding 3 van 3
    • Once everything has been disconnected from the motherboard, remove the six 3 mm Philips #0 mounting screws from the motherboard.

    • There is normally one screw under a sticker at the "bottom" (shown in the picture).

  18. Lenovo IdeaPad 110 Touch-15ACL Motherboard Replacement: stap 18, afbeelding 1 van 1
    • This is what the frame should look like once everything is removed.

Conclusie

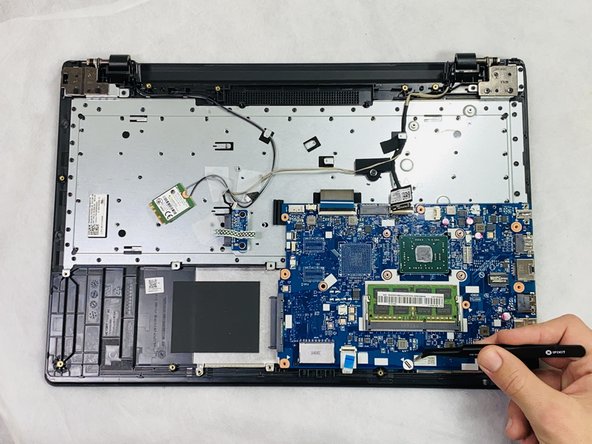
To reassemble your device, follow these instructions in reverse order.

Clark Beuckman

Lid sinds: 02/22/22

529 Reputatie

5 handleidingen geschreven

Team

Clemson, Team 2-3, Hunter Spring 2022 Lid van Clemson, Team 2-3, Hunter Spring 2022

CLEM-HUNTER-S22S2G3

5 Leden

6 handleidingen geschreven

0 opmerkingen

Voeg opmerking toe

Weergavestatistieken:

Afgelopen 24 uren: 0

Afgelopen 7 dagen: 7

Afgelopen 30 dagen: 17

Altijd: 545