Ga door naar hoofdinhoud

Lenovo Flex 6-11IGM Motherboard Replacement

Gearchiveerde handleiding
Deze handleiding wordt enkel nog bijgehouden voor historische doeleinden. Gebruik de laatste versie van deze gids om uw reparatie uit te voeren.

Wat je nodig hebt

  1. Lenovo Flex 6-11IGM Motherboard Replacement, Back Panel: stap 1, afbeelding 1 van 1
    • Flip the device over and lay it down with the underside facing upwards.

  2. Lenovo Flex 6-11IGM Motherboard Replacement: stap 2, afbeelding 1 van 2 Lenovo Flex 6-11IGM Motherboard Replacement: stap 2, afbeelding 2 van 2
    • Remove the ten screws with a Phillips #00 screwdriver.

  3. Lenovo Flex 6-11IGM Motherboard Replacement: stap 3, afbeelding 1 van 1
    • Using a plastic opening tool, make your way around the edge of the laptop.

  4. Lenovo Flex 6-11IGM Motherboard Replacement: stap 4, afbeelding 1 van 2 Lenovo Flex 6-11IGM Motherboard Replacement: stap 4, afbeelding 2 van 2
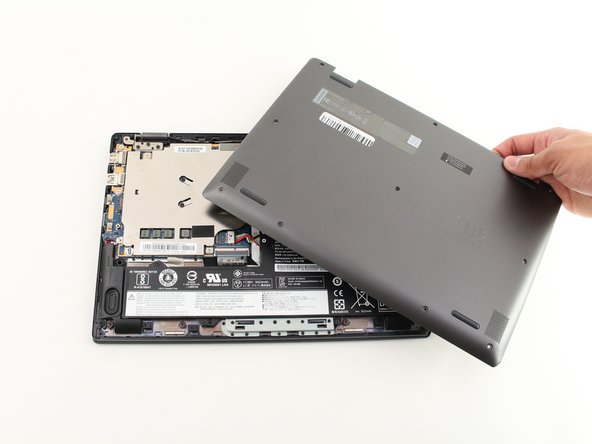
    • After making sure the back panel is completely free from the body, remove the back panel.

  5. Lenovo Flex 6-11IGM Motherboard Replacement, Speaker Unit: stap 5, afbeelding 1 van 3 Lenovo Flex 6-11IGM Motherboard Replacement, Speaker Unit: stap 5, afbeelding 2 van 3 Lenovo Flex 6-11IGM Motherboard Replacement, Speaker Unit: stap 5, afbeelding 3 van 3
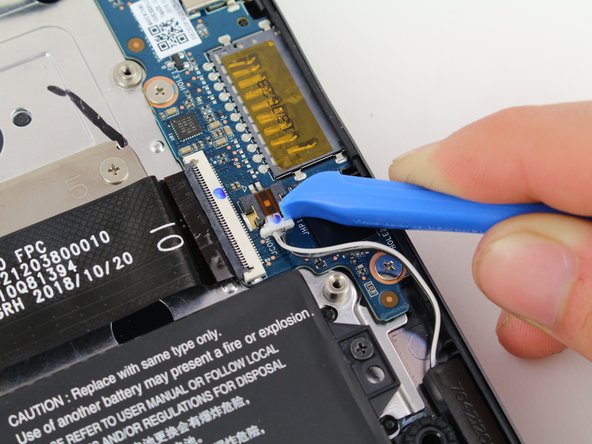
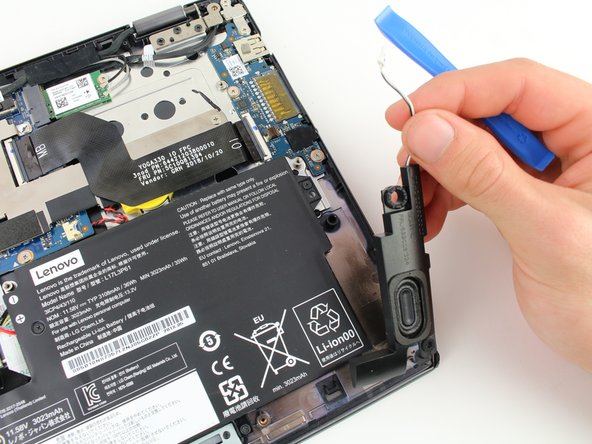
    • For the right speaker, disconnect the wire using the iFixit opening tool.

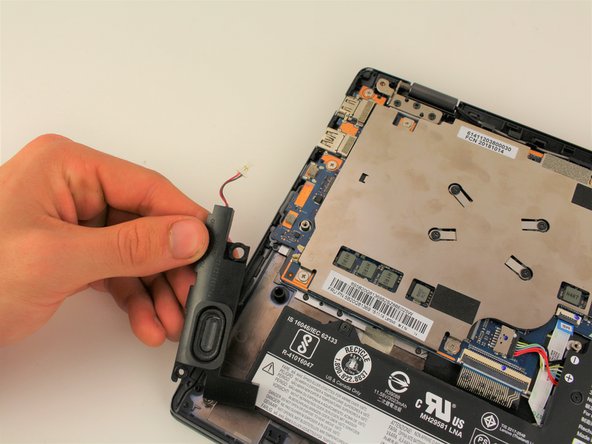
    • Pull the speaker out.

  6. Lenovo Flex 6-11IGM Motherboard Replacement: stap 6, afbeelding 1 van 2 Lenovo Flex 6-11IGM Motherboard Replacement: stap 6, afbeelding 2 van 2
    • For the speaker on the left, disconnect the wire using the iFixit opening tool.

    • Pull the speaker out.

  7. Lenovo Flex 6-11IGM Motherboard Replacement, Battery: stap 7, afbeelding 1 van 2 Lenovo Flex 6-11IGM Motherboard Replacement, Battery: stap 7, afbeelding 2 van 2
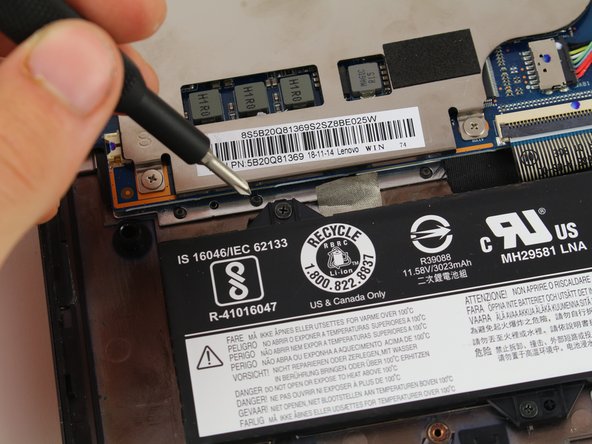
    • Remove the five 3.9 mm Phillips #00 black screws holding the battery in place.

  8. Lenovo Flex 6-11IGM Motherboard Replacement: stap 8, afbeelding 1 van 3 Lenovo Flex 6-11IGM Motherboard Replacement: stap 8, afbeelding 2 van 3 Lenovo Flex 6-11IGM Motherboard Replacement: stap 8, afbeelding 3 van 3
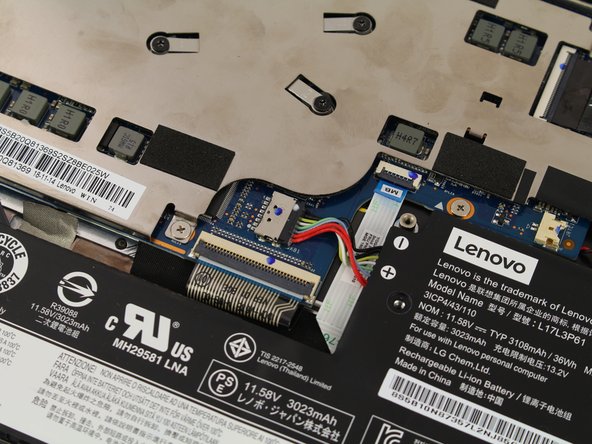
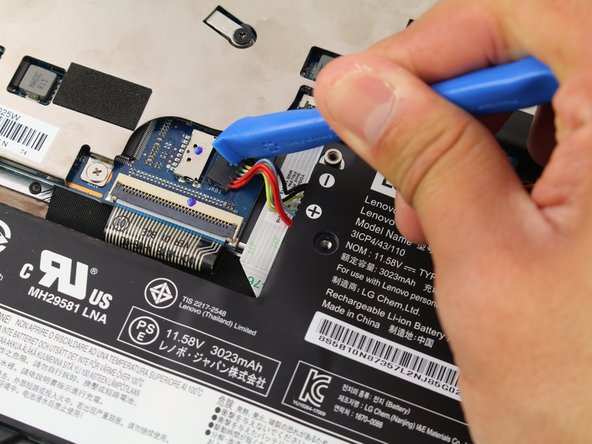
    • Pull out the multicolored connecting cables using an iFixit opening tool.

  9. Lenovo Flex 6-11IGM Motherboard Replacement: stap 9, afbeelding 1 van 1
    • Remove the now disconnected battery from the laptop.

  10. Lenovo Flex 6-11IGM Motherboard Replacement, Heat Sink: stap 10, afbeelding 1 van 3 Lenovo Flex 6-11IGM Motherboard Replacement, Heat Sink: stap 10, afbeelding 2 van 3 Lenovo Flex 6-11IGM Motherboard Replacement, Heat Sink: stap 10, afbeelding 3 van 3
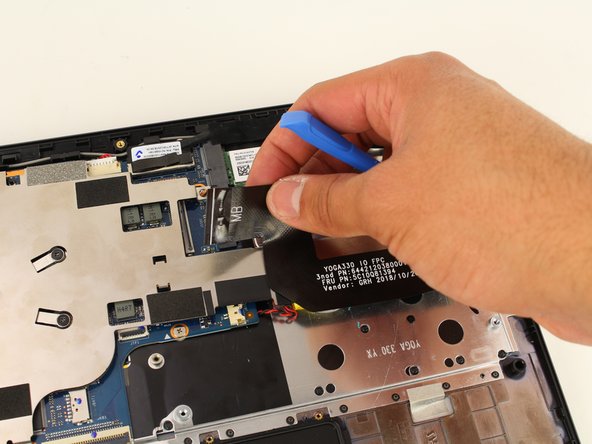
    • Disconnect the ribbon connector from both ends by disengaging the black latch and pulling it directly from its port.

  11. Lenovo Flex 6-11IGM Motherboard Replacement: stap 11, afbeelding 1 van 2 Lenovo Flex 6-11IGM Motherboard Replacement: stap 11, afbeelding 2 van 2
    • Remove the 3.5 mm length screws in the numbered order from 1-10 using the Phillips #00 screwdriver (not all are shown in the first image).

    • Remove the heat sink.

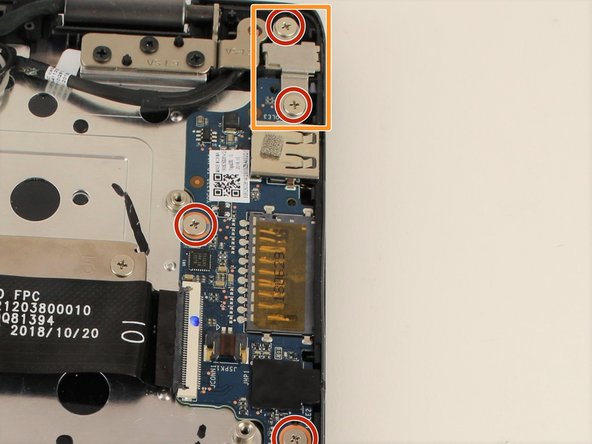
  12. Lenovo Flex 6-11IGM Motherboard Replacement, Auxiliary and USB Port: stap 12, afbeelding 1 van 3 Lenovo Flex 6-11IGM Motherboard Replacement, Auxiliary and USB Port: stap 12, afbeelding 2 van 3 Lenovo Flex 6-11IGM Motherboard Replacement, Auxiliary and USB Port: stap 12, afbeelding 3 van 3
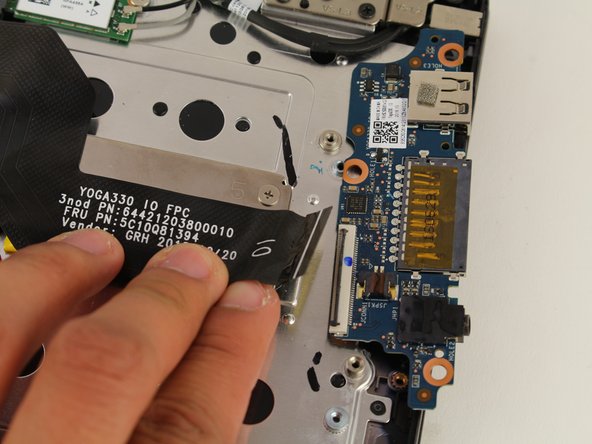
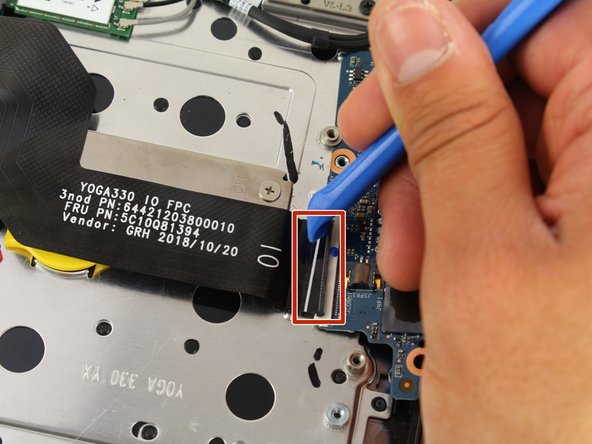
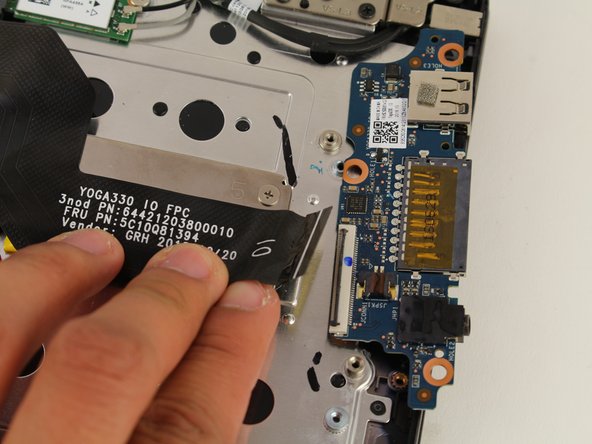
    • Disconnect the ribbon connector using the iFixit opening tool tool by flipping up the black flap and pulling the ribbon out.

  13. Lenovo Flex 6-11IGM Motherboard Replacement: stap 13, afbeelding 1 van 2 Lenovo Flex 6-11IGM Motherboard Replacement: stap 13, afbeelding 2 van 2
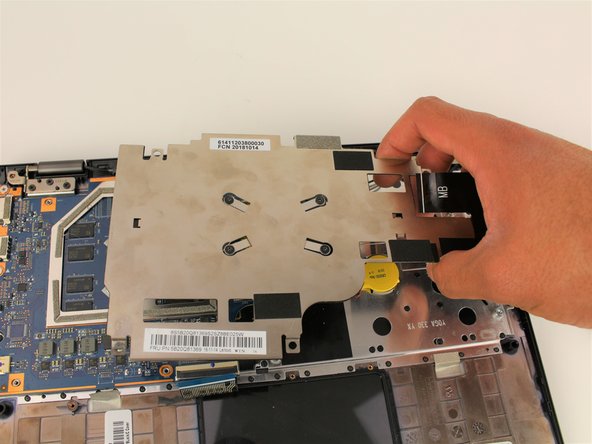
    • Take the three 3.5mm silver screws out using the Phillips #00 screwdriver.

    • Remove the protective silver shield before removing the ports.

    • Using the iFixit opening tool, insert its end underneath the ports, and pull them upwards toward you to remove them safely.

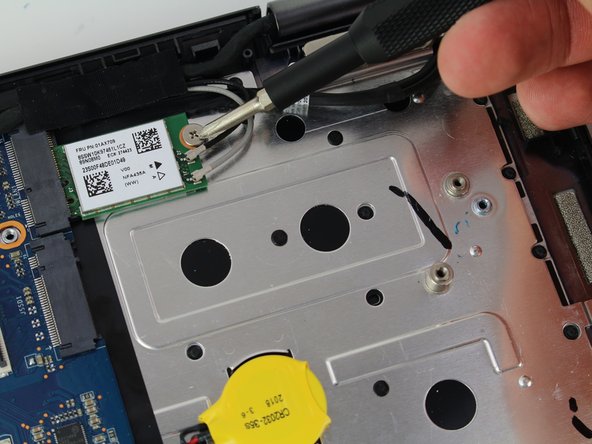
  14. Lenovo Flex 6-11IGM Motherboard Replacement, Motherboard: stap 14, afbeelding 1 van 2 Lenovo Flex 6-11IGM Motherboard Replacement, Motherboard: stap 14, afbeelding 2 van 2
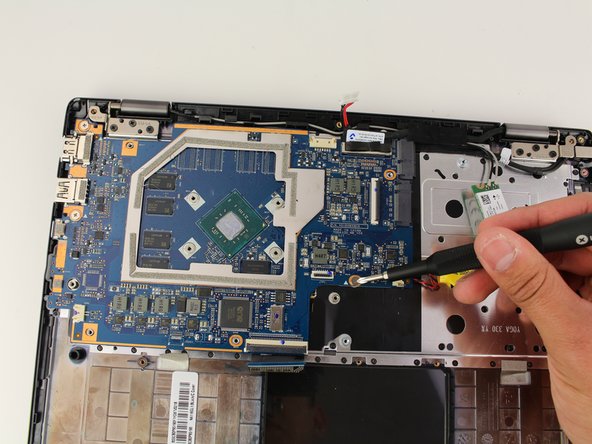
    • Unscrew the single 3.5 mm screw from the RAM card using a Phillips #00 screwdriver.

    • Unplug from motherboard.

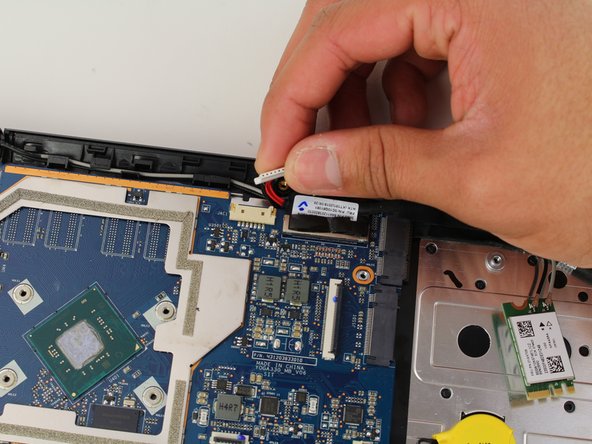
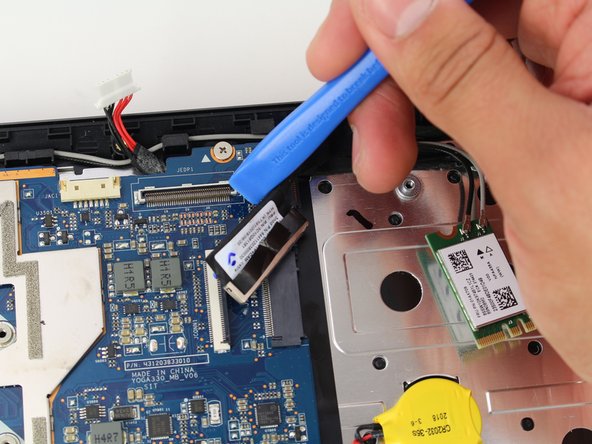
  15. Lenovo Flex 6-11IGM Motherboard Replacement: stap 15, afbeelding 1 van 3 Lenovo Flex 6-11IGM Motherboard Replacement: stap 15, afbeelding 2 van 3 Lenovo Flex 6-11IGM Motherboard Replacement: stap 15, afbeelding 3 van 3
    • Use an opening tool to remove the connecting cables.

  16. Lenovo Flex 6-11IGM Motherboard Replacement: stap 16, afbeelding 1 van 2 Lenovo Flex 6-11IGM Motherboard Replacement: stap 16, afbeelding 2 van 2
    • Unscrew the three 3.5 mm retaining screws from the motherboard using a Phillips #00 screwdriver.

  17. Lenovo Flex 6-11IGM Motherboard Replacement: stap 17, afbeelding 1 van 1
    • Pick up and remove motherboard from laptop.

Conclusie

To reassemble your device, follow these instructions in reverse order.

Één andere persoon heeft deze handleiding voltooid.

Dustin Healy

Lid sinds: 01/23/20

241 Reputatie

2 handleidingen geschreven

Team

Cal Poly, Team S2-G4, White Winter 2020 Lid van Cal Poly, Team S2-G4, White Winter 2020

CPSU-WHITE-W20S2G4

3 Leden

4 handleidingen geschreven

0 opmerkingen

Voeg opmerking toe

Weergavestatistieken:

Afgelopen 24 uren: 0

Afgelopen 7 dagen: 0

Afgelopen 30 dagen: 0

Altijd: 111