Inleiding
I've repaired many modern consumer electronics items by simply 're-capping' them. The capacitors used here cost $15 in total including some extras and shipping. There seem to be a lot of people having failures of these units just after five years (the warranty term). Replacing this unit with an Ecobee or Nest is possible but may require new thermostat wiring among your various HVAC units for the extra wires needed.
Wat je nodig hebt
-
-
You're here because your early-model iComfort screen is blank! The newer Lennox S30 thermostat is the factory replacement for this iComfort, but it cost $1000-$1500 installed (!), so I decided to have a go at a fix.
-
-
-
Hopefully, you or your installer have previously registered your iComfort with Lennox, and you have the iComfort app installed on your cell phone. If so, can you still access and control your iComfort via your cell phone? Good chance of a fix if so. If not, the screen used to work and now it doesn't, so little to lose...
-
-
-
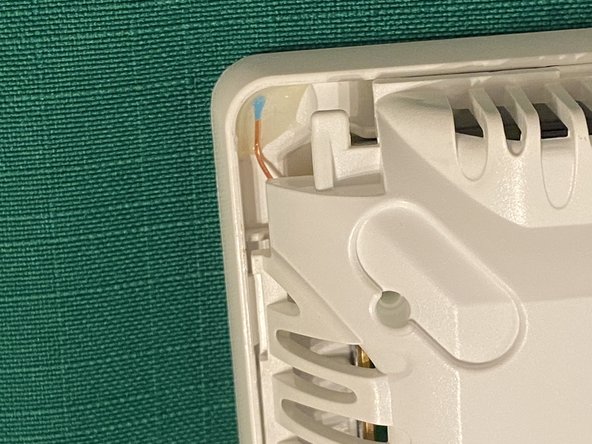
Using the guitar pick or small flat screwdriver, gently pry the bezel rim away from the back plate to free the locking tabs. Take note of the small sensor glued into one corner and start your prying opposite to it. There are 10 tabs, but after you get the first 3 or 4 free the rest are easier. Just don't pry beyond what is needed to clear the tabs!
-
-
-
-
Dab some flux onto each of the capacitor terminals; this helps the solder melt and flushes away any oxides. Apply your soldering iron to the capacitor solder tabs; gently pull up on that side as the solder melts and the capacitor should lift up. Repeat for the other side and remove the capacitor.
-
-
-
PLEASE observe the proper polarities or else damage will occur; look at the pictures; the three large caps all face the same way; the single small cap faces opposite. The white outlines on the circuit board nicely match the shapes of the capacitors' black plastic bases - note that one side has beveled corners.
-
-
-
Apply your soldering iron and some solder to each capacitor tab, heating for long enough that the flux boils and solder flows onto and between the circuit board pad and capacitor lead. The joint should be shiny. Do the other side, and give the capacitor a gentle wiggle to insure the solder joints are good.
-
-
-
If successful, the iComfort screen will be on and may show some error warnings. 'X' out of those and the screen should revert to its normal appearance showing temperature, etc. Now, IMPORTANT, SET THE DATE & TIME by pressing on the clock display at lower left. Getting within a few minutes is OK.
-


I recommend going through any custom iComfort settings to verify they survived (mine did, for 8 months), and I also turned down the screen brightness to the lowest setting of 20%.
I recommend going through any custom iComfort settings to verify they survived (mine did, for 8 months), and I also turned down the screen brightness to the lowest setting of 20%.
Annuleren: ik heb deze handleiding niet afgemaakt.
4 andere personen hebben deze handleiding voltooid.
46 opmerkingen
I have an iComfort 10F81 thermostat that still functions, but has the white screen of death, so I cannot change any of the settings. It came with the home (purchased not long ago) so I do not have an app connected to allow me to make any changes. I was really happy to find this webpage and order the parts. I've had to do a fix like this before on a BMW 3-series HVAC control unit and saved myself $600. Unfortunately when I cracked my unit open and was getting ready to do the repair, I found the PC Board did not match what was shown (mine only had two large caps and a small cap) and the capacitors listed here were not the same as the ones on my unit. Sadly I will have to order the correct capacitors and hope I can find them in stock. For reference, the Part# on my unit is 103445-04. If you plan to attempt this fix, I recommend opening your unit before ordering parts to verify the capacitors you need.
If you're able to reply, I'm not quite sure how to find the right capacitors for my unit. The larger ones read "220 HHB K27" (they are physically about 20% larger than the ones I ordered according to your part numbers); The smaller cap reads "E 723 47 1 0V" or maybe "1 QV" or maybe "10V"
Also, FYI, both of the links in the "What you need" section point to the same capacitor page.
@John Buck - I have the exact some caps in mine; Did you figure it out? I am unable to find anything like these to replace them with!
@craigsmith65430 - Using the data sheet that @twowarm posted in reply to my post, I was able to determine that the capacitors (caps) suggested on this site were indeed fungible with those on my unit's PCB. They were different sized, but the voltage codes and capacitance were the same. What's interesting is that my PCB DOES have the pad for the 3rd cap, but doesn't look like one was ever installed. I think I snagged the last caps that were in stock in the above links, so you might need to find a way to source other comparable caps. Again, this link posted by @twowarm was very helpful and could probably serve as a starting point to find caps from another source. I'm not 100% sure, but I don't see why you couldn't use caps w/ the same specs from another MFR
I'm running into issues currently due to my lack of soldering skills, but if I get everything swapped out, I'll probably post a youtube video on the fix. @twowarm are you ok with me posting a vid and giving you a shout out, if I'm successful? I will include a link to this page as well.
Sadly this fix failed to work for me. Difficult to say if it was due to something else being wrong, or if it was simply my terrible soldering job! I had a terrible time probably because my soldering iron was not getting hot enough. One of the pads came off of the circuit board, so that was fun. I got all three caps soldered back on, but the white screen persisted. Looks like rewiring the HVAC for a standard thermostat is my next stop :(