Ga door naar hoofdinhoud

Le Pan S Camera Replacement

Wat je nodig hebt

  1. Le Pan S Camera Replacement, Battery: stap 1, afbeelding 1 van 1
    • Remove the two 3.5 mm Phillips #00 screws that are covered by the micro SD port.

    • This cover is adjacent to the volume button on the side of the Le Pan S.

  2. Le Pan S Camera Replacement: stap 2, afbeelding 1 van 2 Le Pan S Camera Replacement: stap 2, afbeelding 2 van 2
    • Insert the spudger between the front and back panel in order to pry them apart.

    • Do this beside the volume button and the micro SD cover.

    • Pry open the rest of the Le Pan S by dragging the spudger across the side.

  3. Le Pan S Camera Replacement: stap 3, afbeelding 1 van 1
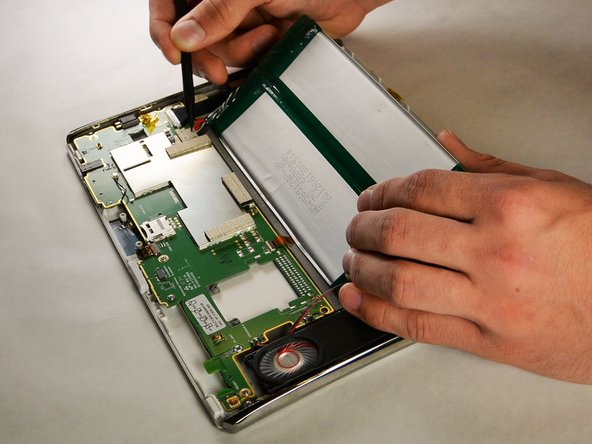
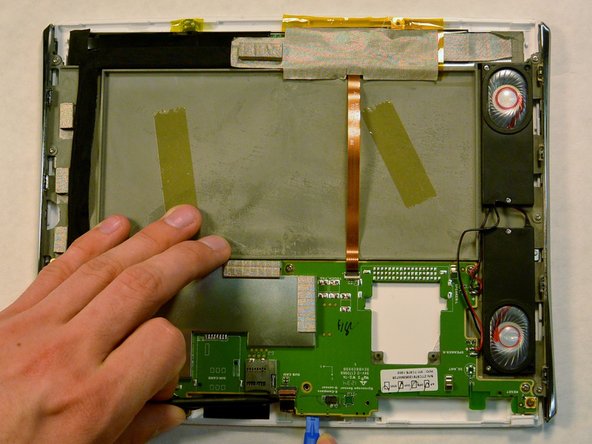
    • Once the front and back faces are completely separated, remove the back cover to reveal the inside components.

  4. Le Pan S Camera Replacement: stap 4, afbeelding 1 van 2 Le Pan S Camera Replacement: stap 4, afbeelding 2 van 2
    • Disconnect the battery from the circuitry and lay it out of the way.

    • The best method to complete this is to pull the bundled cable connector out with your hands. Pull towards the wires and away from the electrical board. Use the spudger to further coax the cable out.

    • If you are replacing your battery, make sure to dispose of it properly.

  5. Le Pan S Camera Replacement, Camera: stap 5, afbeelding 1 van 1
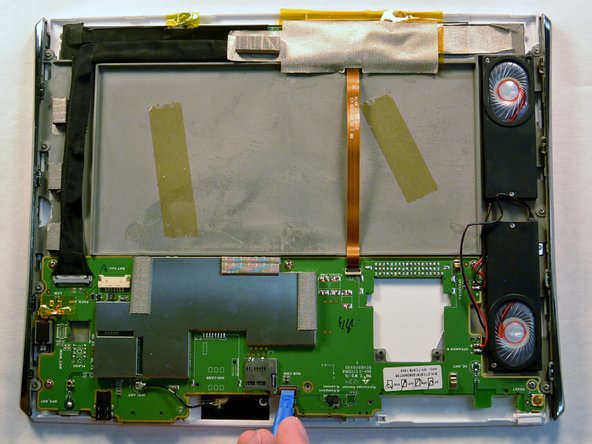
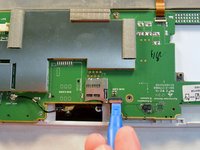
    • Remove the four 3.5 mm Phillips #00 screws from the circuit board near the bottom of the tablet.

  6. Le Pan S Camera Replacement: stap 6, afbeelding 1 van 1
    • Lift and pull the volume rocker up so it is out of the way of the camera.

  7. Le Pan S Camera Replacement: stap 7, afbeelding 1 van 2 Le Pan S Camera Replacement: stap 7, afbeelding 2 van 2
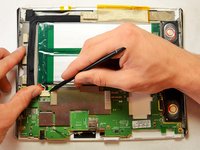
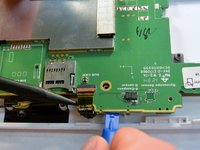
    • Remove the zero insertion force connector (ZIF) by using a plastic opening tool, spudger, or fingernail to lift retaining flap.

  8. Le Pan S Camera Replacement: stap 8, afbeelding 1 van 2 Le Pan S Camera Replacement: stap 8, afbeelding 2 van 2
    • Slightly lift up the green electrical board and pull out the camera.

Conclusie

To reassemble your device, follow these instructions in reverse order.

Tyler Ziliak

Lid sinds: 09/17/15

110 Reputatie

1 Handleiding geschreven

Team

IUPUI, Team 2-1, Harley Fall 2015 Lid van IUPUI, Team 2-1, Harley Fall 2015

IUPUI-HARLEY-F15S2G1

5 Leden

10 handleidingen geschreven

0 opmerkingen

Voeg opmerking toe

Weergavestatistieken:

Afgelopen 24 uren: 1

Afgelopen 7 dagen: 2

Afgelopen 30 dagen: 2

Altijd: 241