Ga door naar hoofdinhoud
Word lid van de reparatiegemeenschap - Account aanmaken

LG env2 vx9100 Camera Replacement

Wat je nodig hebt

  1. LG env2 vx9100 Camera Replacement, Battery: stap 1, afbeelding 1 van 3 LG env2 vx9100 Camera Replacement, Battery: stap 1, afbeelding 2 van 3 LG env2 vx9100 Camera Replacement, Battery: stap 1, afbeelding 3 van 3
    • Power off the phone before disassembly to avoid electric shock or fire.

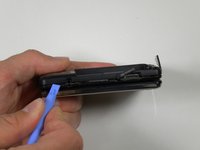
    • Place the phone face down on the table.

    • Pull down the tab below the battery with your fingernail or an opening tool.

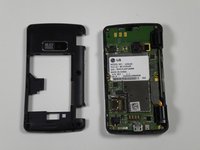
    • Lift the battery out.

  2. LG env2 vx9100 Camera Replacement, Back Panel: stap 2, afbeelding 1 van 2 LG env2 vx9100 Camera Replacement, Back Panel: stap 2, afbeelding 2 van 2
    • Locate the five rubber covers on the back panel of the phone.

    • Use a metal probe to remove each rubber cover and expose the screws underneath.

  3. LG env2 vx9100 Camera Replacement: stap 3, afbeelding 1 van 2 LG env2 vx9100 Camera Replacement: stap 3, afbeelding 2 van 2
    • Locate the six 2.5-millimeter Phillips #00 screws on the back panel.

    • Remove all six screws with a Phillips #00 screwdriver.

  4. LG env2 vx9100 Camera Replacement: stap 4, afbeelding 1 van 2 LG env2 vx9100 Camera Replacement: stap 4, afbeelding 2 van 2
    • Locate the seam around the edge of the phone.

    • Insert a plastic opening tool into the seam and gently pry to release the tabs.

    • Work around the phone until all tabs are released.

    • Remove the back panel.

  5. LG env2 vx9100 Camera Replacement, Camera: stap 5, afbeelding 1 van 2 LG env2 vx9100 Camera Replacement, Camera: stap 5, afbeelding 2 van 2
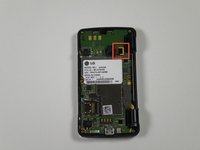
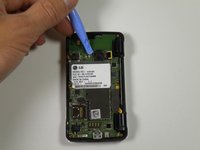
    • Locate the ribbon attached to the lens of the camera.

    • Place the plastic opening tool in between the logic board and ribbon.

    • Lift up the plastic opening to detach the ribbon from the logic board.

  6. LG env2 vx9100 Camera Replacement: stap 6, afbeelding 1 van 2 LG env2 vx9100 Camera Replacement: stap 6, afbeelding 2 van 2
    • Place the plastic opening tool in between the lens and the logic board.

    • Detach the lens from the logic board using the plastic opening tool by popping it out.

    • Take the entire lens and ribbon off of the logic board.

Conclusie

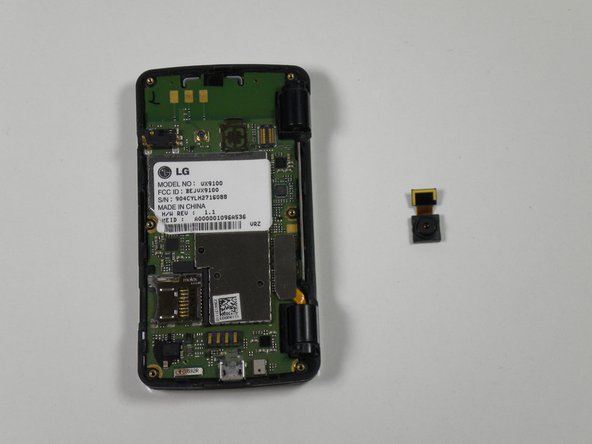
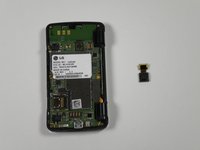
To reassemble your device, follow these instructions in reverse order.

Één andere persoon heeft deze handleiding voltooid.

Reed Williston

Lid sinds: 09/26/12

34 Reputatie

7 handleidingen geschreven

Team

Cal Poly, Team 16-55, Forte Fall 2012 Lid van Cal Poly, Team 16-55, Forte Fall 2012

CPSU-FORTE-F12S16G55

5 Leden

14 handleidingen geschreven

0Gids Commentaar

Voeg opmerking toe

Weergavestatistieken:

Afgelopen 24 uren: 1

Afgelopen 7 dagen: 4

Afgelopen 30 dagen: 5

Altijd: 538