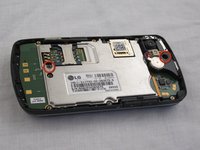
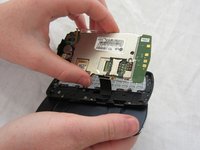
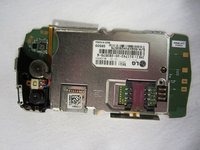
Ga door naar hoofdinhoud

LG Xenon Motherboard Replacement

Wat je nodig hebt

  1. LG Xenon Motherboard Replacement, Back Case: stap 1, afbeelding 1 van 1
    • Turn the phone so the back side is face up.

  2. LG Xenon Motherboard Replacement: stap 2, afbeelding 1 van 2 LG Xenon Motherboard Replacement: stap 2, afbeelding 2 van 2
    • Use your thumb to press on the small ridge at the bottom of the phone, then push upward to slide off the back casing.

  3. LG Xenon Motherboard Replacement, Battery: stap 3, afbeelding 1 van 2 LG Xenon Motherboard Replacement, Battery: stap 3, afbeelding 2 van 2
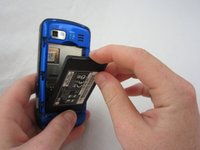
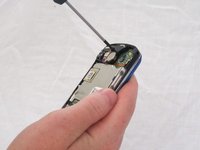
    • Use your index finger to pull the top of the battery out from the top center divot. Then pull the battery towards yourself to remove it from the compartment.

  4. LG Xenon Motherboard Replacement, Motherboard: stap 4, afbeelding 1 van 2 LG Xenon Motherboard Replacement, Motherboard: stap 4, afbeelding 2 van 2
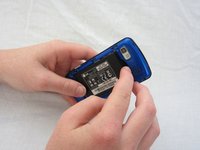
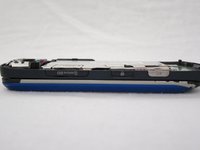
    • Use a Phillips #00 screwdriver to remove the six 2.4mm screws, which secure the back panel.

  5. LG Xenon Motherboard Replacement: stap 5, afbeelding 1 van 1
    • Push a spudger or small tool under the inner edge of the back panel and gently pry upward to separate it from the main body.

  6. LG Xenon Motherboard Replacement: stap 6, afbeelding 1 van 2 LG Xenon Motherboard Replacement: stap 6, afbeelding 2 van 2
    • Pop off the camera, lock, and volume buttons from the side of the phone using tweezers.

  7. LG Xenon Motherboard Replacement: stap 7, afbeelding 1 van 2 LG Xenon Motherboard Replacement: stap 7, afbeelding 2 van 2
    • Use the Phillips #00 screwdriver to remove the two 3mm screws, which secure the motherboard.

  8. LG Xenon Motherboard Replacement: stap 8, afbeelding 1 van 2 LG Xenon Motherboard Replacement: stap 8, afbeelding 2 van 2
    • Carefully lift and remove the motherboard from the main body.

    • The connector cable will still be attached to the motherboard. Any damage to the connector cable may permanently disable the phone.

  9. LG Xenon Motherboard Replacement: stap 9, afbeelding 1 van 2 LG Xenon Motherboard Replacement: stap 9, afbeelding 2 van 2
    • Carefully unclip the metal tab to separate the connector cable from the motherboard.

  10. LG Xenon Motherboard Replacement: stap 10, afbeelding 1 van 2 LG Xenon Motherboard Replacement: stap 10, afbeelding 2 van 2
    • Once the connector cable is detached from the motherboard, you have successfully removed the motherboard from the phone.

Conclusie

To reassemble your device, follow these instructions in reverse order.

2 andere personen hebben deze handleiding voltooid.

Micaela Saqui

Lid sinds: 04/19/12

78 Reputatie

7 handleidingen geschreven

Team

Cal Poly, Team 9-41, Regan Spring 2012 Lid van Cal Poly, Team 9-41, Regan Spring 2012

CPSU-REGAN-S12S9G41

5 Leden

19 handleidingen geschreven

0 opmerkingen

Voeg opmerking toe

Weergavestatistieken:

Afgelopen 24 uren: 0

Afgelopen 7 dagen: 1

Afgelopen 30 dagen: 5

Altijd: 1,115