Ga door naar hoofdinhoud

LG VX4400 Removing the Back Cover

Wat je nodig hebt

  1. LG VX4400 Removing the Back Cover, Battery: stap 1, afbeelding 1 van 3 LG VX4400 Removing the Back Cover, Battery: stap 1, afbeelding 2 van 3 LG VX4400 Removing the Back Cover, Battery: stap 1, afbeelding 3 van 3
    • Press the light grey button in the top-center on the back of the phone.

    • While pressing, slide the battery and cover up.

  2. LG VX4400 Removing the Back Cover, Antenna: stap 2, afbeelding 1 van 1
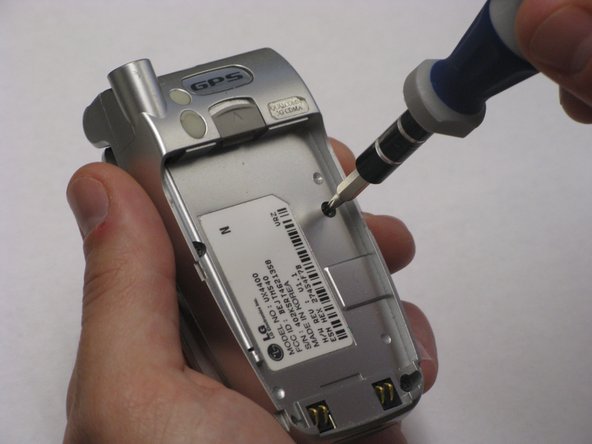
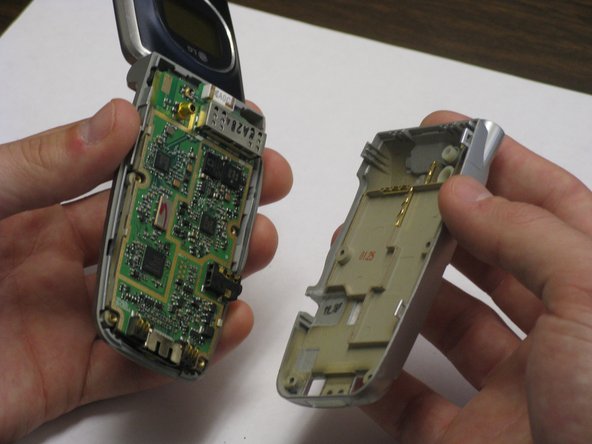
    • Unscrew the antenna by grasping the base and twisting counterclockwise.

    • The antenna may separate from a black sleeve during removal. You may need to use tweezers to remove the sleeve. Remove both the antenna and the sleeve and set aside.

  3. LG VX4400 Removing the Back Cover, LG VX4400 Removing the Back Cover: stap 3, afbeelding 1 van 3 LG VX4400 Removing the Back Cover, LG VX4400 Removing the Back Cover: stap 3, afbeelding 2 van 3 LG VX4400 Removing the Back Cover, LG VX4400 Removing the Back Cover: stap 3, afbeelding 3 van 3
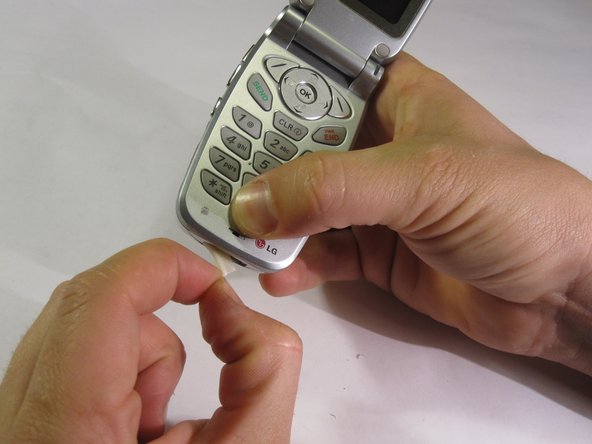
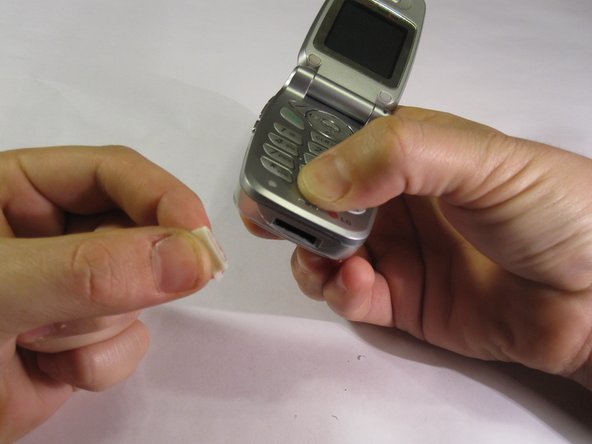
    • The phone may have a rubber insert in the bottom of the phone (see picture). If this rubber insert exists, remove it from the bottom of phone and set aside.

  4. LG VX4400 Removing the Back Cover: stap 4, afbeelding 1 van 2 LG VX4400 Removing the Back Cover: stap 4, afbeelding 2 van 2
    • Use a Torx T6 screwdriver to unscrew the four screws on the back of the phone.

    • The bit size is engraved on the base of the bit head.

  5. LG VX4400 Removing the Back Cover: stap 5, afbeelding 1 van 3 LG VX4400 Removing the Back Cover: stap 5, afbeelding 2 van 3 LG VX4400 Removing the Back Cover: stap 5, afbeelding 3 van 3
    • With the phone flipped open, wedge the back cover from the faceplate by running the tip of the plastic opening tool around the seam on the back of the phone.

    • Gently pull the two pieces apart to separate, and set the back casing aside.

    • Apply enough force to separate the pieces without cracking the back cover.

  6. LG VX4400 Removing the Back Cover: stap 6, afbeelding 1 van 1
    • Lift the motherboard to gain access to the keypad and side buttons beneath.

    • The motherboard is attached with a thin ribbon cable at the upper right corner of the case. Be careful not to break the cable.

Conclusie

<b>To reassemble your device, follow these instructions in reverse order.</b>

Nico Chiarito

Lid sinds: 01/21/10

22 Reputatie

5 handleidingen geschreven

Team

Cal Poly, Team 8-47, Regan Winter 2010 Lid van Cal Poly, Team 8-47, Regan Winter 2010

CPSU-REGAN-W10S8G47

5 Leden

8 handleidingen geschreven

0 opmerkingen

Voeg opmerking toe

Weergavestatistieken:

Afgelopen 24 uren: 0

Afgelopen 7 dagen: 0

Afgelopen 30 dagen: 3

Altijd: 2,551