Ga door naar hoofdinhoud

LG Tribute Rear-Facing Camera Replacement

Wat je nodig hebt

  1. LG Tribute Rear-Facing Camera Replacement, Battery: stap 1, afbeelding 1 van 2 LG Tribute Rear-Facing Camera Replacement, Battery: stap 1, afbeelding 2 van 2
    • Use the plastic opening tool to pry off the back cover.

  2. LG Tribute Rear-Facing Camera Replacement: stap 2, afbeelding 1 van 1
    • Lift the battery out of place.

    • When replacing the battery, the (+) and (-) symbols must match up with the phone's charging nodes.

  3. LG Tribute Rear-Facing Camera Replacement, Mid-panel: stap 3, afbeelding 1 van 2 LG Tribute Rear-Facing Camera Replacement, Mid-panel: stap 3, afbeelding 2 van 2
    • Remove eight 4mm screws using a Phillips head 000 screwdriver (PH000).

  4. LG Tribute Rear-Facing Camera Replacement: stap 4, afbeelding 1 van 2 LG Tribute Rear-Facing Camera Replacement: stap 4, afbeelding 2 van 2
    • Use a plastic opening tool to loosen the tabs around the edge of the phone.

    • Inserting a thin piece of plastic will help prevent opened tabs from locking back into place.

    • This step can be frustrating, but requires patience. Avoid the temptation to pry the panel loose. Using excessive force may break the delicate tabs.

  5. LG Tribute Rear-Facing Camera Replacement, Rear Facing Camera: stap 5, afbeelding 1 van 2 LG Tribute Rear-Facing Camera Replacement, Rear Facing Camera: stap 5, afbeelding 2 van 2
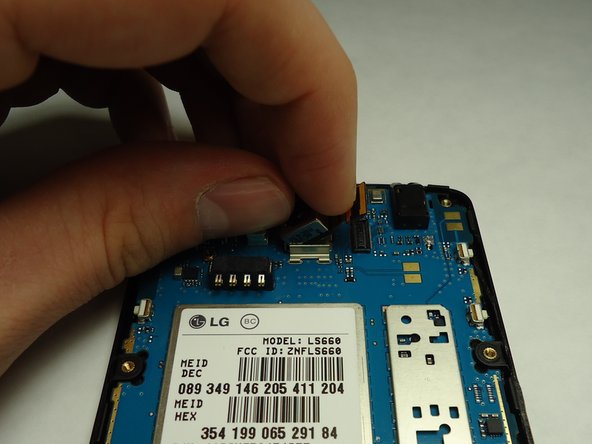
    • Disconnect the rear facing camera from the motherboard using a plastic opening tool.

    • Lift the rear facing camera out of its housing.

Conclusie

To reassemble your device, follow these instructions in reverse order.

2 andere personen hebben deze handleiding voltooid.

0 opmerkingen

Voeg opmerking toe

Weergavestatistieken:

Afgelopen 24 uren: 0

Afgelopen 7 dagen: 0

Afgelopen 30 dagen: 0

Altijd: 623