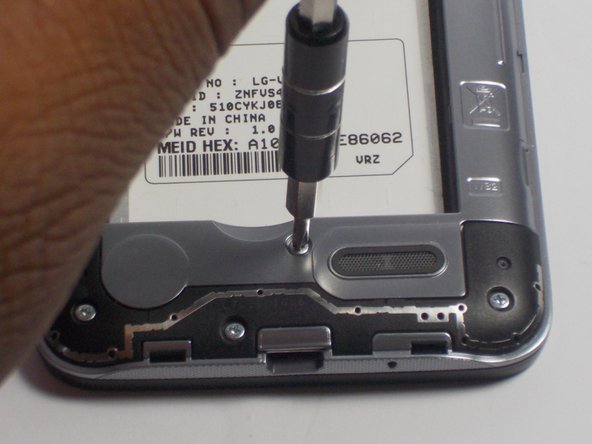
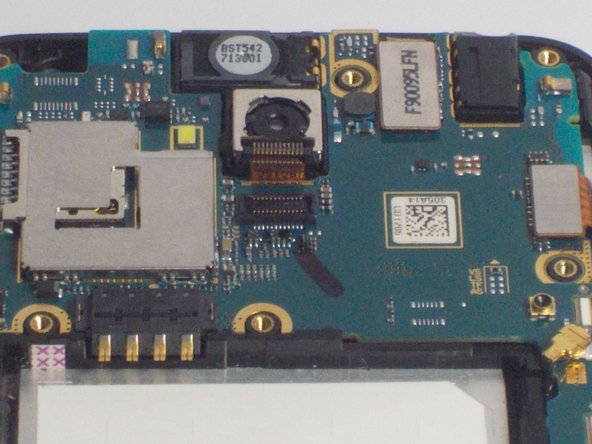
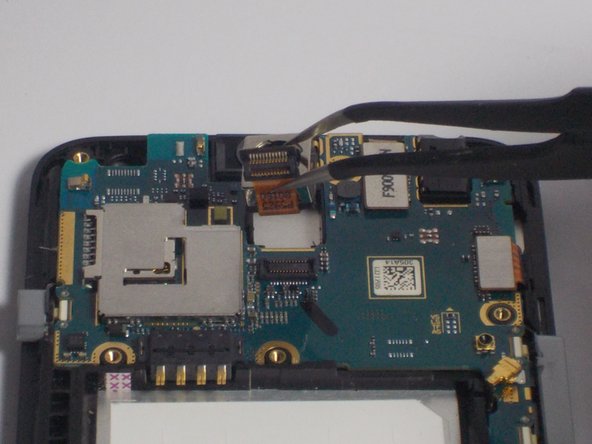
Ga door naar hoofdinhoud

LG Optimus Exceed 2 Rear Camera Replacement

Gearchiveerde handleiding
Deze handleiding wordt enkel nog bijgehouden voor historische doeleinden. Gebruik de laatste versie van deze gids om uw reparatie uit te voeren.

Wat je nodig hebt

  1. LG Optimus Exceed 2 Rear Camera Replacement, Battery: stap 1, afbeelding 1 van 2 LG Optimus Exceed 2 Rear Camera Replacement, Battery: stap 1, afbeelding 2 van 2
    • Flip the device over and remove the back covering.

  2. LG Optimus Exceed 2 Rear Camera Replacement: stap 2, afbeelding 1 van 1
    • Push on the top of the battery downward and pull the battery off of the device.

  3. LG Optimus Exceed 2 Rear Camera Replacement, Rear Camera: stap 3, afbeelding 1 van 3 LG Optimus Exceed 2 Rear Camera Replacement, Rear Camera: stap 3, afbeelding 2 van 3 LG Optimus Exceed 2 Rear Camera Replacement, Rear Camera: stap 3, afbeelding 3 van 3
    • Remove the eleven 4mm screws using a Philips head screw driver.

  4. LG Optimus Exceed 2 Rear Camera Replacement: stap 4, afbeelding 1 van 3 LG Optimus Exceed 2 Rear Camera Replacement: stap 4, afbeelding 2 van 3 LG Optimus Exceed 2 Rear Camera Replacement: stap 4, afbeelding 3 van 3
    • Insert the plastic opening tool into the side of the device and pry off silver covering. Push up against the back covering when the tool is inserted to detach from the phone.

    • Make sure to detach all sides of silver covering before lifting it off the phone.

  5. LG Optimus Exceed 2 Rear Camera Replacement: stap 5, afbeelding 1 van 2 LG Optimus Exceed 2 Rear Camera Replacement: stap 5, afbeelding 2 van 2
    • Using the prying tool detach the connector on the device.

    • Insert the plastic opening tool underneath the connector and push tool down to lift the connector from the device.

  6. LG Optimus Exceed 2 Rear Camera Replacement: stap 6, afbeelding 1 van 2 LG Optimus Exceed 2 Rear Camera Replacement: stap 6, afbeelding 2 van 2
    • Using tweezers lift the camera off of the device.

    • To do so grasp the camera gently with the tweezers and pull the camera up out of the device.

Conclusie

To reassemble your device, follow these instructions in reverse order.

Één andere persoon heeft deze handleiding voltooid.

Carl Dorvilus

Lid sinds: 03/10/16

708 Reputatie

6 handleidingen geschreven

Team

UMass Dartmouth, Team 4-4, Catania Spring 2016 Lid van UMass Dartmouth, Team 4-4, Catania Spring 2016

UMASSD-CATANIA-S16S4G4

3 Leden

6 handleidingen geschreven

0 opmerkingen

Voeg opmerking toe

Weergavestatistieken:

Afgelopen 24 uren: 0

Afgelopen 7 dagen: 2

Afgelopen 30 dagen: 2

Altijd: 180