Ga door naar hoofdinhoud

LG G Watch R Power Button

Wat je nodig hebt

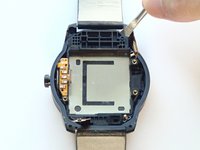
  1. LG G Watch R Power Button, Back Case: stap 1, afbeelding 1 van 2 LG G Watch R Power Button, Back Case: stap 1, afbeelding 2 van 2
    • Power off your watch before disassembling it.

    • Place the watch upside down on a hard surface so that its back case is facing upright.

    • Use a T4 Torx Star screwdriver to remove the four 4.0 mm Torx screws from the corners of the back case.

  2. LG G Watch R Power Button: stap 2, afbeelding 1 van 1
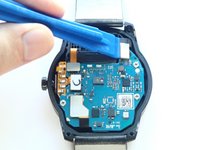
    • Use a plastic opening tool to pry open the back case from both sides of the watch.

  3. LG G Watch R Power Button: stap 3, afbeelding 1 van 1
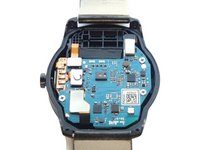
    • Remove the back case.

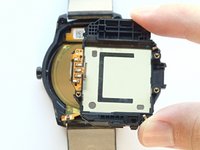
  4. LG G Watch R Power Button, Motherboard: stap 4, afbeelding 1 van 2 LG G Watch R Power Button, Motherboard: stap 4, afbeelding 2 van 2
    • With a plastic opening tool, disconnect the four connectors on the top of the motherboard.

  5. LG G Watch R Power Button: stap 5, afbeelding 1 van 2 LG G Watch R Power Button: stap 5, afbeelding 2 van 2
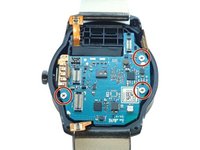
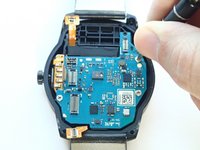
    • Remove three 3.0 mm Phillips screws on the edges of the motherboard with a Phillips #000 screwdriver.

  6. LG G Watch R Power Button: stap 6, afbeelding 1 van 1
    • Grasp the edges of the motherboard and slide it slightly towards the right to remove it from its case.

  7. LG G Watch R Power Button, Battery Replacement: stap 7, afbeelding 1 van 1
    • Use a plastic opening tool to pry the battery out of the device.

    • You may need to use a stronger prying force due to the adhesive that secures the battery to the case.

  8. LG G Watch R Power Button, Battery Housing Replacement: stap 8, afbeelding 1 van 2 LG G Watch R Power Button, Battery Housing Replacement: stap 8, afbeelding 2 van 2
    • Pry the battery housing from the top right corner using a spudger.

    • Once loosened, remove the battery housing.

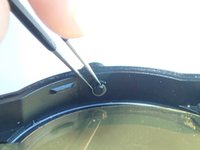
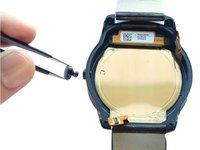
  9. LG G Watch R Power Button, Power Button: stap 9, afbeelding 1 van 3 LG G Watch R Power Button, Power Button: stap 9, afbeelding 2 van 3 LG G Watch R Power Button, Power Button: stap 9, afbeelding 3 van 3
    • On the power button, locate a small grey washer on the interior side of the watch.

    • Use a pair of tweezers or another pointed object to push the washer out of its socket, and remove the power button.

Conclusie

To reassemble your device, follow these instructions in reverse order.

7 andere personen hebben deze handleiding voltooid.

Westley Courchene

Lid sinds: 01/13/15

3.362 Reputatie

14 handleidingen geschreven

Team

USF Tampa, Team 1-1, Remmell Fall 2015 Lid van USF Tampa, Team 1-1, Remmell Fall 2015

USFT-REMMELL-F15S1G1

5 Leden

14 handleidingen geschreven

0 opmerkingen

Voeg opmerking toe

Weergavestatistieken:

Afgelopen 24 uren: 0

Afgelopen 7 dagen: 0

Afgelopen 30 dagen: 2

Altijd: 2,597