Inleiding
The motherboard replacement is more time extensive than a simple battery swap but should still be manageable for any novice. Keep track of your screws since they are tiny and easy to lose.
Wat je nodig hebt
-
-
Power off the device before starting battery replacement.
-
Remove SD card and SIM Card.
-
With the opening tool, gently pry the back plate away from the main board. The corners are the easiest spots to start at.
-
-
-
Gently pull the back cover away from the adhesive on the battery.
-
-
-
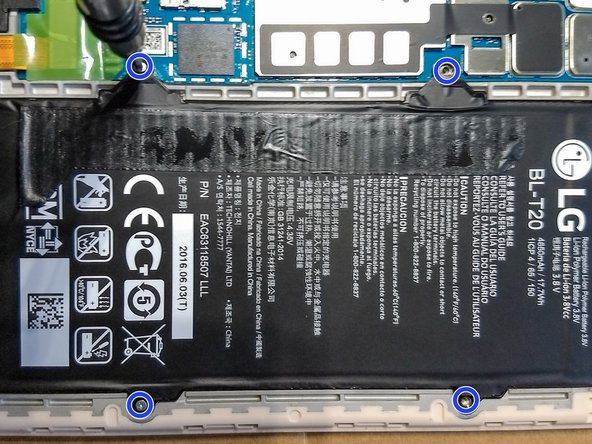
Slowly and gently lift the power cable upwards.
-
Unscrew the 4 screws keeping the battery in place, set aside.
-
-
-
-
Pry the connector for the camera up.
-
Pry the connector for the USB module up.
-
Pry the cable connecting the metal circle.
-
-
-
Unscrew the 3 screws holding the USB module down.
-
Unscrew the 2 screws keeping the motherboard in place.
-
Finally, the two screws for the micro USB port.
-
-
-
Remove the motherboard by pulling it straight up and away from the tablet body.
-


To reassemble your device, follow these instructions in reverse order.
To reassemble your device, follow these instructions in reverse order.
Annuleren: ik heb deze handleiding niet afgemaakt.
5 andere personen hebben deze handleiding voltooid.
2 opmerkingen
Would my motherboard to my pad be no good due to water damage it’s been 3 months still won’t turn on. The little sticker is pink still but my battery smells burnt. Could I take out the mother and use some air dust ?
You may need to replace the battery as it sounds like it shorted out. A burnt smell more than likely means the battery is damaged.
Have you tried replacing the battery yet?