Ga door naar hoofdinhoud

LG G Pad 8.3 4G Back Camera Replacement

Wat je nodig hebt

  1. LG G Pad 8.3 4G Back Camera Replacement, Back Panel: stap 1, afbeelding 1 van 1
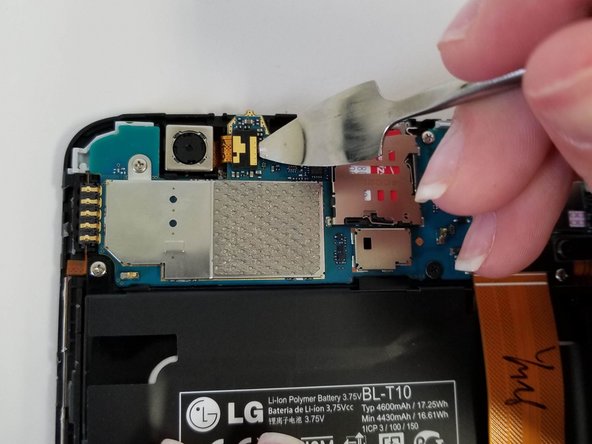
    • With the screen faced up, insert the metal spudger into the crevice so that it is sticking out between the side panel and the screen.

    • Be gentle when popping the panel off.

  2. LG G Pad 8.3 4G Back Camera Replacement: stap 2, afbeelding 1 van 3 LG G Pad 8.3 4G Back Camera Replacement: stap 2, afbeelding 2 van 3 LG G Pad 8.3 4G Back Camera Replacement: stap 2, afbeelding 3 van 3
    • Take the spudger and slide it around the perimeter of the device.

    • Pull gently on the edges to get the panel to pop up.

    • If the panel does not budge, be aware that there is adhesive on the back of the battery holding the back shut. Make sure to just move around the perimeter of the back panel until the panel is able to lift forward.

  3. LG G Pad 8.3 4G Back Camera Replacement, Back Camera: stap 3, afbeelding 1 van 2 LG G Pad 8.3 4G Back Camera Replacement, Back Camera: stap 3, afbeelding 2 van 2
    • Place metal spudger under edge of the IT1430 and lift vertically.

    • The IT1430 looks like a small cube with a yellow bar hanging off the side.

  4. LG G Pad 8.3 4G Back Camera Replacement: stap 4, afbeelding 1 van 2 LG G Pad 8.3 4G Back Camera Replacement: stap 4, afbeelding 2 van 2
    • Insert spudger to the right edge of the gold band and gently pry it up to disconnect the chip.

    • Repeat step with top and bottom sides.

    • Remove with tweezers.

    • Be careful when inserting the spudger behind the gold band because it is possible to tear it.

Conclusie

To reassemble your device, follow these instructions in reverse order.

0 opmerkingen

Voeg opmerking toe

Weergavestatistieken:

Afgelopen 24 uren: 0

Afgelopen 7 dagen: 0

Afgelopen 30 dagen: 2

Altijd: 190