Ga door naar hoofdinhoud

Kindle Touch Speaker Replacement

Wat je nodig hebt

  1. Kindle Touch Speaker Replacement, Back Cover: stap 1, afbeelding 1 van 3 Kindle Touch Speaker Replacement, Back Cover: stap 1, afbeelding 2 van 3 Kindle Touch Speaker Replacement, Back Cover: stap 1, afbeelding 3 van 3
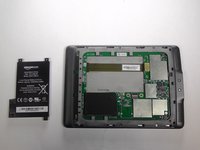
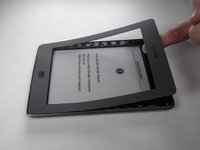
    • Use the plastic opening tool to undo the ten plastic clips around the back panel of the Kindle.

  2. Kindle Touch Speaker Replacement: stap 2, afbeelding 1 van 2 Kindle Touch Speaker Replacement: stap 2, afbeelding 2 van 2
    • Gently lift the bottom and slide the panel off.

  3. Kindle Touch Speaker Replacement, Battery: stap 3, afbeelding 1 van 3 Kindle Touch Speaker Replacement, Battery: stap 3, afbeelding 2 van 3 Kindle Touch Speaker Replacement, Battery: stap 3, afbeelding 3 van 3
    • Use a Phillips #00 screwdriver to remove the five screws.

  4. Kindle Touch Speaker Replacement: stap 4, afbeelding 1 van 3 Kindle Touch Speaker Replacement: stap 4, afbeelding 2 van 3 Kindle Touch Speaker Replacement: stap 4, afbeelding 3 van 3
    • Using the flat end of your spudger, gently pry the battery up and remove it.

  5. Kindle Touch Speaker Replacement, Bezel: stap 5, afbeelding 1 van 2 Kindle Touch Speaker Replacement, Bezel: stap 5, afbeelding 2 van 2
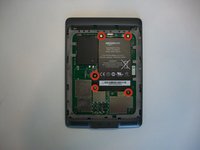
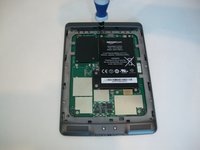
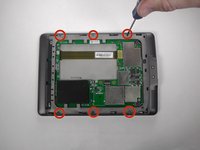
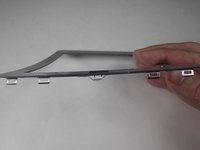
    • Using a Phillips #00 screwdriver, remove the six 4 mm screws to access the front plate.

  6. Kindle Touch Speaker Replacement: stap 6, afbeelding 1 van 3 Kindle Touch Speaker Replacement: stap 6, afbeelding 2 van 3 Kindle Touch Speaker Replacement: stap 6, afbeelding 3 van 3
    • Use the plastic opening tool to pry the bezel from the top and sides

    • The bottom of the bezel will be glued, so be careful when sliding the clips out.

    • The clips can be easily bent, so do not try to force them out. If you do bend some, they can be bent back.

  7. Kindle Touch Speaker Replacement, Rear Casing: stap 7, afbeelding 1 van 1
    • Use your Phillips #00 srewdriver to remove the indicated screws.

    • There are three pairs of screws that are each different. The screws on the top corners are 4 mm #00 Phillips screws, the screws on the bottom corners are 2 mm #00 Phillips screws, and the black bottom center screws are 6 mm #00 Phillips screws.

  8. Kindle Touch Speaker Replacement: stap 8, afbeelding 1 van 2 Kindle Touch Speaker Replacement: stap 8, afbeelding 2 van 2
    • With the screws removed, gently remove the case from the internals.

  9. Kindle Touch Speaker Replacement, Speaker: stap 9, afbeelding 1 van 3 Kindle Touch Speaker Replacement, Speaker: stap 9, afbeelding 2 van 3 Kindle Touch Speaker Replacement, Speaker: stap 9, afbeelding 3 van 3
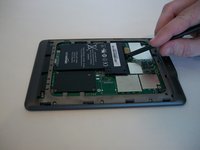
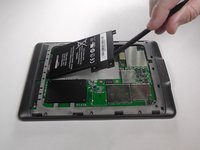
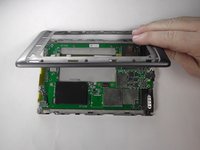
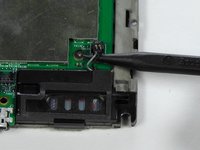
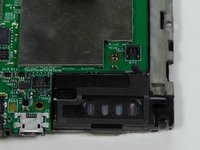
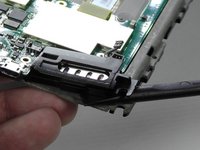
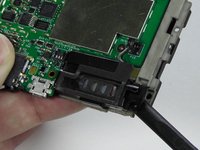
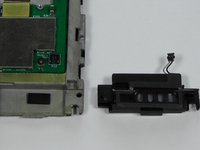
    • Use the pointy end of your Spudger to separate the Speaker's connector from the motherboard on both sides.

  10. Kindle Touch Speaker Replacement: stap 10, afbeelding 1 van 3 Kindle Touch Speaker Replacement: stap 10, afbeelding 2 van 3 Kindle Touch Speaker Replacement: stap 10, afbeelding 3 van 3
    • The speakers are held down solely with contact adhesive, so use your Spudger to pry them from the support board.

Conclusie

To reassemble your device, follow these instructions in reverse order.

Adam Yerly

Lid sinds: 01/20/15

1.933 Reputatie

7 handleidingen geschreven

Team

USF Tampa, Team 19-5, Blackwell Winter 2015 Lid van USF Tampa, Team 19-5, Blackwell Winter 2015

USFT-BLACKWELL-W15S19G5

3 Leden

8 handleidingen geschreven

0 opmerkingen

Voeg opmerking toe

Weergavestatistieken:

Afgelopen 24 uren: 0

Afgelopen 7 dagen: 0

Afgelopen 30 dagen: 8

Altijd: 1,037