Ga door naar hoofdinhoud

Kindle Fire HD 8.9" Battery Replacement

Wat je nodig hebt

  1. Kindle Fire HD 8.9" Battery Replacement, Screen: stap 1, afbeelding 1 van 3 Kindle Fire HD 8.9" Battery Replacement, Screen: stap 1, afbeelding 2 van 3 Kindle Fire HD 8.9" Battery Replacement, Screen: stap 1, afbeelding 3 van 3
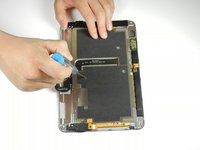
    • Insert a large plastic opening tool next to the Kindle's headphone jack.

    • Make sure the notch on the plastic opening tool is facing the back of the Kindle.

    • Move the plastic opening tool evenly around the Kindle, separating the two halves.

    • Be careful not to completely separate the rear cover. There are two delicate flex cables that connect the display assembly to the motherboard.

  2. Kindle Fire HD 8.9" Battery Replacement: stap 2, afbeelding 1 van 1
    • Set the Kindle down on the rear case.

    • Holding the display assembly near the camera, carefully open the display assembly up to about 90 degrees from the rear case.

    • These images show the Kindle laying flat. In order to prevent damage to the flex cables, keep the Kindle open at 90 degrees while disconnecting the display assembly.

  3. Kindle Fire HD 8.9" Battery Replacement: stap 3, afbeelding 1 van 3 Kindle Fire HD 8.9" Battery Replacement: stap 3, afbeelding 2 van 3 Kindle Fire HD 8.9" Battery Replacement: stap 3, afbeelding 3 van 3
    • Lift the retaining flap on the ZIF connector of the upper flex cable.

    • Gently pull the cable out of its socket.

    • This flex cable is delicate. Be careful not to crease or bend it while working.

  4. Kindle Fire HD 8.9" Battery Replacement: stap 4, afbeelding 1 van 1
    • Separate the display assembly from the rest of the device.

    • When reassembling the device, align the two halves of the case before connecting the flex cables.

  5. Kindle Fire HD 8.9" Battery Replacement, Inner Metal Casing: stap 5, afbeelding 1 van 2 Kindle Fire HD 8.9" Battery Replacement, Inner Metal Casing: stap 5, afbeelding 2 van 2
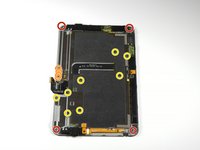
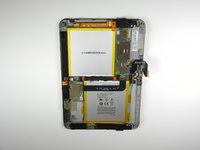
    • Remove the following sixteen screws from the metal midframe on the rear of the device:

    • Four 3 mm Phillips screw (located in each corner of the device - noted in red in the diagram)

    • Four 3 mm Phillips screws (surrounding the ports - noted in orange in the diagram)

    • Eight 3 mm Phillips screws (located around the body of the midframe - noted in yellow in the diagram)

  6. Kindle Fire HD 8.9" Battery Replacement: stap 6, afbeelding 1 van 2 Kindle Fire HD 8.9" Battery Replacement: stap 6, afbeelding 2 van 2
    • Carefully remove the metal midframe.

  7. Kindle Fire HD 8.9" Battery Replacement, Battery: stap 7, afbeelding 1 van 2 Kindle Fire HD 8.9" Battery Replacement, Battery: stap 7, afbeelding 2 van 2
    • For easier handling, position the Kindle as shown.

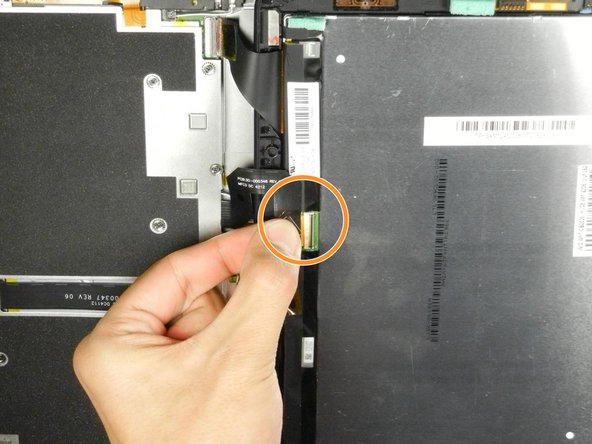
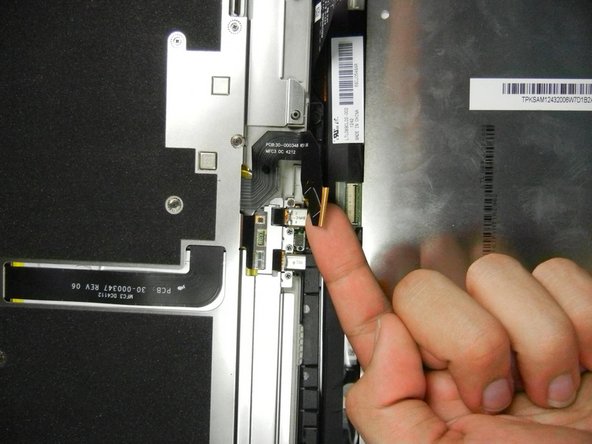
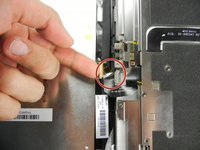
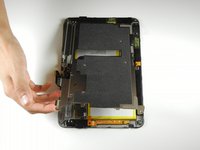
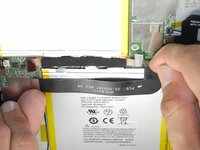
    • Lift up on the silver ends of the black flex cable that lays across the battery.

    • Gently pull the black flex cable from the battery.

  8. Kindle Fire HD 8.9" Battery Replacement: stap 8, afbeelding 1 van 1
    • Disconnect the orange button cable from its socket on the motherboard.

    • Don't remove the button from the device. It is adhered to the case and may tear during removal.

  9. Kindle Fire HD 8.9" Battery Replacement: stap 9, afbeelding 1 van 3 Kindle Fire HD 8.9" Battery Replacement: stap 9, afbeelding 2 van 3 Kindle Fire HD 8.9" Battery Replacement: stap 9, afbeelding 3 van 3
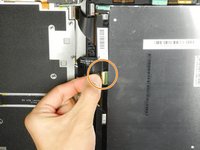
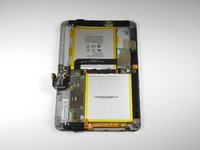
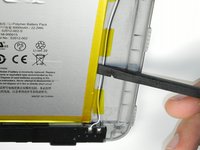
    • Starting at the outside edge of the battery, use the flat edge of a spudger to separate the battery from the rear of the device.

    • Work carefully. Excessive force on battery may cause it to bend, break, or crack.

    • Move the spudger along each side of the battery, prying upwards with even pressure.

    • As the adhesive releases, push the spudger further underneath the battery.

    • Once half of the battery is detached, pry the other half in the same manner.

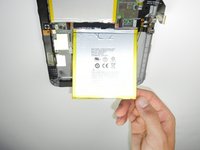
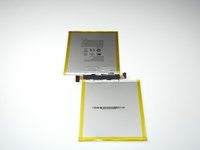
    • Remove the battery assembly from the Kindle.

Conclusie

To reassemble your device, follow these instructions in reverse order.

20 andere personen hebben deze handleiding voltooid.

Jesus Perez

Lid sinds: 01/11/13

1.007 Reputatie

2 handleidingen geschreven

Team

Cal Poly, Team 5-16, Forte Winter 2013 Lid van Cal Poly, Team 5-16, Forte Winter 2013

CPSU-FORTE-W13S5G16

5 Leden

14 handleidingen geschreven

8 opmerkingen

Great guide. Easy to follow! Step 1 was the hardest step. I had so much trouble getting the device open.

Racheal - Antwoord

Holy heck was that a pain in the ass, but it seems to have worked. Thanks for the info.

jellin67 - Antwoord

Can anyone help me? I have replaced the battery twice and also replaced the charging port and it is not holding a charge /won't charge! Any suggestions?

Luna Noir - Antwoord

Same thing but the port is not bent but the battery has been replaced about 3-4 times! Any tips????????????

Matthew Muehlberger - Antwoord

Voeg opmerking toe

Weergavestatistieken:

Afgelopen 24 uren: 5

Afgelopen 7 dagen: 79

Afgelopen 30 dagen: 255

Altijd: 71,412