Deze versie kan foutieve bewerkingen bevatten. Schakel over naar de recentste gecontroleerde momentopname.
Wat je nodig hebt
-
Deze stap is niet vertaald. Help het te vertalen
-
Place the device face down on a clean cloth or another smooth surface.
-
Insert the plastic opening tool between the device’s front and back panels. You might need to wiggle the tool up and down to wedge it in the gap.
-
Maneuver the tool around the device until the back unclips from the front panel.
-
-
Deze stap is niet vertaald. Help het te vertalen
-
Carefully separate the back panel from the rest of the device internals.
-
-
-
Deze stap is niet vertaald. Help het te vertalen
-
Unscrew the two 3.5mm T5 Torx Screws from the top of the camera.
-
-
Deze stap is niet vertaald. Help het te vertalen
-
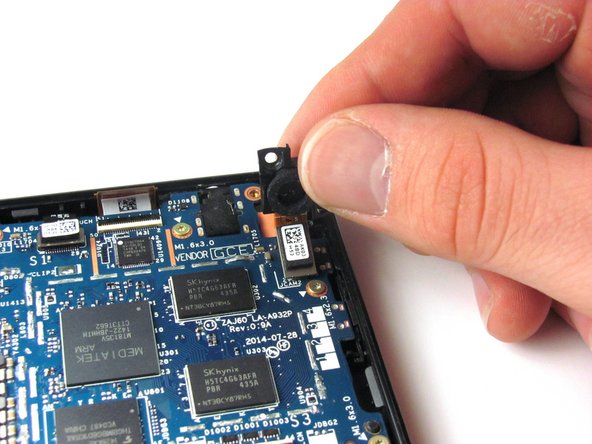
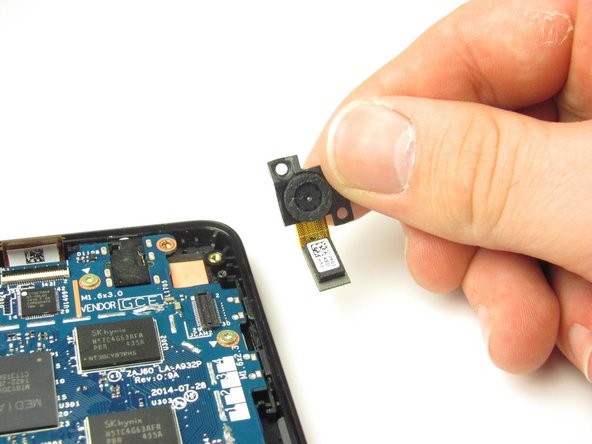
Gently pull the camera up and out of the device. As you pull, unclip the black and white connector with orange tape by popping it off at its base.
-


Team

Cal Poly, Team 70-4, Forte Winter 2015 Lid van Cal Poly, Team 70-4, Forte Winter 2015
CPSU-FORTE-W15S70G4
4 Leden
12 handleidingen geschreven