Ga door naar hoofdinhoud

Kensington Hi-Fi Headphones 33137 Speaker Ear-Pad

  1. Kensington Hi-Fi Headphones 33137 Speaker Ear-Pad, Speaker Cover: stap 1, afbeelding 1 van 3 Kensington Hi-Fi Headphones 33137 Speaker Ear-Pad, Speaker Cover: stap 1, afbeelding 2 van 3 Kensington Hi-Fi Headphones 33137 Speaker Ear-Pad, Speaker Cover: stap 1, afbeelding 3 van 3
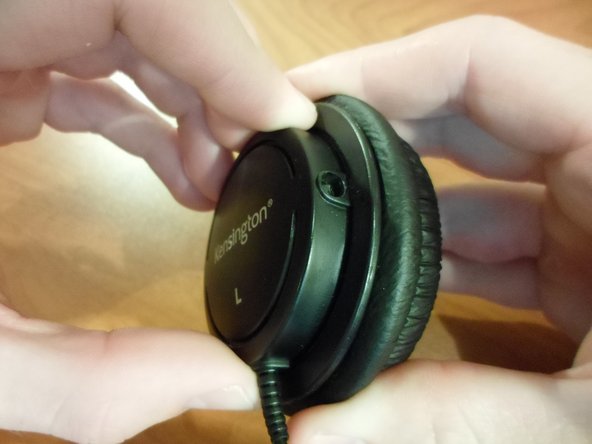
    • Starting with the left speaker first, pull out one side of the speaker clamp where the clamp enters the hole on the speaker cover.

    • Do not pull out the speaker clamp with too much force, or it may break.

    • After one side of the speaker clamp is removed from the speaker cover, pull the other side of the speaker clamp out.

  2. Kensington Hi-Fi Headphones 33137 Speaker Ear-Pad: stap 2, afbeelding 1 van 3 Kensington Hi-Fi Headphones 33137 Speaker Ear-Pad: stap 2, afbeelding 2 van 3 Kensington Hi-Fi Headphones 33137 Speaker Ear-Pad: stap 2, afbeelding 3 van 3
    • Repeat the process in Step 1 to remove the right speaker clamp.

  3. Kensington Hi-Fi Headphones 33137 Speaker Ear-Pad: stap 3, afbeelding 1 van 3 Kensington Hi-Fi Headphones 33137 Speaker Ear-Pad: stap 3, afbeelding 2 van 3 Kensington Hi-Fi Headphones 33137 Speaker Ear-Pad: stap 3, afbeelding 3 van 3
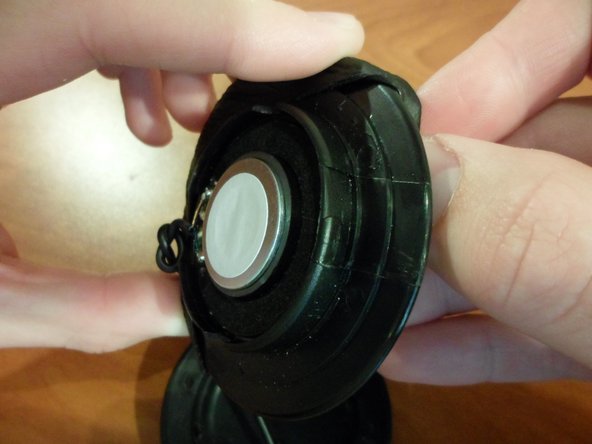
    • Hold the speaker cover in one hand and the speaker ear-padding in the other.

    • Turn the speaker cover counter-clockwise until it stops turning.

    • Pull the speaker cover and the speaker ear padding apart to expose the inner components of the speaker.

    • Make sure to pull the speakers apart gently to avoid disconnecting the speaker cable wires from the speaker.

    • If the speaker cover and ear-padding don't easily come apart, then make sure the speaker cover is fully turned.

    • Repeat this process for both speakers.

  4. Kensington Hi-Fi Headphones 33137 Speaker Ear-Pad, Speaker Ear-Pad: stap 4, afbeelding 1 van 3 Kensington Hi-Fi Headphones 33137 Speaker Ear-Pad, Speaker Ear-Pad: stap 4, afbeelding 2 van 3 Kensington Hi-Fi Headphones 33137 Speaker Ear-Pad, Speaker Ear-Pad: stap 4, afbeelding 3 van 3
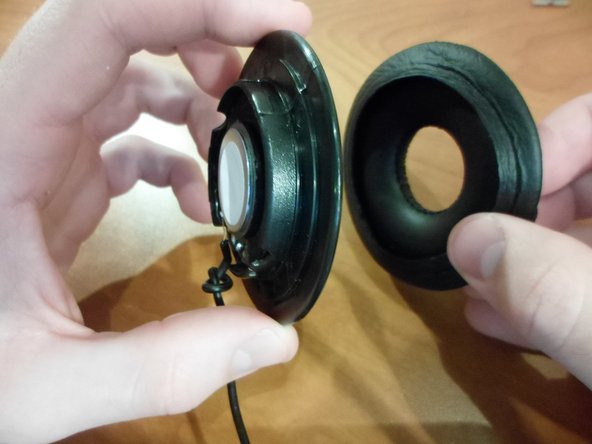
    • After the speaker cover has been removed, hold the edge of the speaker ear-pad with fingers.

    • Gently pull the edge of the speaker ear-pad around the edge of the speaker.

    • To avoid tearing the speaker ear-pad, don't use too much force when pulling it around the edge of the speaker.

    • Repeat this process for the other speaker ear-padding.

Conclusie

To reassemble your device, follow these instructions in reverse order.

William Sanders

Lid sinds: 03/26/14

573 Reputatie

5 handleidingen geschreven

Team

Clemson, Team 1-3, Benson Spring 2014 Lid van Clemson, Team 1-3, Benson Spring 2014

CLEM-BENSON-S14S1G3

3 Leden

18 handleidingen geschreven

0 opmerkingen

Voeg opmerking toe

Weergavestatistieken:

Afgelopen 24 uren: 0

Afgelopen 7 dagen: 1

Afgelopen 30 dagen: 3

Altijd: 893