Ga door naar hoofdinhoud

Karcher Rotary Floor Cleaner 17833080 2017 Vacuum Motor Replacement

Wat je nodig hebt

  1. Karcher Rotary Floor Cleaner 17833080 2017 Vacuum Motor Replacement, Remove the tank: stap 1, afbeelding 1 van 2 Karcher Rotary Floor Cleaner 17833080 2017 Vacuum Motor Replacement, Remove the tank: stap 1, afbeelding 2 van 2
    • Before you begin, make sure to power off and unplug the device.

    • Lift the tank by the handle and remove it from the device.

  2. Karcher Rotary Floor Cleaner 17833080 2017 Vacuum Motor Replacement, Remove the transport wheels: stap 2, afbeelding 1 van 3 Karcher Rotary Floor Cleaner 17833080 2017 Vacuum Motor Replacement, Remove the transport wheels: stap 2, afbeelding 2 van 3 Karcher Rotary Floor Cleaner 17833080 2017 Vacuum Motor Replacement, Remove the transport wheels: stap 2, afbeelding 3 van 3
    • Press the yellow button near each wheel base to release the wheels.

    • Remove both wheels from their sockets.

  3. Karcher Rotary Floor Cleaner 17833080 2017 Vacuum Motor Replacement, Remove the pump cover: stap 3, afbeelding 1 van 1
    • Use a T20 driver to remove the three screws securing the pump cover.

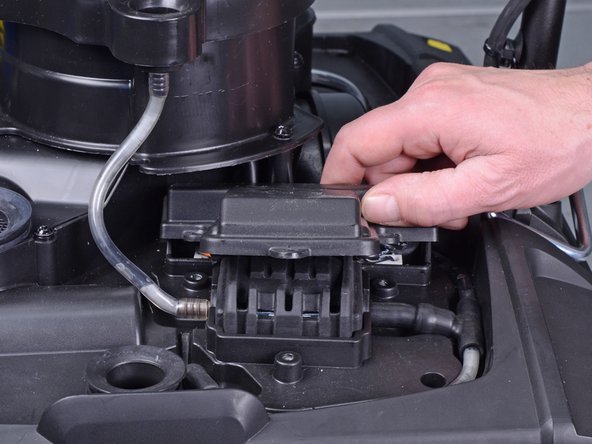
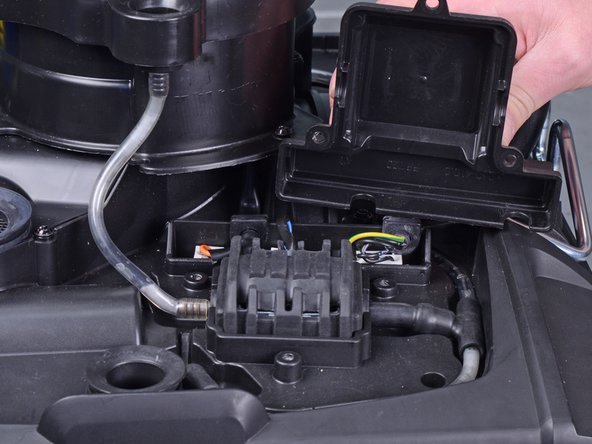
  4. Karcher Rotary Floor Cleaner 17833080 2017 Vacuum Motor Replacement: stap 4, afbeelding 1 van 3 Karcher Rotary Floor Cleaner 17833080 2017 Vacuum Motor Replacement: stap 4, afbeelding 2 van 3 Karcher Rotary Floor Cleaner 17833080 2017 Vacuum Motor Replacement: stap 4, afbeelding 3 van 3
    • Remove the pump cover.

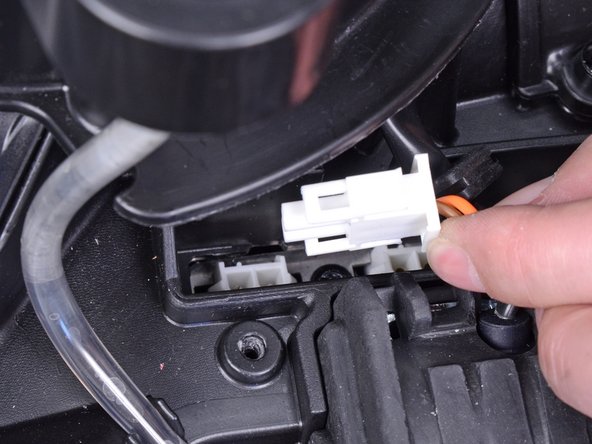
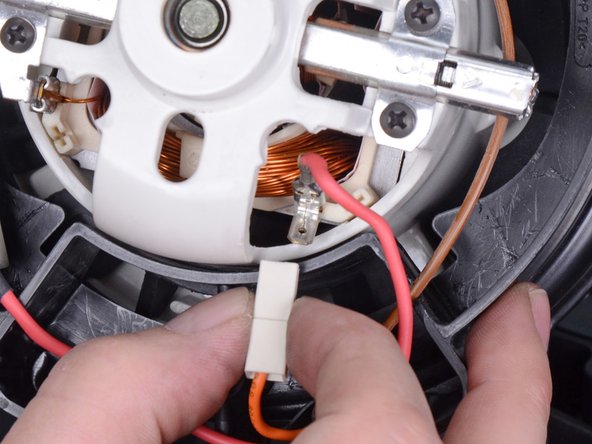
  5. Karcher Rotary Floor Cleaner 17833080 2017 Vacuum Motor Replacement, Unplug the motor: stap 5, afbeelding 1 van 2 Karcher Rotary Floor Cleaner 17833080 2017 Vacuum Motor Replacement, Unplug the motor: stap 5, afbeelding 2 van 2
    • Squeeze the left plug by the edges and pull it out of its socket.

    • During reassembly, make sure that all plugs are firmly seated in their sockets.

  6. Karcher Rotary Floor Cleaner 17833080 2017 Vacuum Motor Replacement, Remove the vacuum cover: stap 6, afbeelding 1 van 1
    • Use a T20 driver to remove the two screws securing the vacuum cover.

  7. Karcher Rotary Floor Cleaner 17833080 2017 Vacuum Motor Replacement: stap 7, afbeelding 1 van 1
    • Remove the vacuum cover.

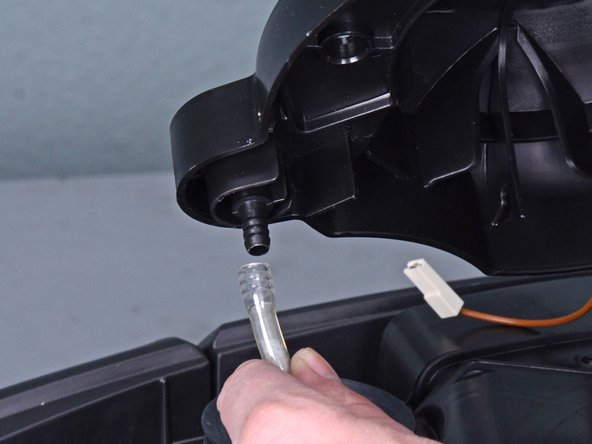
  8. Karcher Rotary Floor Cleaner 17833080 2017 Vacuum Motor Replacement: stap 8, afbeelding 1 van 2 Karcher Rotary Floor Cleaner 17833080 2017 Vacuum Motor Replacement: stap 8, afbeelding 2 van 2
    • Pull the clear hose off the vacuum cover.

  9. Karcher Rotary Floor Cleaner 17833080 2017 Vacuum Motor Replacement, Reassembly tip: stap 9, afbeelding 1 van 1
    • Reassembly tip: Use this photo as a reference on how to route the motor wires in the vacuum housing.

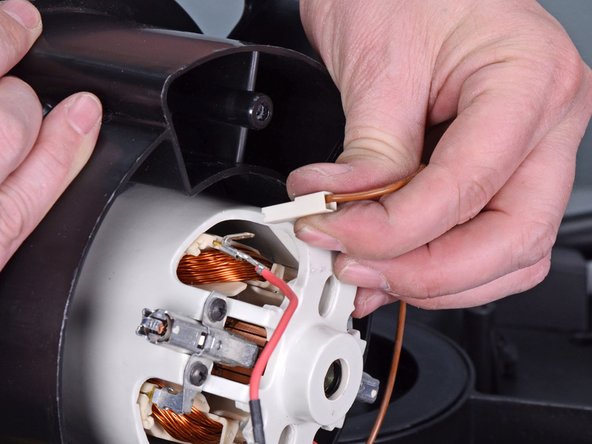
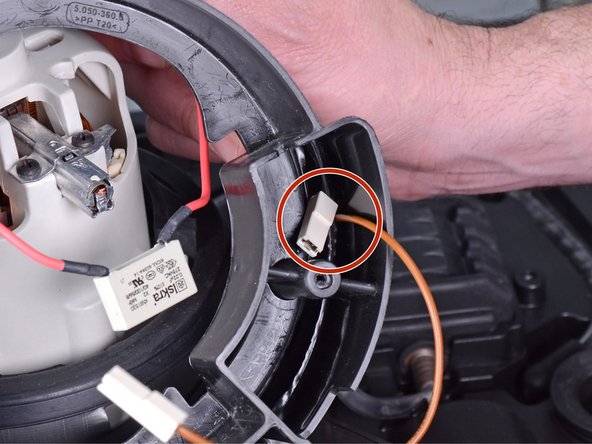
  10. Karcher Rotary Floor Cleaner 17833080 2017 Vacuum Motor Replacement, Disconnect the motor wires: stap 10, afbeelding 1 van 3 Karcher Rotary Floor Cleaner 17833080 2017 Vacuum Motor Replacement, Disconnect the motor wires: stap 10, afbeelding 2 van 3 Karcher Rotary Floor Cleaner 17833080 2017 Vacuum Motor Replacement, Disconnect the motor wires: stap 10, afbeelding 3 van 3
    • Disconnect the two motor wires by pulling the plugs off their spade sockets.

  11. Karcher Rotary Floor Cleaner 17833080 2017 Vacuum Motor Replacement, Remove the vacuum housing: stap 11, afbeelding 1 van 1
    • Use a T20 driver to remove the five screws securing the vacuum housing.

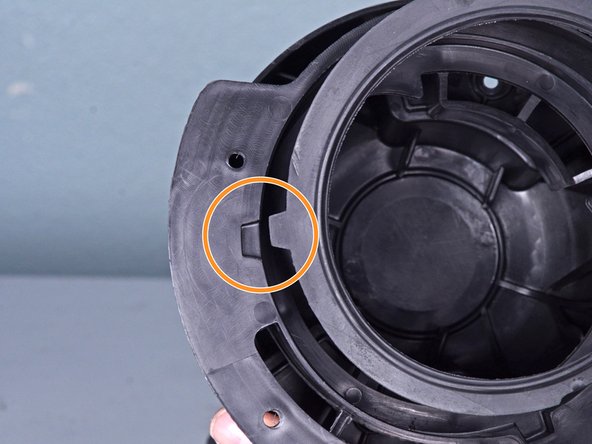
  12. Karcher Rotary Floor Cleaner 17833080 2017 Vacuum Motor Replacement: stap 12, afbeelding 1 van 3 Karcher Rotary Floor Cleaner 17833080 2017 Vacuum Motor Replacement: stap 12, afbeelding 2 van 3 Karcher Rotary Floor Cleaner 17833080 2017 Vacuum Motor Replacement: stap 12, afbeelding 3 van 3
    • Lift the vacuum housing to remove it.

    • Reassembly tip: During reassembly, be sure to thread the motor wires through cutout on the side of the vacuum housing.

    • Reassembly tip: Be sure to properly align the vacuum housing to the rubber motor seal.

  13. Karcher Rotary Floor Cleaner 17833080 2017 Vacuum Motor Replacement, Remove the motor: stap 13, afbeelding 1 van 1
    • Lift the vacuum motor from the device to remove it.

  14. Karcher Rotary Floor Cleaner 17833080 2017 Vacuum Motor Replacement, Remove the lower seal: stap 14, afbeelding 1 van 1
    • Peel the lower rubber seal from the motor and transfer it to the replacement part.

  15. Karcher Rotary Floor Cleaner 17833080 2017 Vacuum Motor Replacement, Remove the upper seal: stap 15, afbeelding 1 van 2 Karcher Rotary Floor Cleaner 17833080 2017 Vacuum Motor Replacement, Remove the upper seal: stap 15, afbeelding 2 van 2
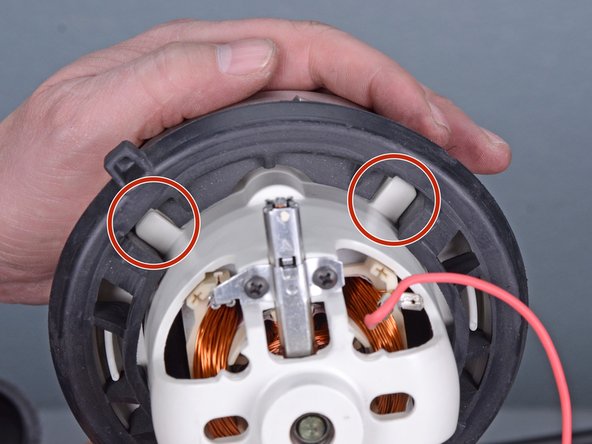
    • Peel the upper rubber seal from the motor and transfer it to the replacement part.

    • The upper seal is keyed to the motor. Be sure to properly align it during assembly.

Conclusie

To reassemble your device, follow these instructions in reverse order.

Één andere persoon heeft deze handleiding voltooid.

Arthur Shi

Lid sinds: 01/03/18

249.876 Reputatie

503 handleidingen geschreven

Team

iFixit Lid van iFixit

Staff

135 Leden

16.734 handleidingen geschreven

0 opmerkingen

Voeg opmerking toe

Weergavestatistieken:

Afgelopen 24 uren: 0

Afgelopen 7 dagen: 2

Afgelopen 30 dagen: 6

Altijd: 274