-
-
The first step is to place the device face down on a flat surface in order to remove the keyboard.
-
After the device is laying face-down, with the screen on the table, we remove the keyboard.
-
After removing the Keyboard there's a hole in the case that's meant to allow some airflow. We will use this hole to put our finger in to aid in removing the case.
 Vraag FixBot
-
-
-
The first picture is a view of the inside of the computer.
-
Unplug the USB connectors from the battery.
-
Remove the battery from the case.
-
-
-
-
After removing the battery it's always a good idea to press and hold the power button for 3 seconds to make sure you don't get a little shock.
-
-
-
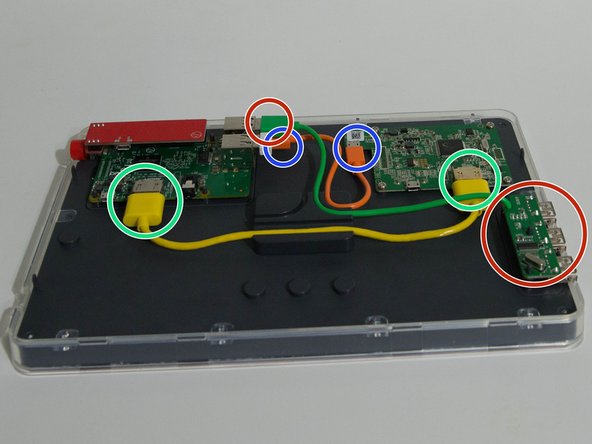
Remember the power cable we removed from the battery? Let's go ahead and get that out of the way. It's plugged in to the power control board we used earlier, and the video driver board on the right of the image.
-
Next we will get this speaker out of the way. The speaker circled on the far left has a 3.5mm plug circled in the middle that carries the audio signal, and a USB connector circled towards the right that powers the speaker.
-
The yellow cable here is our HDMI cable that carries the video signal to the screen. We will remove it by unplugging it.
-
This little orange cable is a USB cable that allows the touch screen to operate. All we need to do to remove it is unplug it.
-
This green cable is a 3 port USB hub that lets us plug more than 4 USB devices in. We will remove it by unplugging it and then lifting the hub circled on the right up.
-
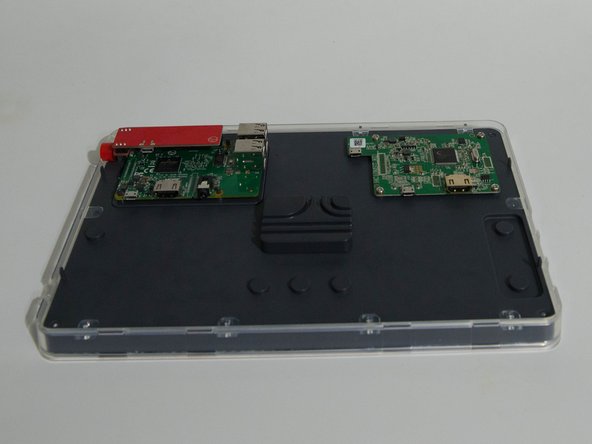
The last picture is with all of the cables removed.
-
-
-
Remove the power board from the Raspberry Pi headers by simply lifting up.
-
Removing the Raspberry Pi is a simple as lifting it up and out of the case.
-
After the Pi is out flip it over and remove the Micro SD Card.
-


To reassemble your device, follow these instructions in reverse order.

2Gids Commentaar
Hi there, I am looking for an info on the other board in this kit that controls the display. Would you happen to know anything about it? The display itself works perfectly for a project but I’m wanting to connect a different pc. THANKS!
Hi Bernard, I know a bit, what questions did you have?