Ga door naar hoofdinhoud

Justin Bieber Concert Microphone Printed Circuit Board (PCB) Replacement

Wat je nodig hebt

  1. Justin Bieber Concert Microphone Printed Circuit Board (PCB) Replacement, Removing back panel: stap 1, afbeelding 1 van 2 Justin Bieber Concert Microphone Printed Circuit Board (PCB) Replacement, Removing back panel: stap 1, afbeelding 2 van 2
    Gereedschap gebruikt in deze stap:
    Flathead 1.5 mm Screwdriver
    $5.49
    Koop
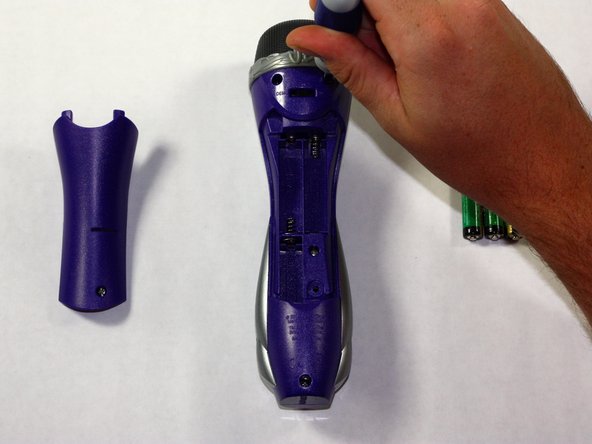
    • Remove the back panel of the device by unscrewing the single #8 11.6 mm Flathead screw on the back of the device.

  2. Justin Bieber Concert Microphone Printed Circuit Board (PCB) Replacement, Removing batteries: stap 2, afbeelding 1 van 1
    • Remove the 3 AAA batteries from the device.

  3. Justin Bieber Concert Microphone Printed Circuit Board (PCB) Replacement, Removing back half of device: stap 3, afbeelding 1 van 2 Justin Bieber Concert Microphone Printed Circuit Board (PCB) Replacement, Removing back half of device: stap 3, afbeelding 2 van 2
    • Unscrew the other 4, #8 11.6 mm Phillips Head screws to remove the entire back half of the device.

    • Pull apart the device once screws are loose, splitting the device in half.

  4. Justin Bieber Concert Microphone Printed Circuit Board (PCB) Replacement, Positioning device: stap 4, afbeelding 1 van 1
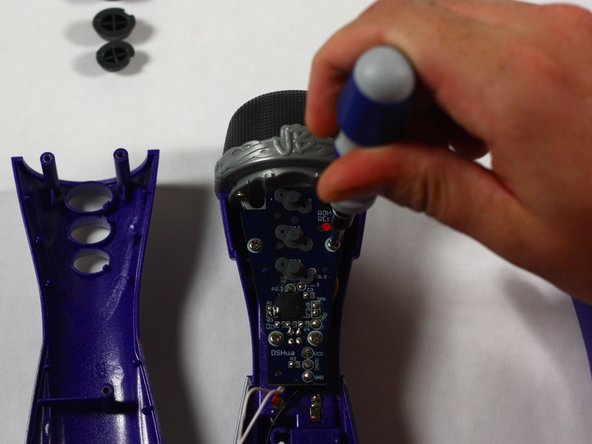
    • Keeping all wires connected to their attachments, place the front half of the device face down.

  5. Justin Bieber Concert Microphone Printed Circuit Board (PCB) Replacement, Inspecting PCB: stap 5, afbeelding 1 van 1
    • Inspect the printed circuit board for any breaks or cracks.

  6. Justin Bieber Concert Microphone Printed Circuit Board (PCB) Replacement, Removing PCB: stap 6, afbeelding 1 van 2 Justin Bieber Concert Microphone Printed Circuit Board (PCB) Replacement, Removing PCB: stap 6, afbeelding 2 van 2
    • Remove the 2, #8 11.7 mm Phillips Head screws as well as the 2, #8 7.5 mm screws on the printed circuit board.

  7. Justin Bieber Concert Microphone Printed Circuit Board (PCB) Replacement, Replacing PCB: stap 7, afbeelding 1 van 2 Justin Bieber Concert Microphone Printed Circuit Board (PCB) Replacement, Replacing PCB: stap 7, afbeelding 2 van 2
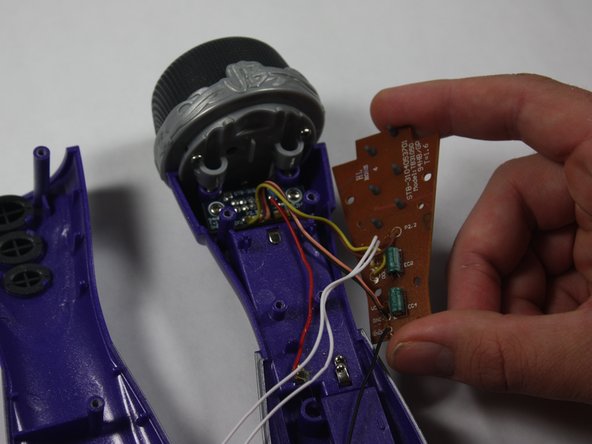
    • Disconnect all wires from the PCB

    • Remove the damaged PCB from the microphone

    • Place new PCB in the Justin Bieber Concert Microphone.

    • Connect all the wires to the new PCB using this soldering guide.

Conclusie

To reassemble your device, follow these instructions in reverse order.

Mike Seyman

Lid sinds: 10/19/14

437 Reputatie

4 handleidingen geschreven

Team

Baylor, Team 4-1, Williams Fall 2014 Lid van Baylor, Team 4-1, Williams Fall 2014

BU-WILLIAMS-F14S4G1

3 Leden

4 handleidingen geschreven

0 opmerkingen

Voeg opmerking toe

Weergavestatistieken:

Afgelopen 24 uren: 0

Afgelopen 7 dagen: 0

Afgelopen 30 dagen: 0

Altijd: 289