Ga door naar hoofdinhoud

JBL Pulse 2 Auxiliary and Micro USB Port Replacements

Wat je nodig hebt

  1. JBL Pulse 2 Auxiliary and Micro USB Port Replacements, Battery: stap 1, afbeelding 1 van 2 JBL Pulse 2 Auxiliary and Micro USB Port Replacements, Battery: stap 1, afbeelding 2 van 2
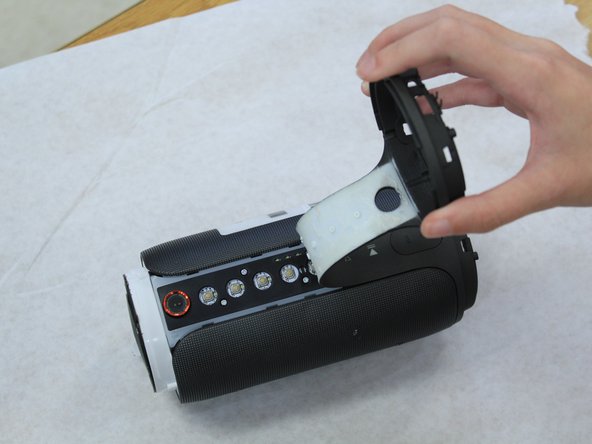
    • Remove the rubber rings from either end of the device.

    • If there is difficulty in lifting the rings from the device, use the metal spudger.

  2. JBL Pulse 2 Auxiliary and Micro USB Port Replacements: stap 2, afbeelding 1 van 1
    • Remove the four 4.8mm Phillips #1 screws from each end of the device with the Phillips head screwdriver.

    • Lift the end pieces off of the device.

  3. JBL Pulse 2 Auxiliary and Micro USB Port Replacements: stap 3, afbeelding 1 van 1
    • Remove the four 9.5mm Phillips #1 screws from each end of the device.

  4. JBL Pulse 2 Auxiliary and Micro USB Port Replacements: stap 4, afbeelding 1 van 2 JBL Pulse 2 Auxiliary and Micro USB Port Replacements: stap 4, afbeelding 2 van 2
    • Peel one end off and slowly draw it across the length of the device until you get to the other side.

  5. JBL Pulse 2 Auxiliary and Micro USB Port Replacements: stap 5, afbeelding 1 van 3 JBL Pulse 2 Auxiliary and Micro USB Port Replacements: stap 5, afbeelding 2 van 3 JBL Pulse 2 Auxiliary and Micro USB Port Replacements: stap 5, afbeelding 3 van 3
    • Remove the four 7.9mm Phillips #1 screws along the black centerpiece of the device between the camera and the auxiliary port.

    • Lift up the casing and circuit board but do not try and remove the ribbon wires.

  6. JBL Pulse 2 Auxiliary and Micro USB Port Replacements: stap 6, afbeelding 1 van 1
    • Remove the cover from the end that the ribbon wires are attached to. It should peel off easily.

  7. JBL Pulse 2 Auxiliary and Micro USB Port Replacements: stap 7, afbeelding 1 van 2 JBL Pulse 2 Auxiliary and Micro USB Port Replacements: stap 7, afbeelding 2 van 2
    • Unlatch the mechanism holding the ribbon wires in place, then disconnect them from the motherboard.

    • To access the wires, remove some of the black glue holding them in place with the spudger.

  8. JBL Pulse 2 Auxiliary and Micro USB Port Replacements: stap 8, afbeelding 1 van 2 JBL Pulse 2 Auxiliary and Micro USB Port Replacements: stap 8, afbeelding 2 van 2
    • Slowly pull the ribbon wires out from the outside.

    • If there is too much resistance, remove more of the black glue.

  9. JBL Pulse 2 Auxiliary and Micro USB Port Replacements: stap 9, afbeelding 1 van 2 JBL Pulse 2 Auxiliary and Micro USB Port Replacements: stap 9, afbeelding 2 van 2
    • Remove the four 7.9mm Phillips #1 screws around the edges of the center piece.

    • Slide the outer casing off away from the auxiliary and micro USB port.

  10. JBL Pulse 2 Auxiliary and Micro USB Port Replacements: stap 10, afbeelding 1 van 1
    • Remove the other end of the device to access the wiring underneath it.

  11. JBL Pulse 2 Auxiliary and Micro USB Port Replacements: stap 11, afbeelding 1 van 1
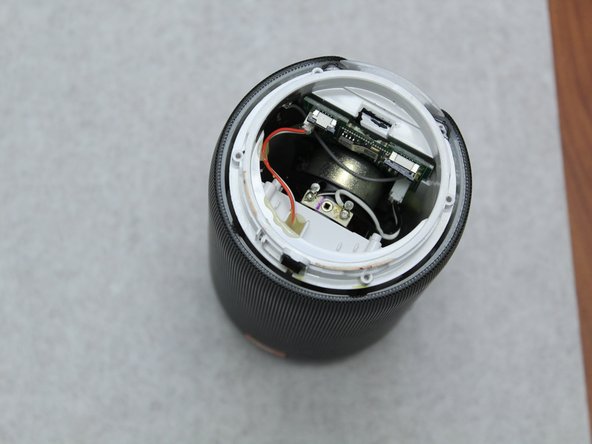
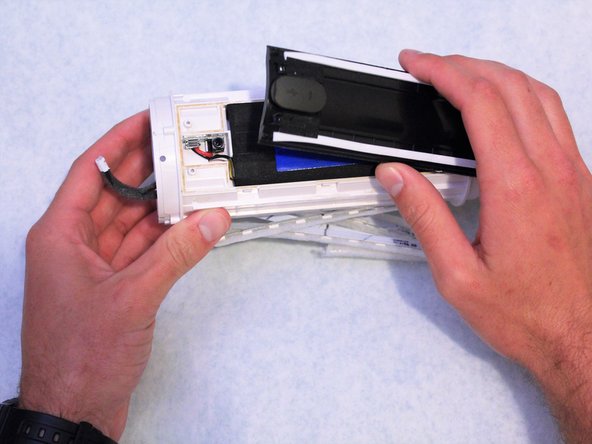
    • Use the angled tweezers to disconnect the battery from the motherboard. It will take some work to remove this piece.

  12. JBL Pulse 2 Auxiliary and Micro USB Port Replacements: stap 12, afbeelding 1 van 1
    • Remove the four 7.9mm Phillips #1 screws from the black centerpiece of the device.

  13. JBL Pulse 2 Auxiliary and Micro USB Port Replacements: stap 13, afbeelding 1 van 2 JBL Pulse 2 Auxiliary and Micro USB Port Replacements: stap 13, afbeelding 2 van 2
    • Use the spudger to reach under the sides of the black centerpiece to access the six latches, three of which are on each side.

  14. JBL Pulse 2 Auxiliary and Micro USB Port Replacements: stap 14, afbeelding 1 van 2 JBL Pulse 2 Auxiliary and Micro USB Port Replacements: stap 14, afbeelding 2 van 2
    • Lift the black centerpiece off with the metal spudger to reveal the battery underneath.

  15. JBL Pulse 2 Auxiliary and Micro USB Port Replacements: stap 15, afbeelding 1 van 1
    • Use a hot air gun to soften the hot glue in order to fully remove the battery.

  16. JBL Pulse 2 Auxiliary and Micro USB Port Replacements, Auxiliary and Micro USB Port: stap 16, afbeelding 1 van 1
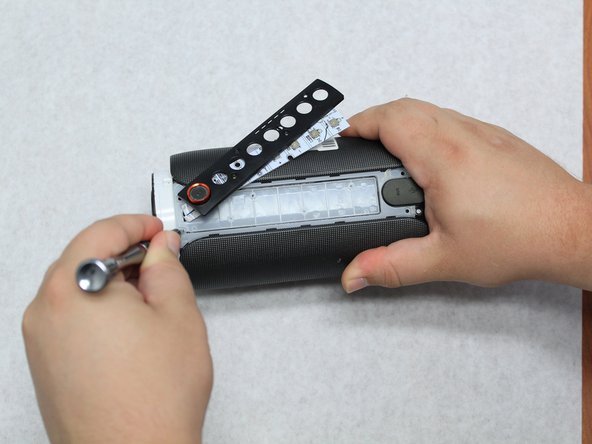
    • Remove the solder on the micro USB and Auxiliary port wires to disconnect them.

Conclusie

To reassemble your device, follow these instructions in reverse order.

15 andere personen hebben deze handleiding voltooid.

8 opmerkingen

Can anyone post a link to buy the correct replacement micro USB port?

Thanks

thetjfree - Antwoord

Is there a video out there to demonstrate this repair process?

a_mostafa_k - Antwoord

Hallo, suche für die “JBL pulse 2” die Bauteile FB5 und D9 auf dem Mainboard.

Wer kennt diese Bauteile ?

Würde mich auf eine positive Antwort freuen.

Liebe Grüße J.R.

Roweda Johannes - Antwoord

Bonjour pourriez-vous me dire ou acheter cette petite carte électronique merci.

william.avril132 - Antwoord

Voeg opmerking toe

Weergavestatistieken:

Afgelopen 24 uren: 3

Afgelopen 7 dagen: 19

Afgelopen 30 dagen: 101

Altijd: 13,184