Ga door naar hoofdinhoud

Insignia NS-BCDCAS1 Cassette Door Latch Replacement

Wat je nodig hebt

  1. Insignia NS-BCDCAS1 Cassette Door Latch Replacement, Outer Panels: stap 1, afbeelding 1 van 2 Insignia NS-BCDCAS1 Cassette Door Latch Replacement, Outer Panels: stap 1, afbeelding 2 van 2
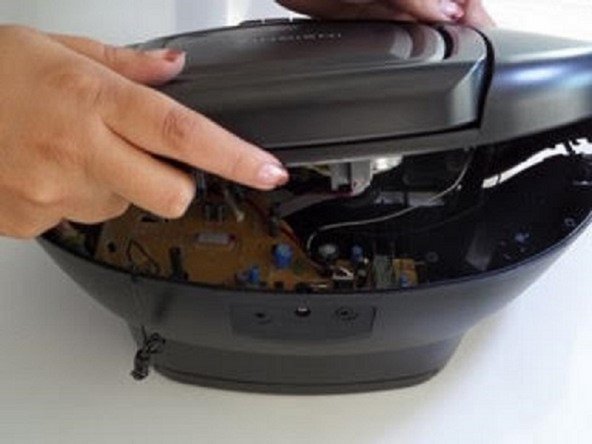
    • Turn the boombox around to see the back, and then flip it upside down.

    • Insert a 2.5mm flathead driver into the two holes next to the battery compartment.

    • Turn the driver counterclockwise several times to loosen and pull out the 17mm screw.

  2. Insignia NS-BCDCAS1 Cassette Door Latch Replacement: stap 2, afbeelding 1 van 1
    • Peel off the two black square foams in front of the battery compartment to reveal a screw under each one.

  3. Insignia NS-BCDCAS1 Cassette Door Latch Replacement: stap 3, afbeelding 1 van 2 Insignia NS-BCDCAS1 Cassette Door Latch Replacement: stap 3, afbeelding 2 van 2
    • Remove the two 8mm screws using a 2.5mm flathead driver.

    • The front grey panel will loosen up once the final screw is removed.

  4. Insignia NS-BCDCAS1 Cassette Door Latch Replacement: stap 4, afbeelding 1 van 1
    • Turn the boombox on its back.

    • Release the front panel by pushing down on the latches holding the panels together.

    • There are four silver latches on the top side of the panel and one on the bottom.

    • Do not force the panel comletely off, there are cables attached inside.

  5. Insignia NS-BCDCAS1 Cassette Door Latch Replacement: stap 5, afbeelding 1 van 2 Insignia NS-BCDCAS1 Cassette Door Latch Replacement: stap 5, afbeelding 2 van 2
    • Turn the boombox around to view the back and lift the handle up.

    • Using the same driver with 2.5mm flathead, remove the two 14mm screws under the handle.

    • Gently lift the black top but do not pull completely away.

  6. Insignia NS-BCDCAS1 Cassette Door Latch Replacement, Cassette Door Latch: stap 6, afbeelding 1 van 1
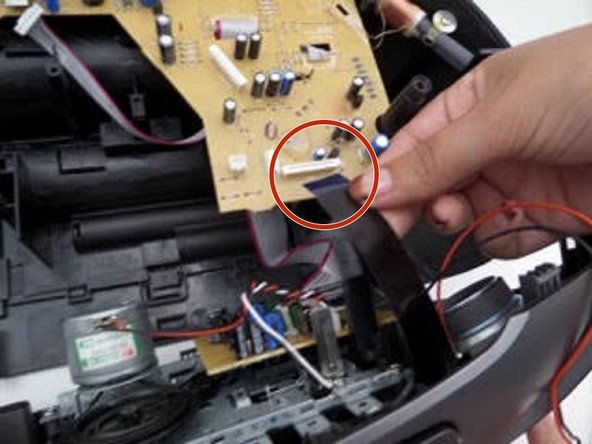
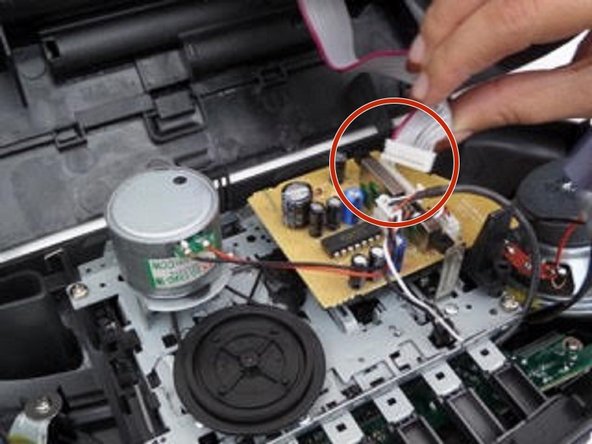
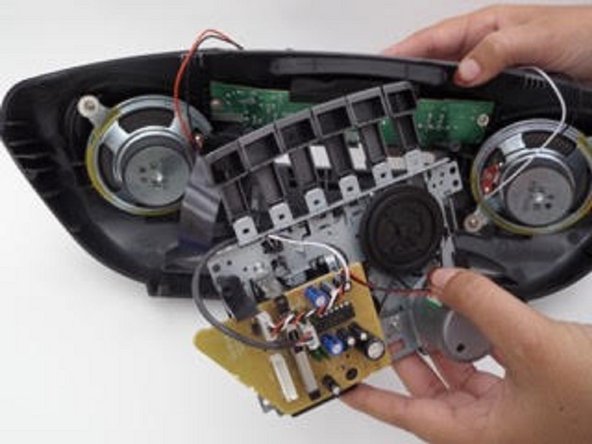
    • Start by unplugging the red and black cable connected to the motherboard

  7. Insignia NS-BCDCAS1 Cassette Door Latch Replacement: stap 7, afbeelding 1 van 1
    • Unplug the red and pink wires connecting the top of the device to the motherboard

  8. Insignia NS-BCDCAS1 Cassette Door Latch Replacement: stap 8, afbeelding 1 van 3 Insignia NS-BCDCAS1 Cassette Door Latch Replacement: stap 8, afbeelding 2 van 3 Insignia NS-BCDCAS1 Cassette Door Latch Replacement: stap 8, afbeelding 3 van 3
    • Disconnect the black shiny tape connecting the motherboard to the front of the device

    • Also disconnect the pink and white wires connecting the cassette unit to the device.

  9. Insignia NS-BCDCAS1 Cassette Door Latch Replacement: stap 9, afbeelding 1 van 1
    • After disconnecting all the wires, the front panel is now free and easy to work on.

  10. Insignia NS-BCDCAS1 Cassette Door Latch Replacement: stap 10, afbeelding 1 van 1
    Gereedschap gebruikt in deze stap:
    Flathead 3/32" or 2.5 mm Screwdriver
    $5.49
    Koop
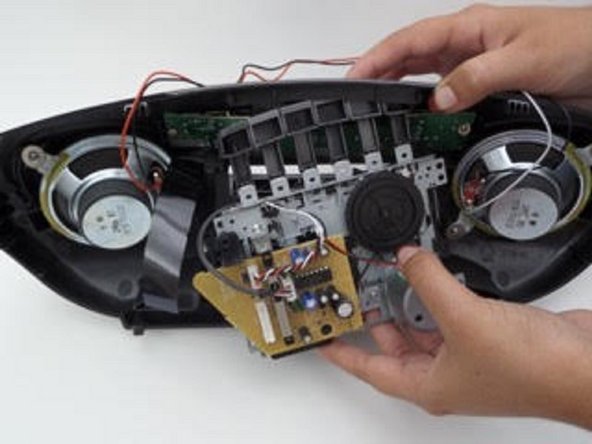
    • To remove the cassette unit, use a 2.5mm flathead on the 4 screws holding the unit together.

  11. Insignia NS-BCDCAS1 Cassette Door Latch Replacement: stap 11, afbeelding 1 van 3 Insignia NS-BCDCAS1 Cassette Door Latch Replacement: stap 11, afbeelding 2 van 3 Insignia NS-BCDCAS1 Cassette Door Latch Replacement: stap 11, afbeelding 3 van 3
    • While pressing the eject bottom, pull the cassette unit down and away from the front panel.

  12. Insignia NS-BCDCAS1 Cassette Door Latch Replacement: stap 12, afbeelding 1 van 1
    • The door latch is located on the bottom corner of the cassette unit.

Conclusie

To reassemble your device, follow these instructions in reverse order.

diego geldres

Lid sinds: 09/12/16

148 Reputatie

1 Handleiding geschreven

Team

CSU Fullerton, Team 2-5, Bruce Fall 2016 Lid van CSU Fullerton, Team 2-5, Bruce Fall 2016

CSUF-BRUCE-F16S2G5

4 Leden

4 handleidingen geschreven

0 opmerkingen

Voeg opmerking toe

Weergavestatistieken:

Afgelopen 24 uren: 2

Afgelopen 7 dagen: 4

Afgelopen 30 dagen: 6

Altijd: 596