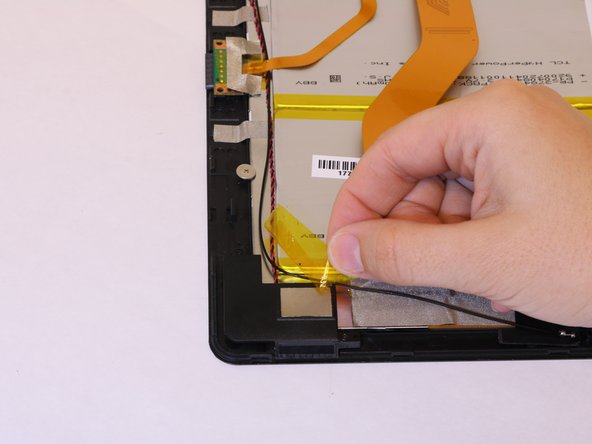
Ga door naar hoofdinhoud

Insignia Flex 10.1 NS-P10W8100 Speaker Replacement

Wat je nodig hebt

  1. Insignia Flex 10.1 NS-P10W8100 Speaker Replacement, Speakers: stap 1, afbeelding 1 van 2 Insignia Flex 10.1 NS-P10W8100 Speaker Replacement, Speakers: stap 1, afbeelding 2 van 2
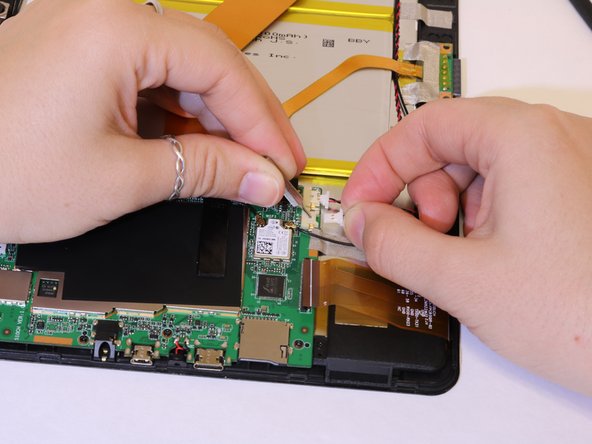
    • Carefully open the laptop and remove the keyboard by disconnecting it.

    • Place keyboard to the side as you will not need it.

    • Beware of plastic clips on the side of the device.

  2. Insignia Flex 10.1 NS-P10W8100 Speaker Replacement: stap 2, afbeelding 1 van 1
    • Lay the screen flat on its surface and use the iFixit opening tool to remove the cover by gently prying the back cover from the screen.

    • Apply the opening tool to the edge closest to the screen.

    • Apply the opening tool to each side which will help pry the back cover evenly.

    • Do not pry on the bottom side of the device. This is the side across from the camera.

  3. Insignia Flex 10.1 NS-P10W8100 Speaker Replacement: stap 3, afbeelding 1 van 1
    • Use your fingers and pry the back cover from the screen. You may need to wiggle the cover a bit to separate the pieces.

    • If the back cover does not come off work your fingers around the corners and slowly pry the cover off.

    • Be careful with potential sharp edges and any exposed electrical components.

  4. Insignia Flex 10.1 NS-P10W8100 Speaker Replacement: stap 4, afbeelding 1 van 2 Insignia Flex 10.1 NS-P10W8100 Speaker Replacement: stap 4, afbeelding 2 van 2
    • Using a fingernail, gently pull back on the yellow tape holding the speaker wire in place.

    • Looking on the right side of the device remove the second piece of tape the same way.

    • Try to place the the tape in a location with little dust for later when reinstalling the tape.

  5. Insignia Flex 10.1 NS-P10W8100 Speaker Replacement: stap 5, afbeelding 1 van 2 Insignia Flex 10.1 NS-P10W8100 Speaker Replacement: stap 5, afbeelding 2 van 2
    • Remove the black tape covering the ribbon connector.

    • Then use a fingernail to lift up the black edge on top of the ribbon connector.

  6. Insignia Flex 10.1 NS-P10W8100 Speaker Replacement: stap 6, afbeelding 1 van 3 Insignia Flex 10.1 NS-P10W8100 Speaker Replacement: stap 6, afbeelding 2 van 3 Insignia Flex 10.1 NS-P10W8100 Speaker Replacement: stap 6, afbeelding 3 van 3
    • Gently pull on the speaker wire connector from the motherboard.

    • Then continue to slide the cable gently to clear it from other components.

    • The longer speaker wire has to be removed from under the smaller ribbon wire connected to the keyboard connector.

    • You may need to use the 0.8 tip tool to press down on the connector if it is not removing easily.

  7. Insignia Flex 10.1 NS-P10W8100 Speaker Replacement: stap 7, afbeelding 1 van 3 Insignia Flex 10.1 NS-P10W8100 Speaker Replacement: stap 7, afbeelding 2 van 3 Insignia Flex 10.1 NS-P10W8100 Speaker Replacement: stap 7, afbeelding 3 van 3
    • Using a Phillips #2 screwdriver, remove the two 4 mm screws holding the speakers in place.

  8. Insignia Flex 10.1 NS-P10W8100 Speaker Replacement: stap 8, afbeelding 1 van 1
    • Remove the speakers from the device.

    • Be sure to watch the speaker wires as they may snag on other items.

Conclusie

To reassemble your device, follow these instructions in reverse order.

0 opmerkingen

Voeg opmerking toe

Weergavestatistieken:

Afgelopen 24 uren: 0

Afgelopen 7 dagen: 0

Afgelopen 30 dagen: 0

Altijd: 134