Ga door naar hoofdinhoud

Insignia Flex 10.1 NS-P10W8100 Battery Replacement

Wat je nodig hebt

  1. Insignia Flex 10.1 NS-P10W8100 Battery Replacement, Battery: stap 1, afbeelding 1 van 2 Insignia Flex 10.1 NS-P10W8100 Battery Replacement, Battery: stap 1, afbeelding 2 van 2
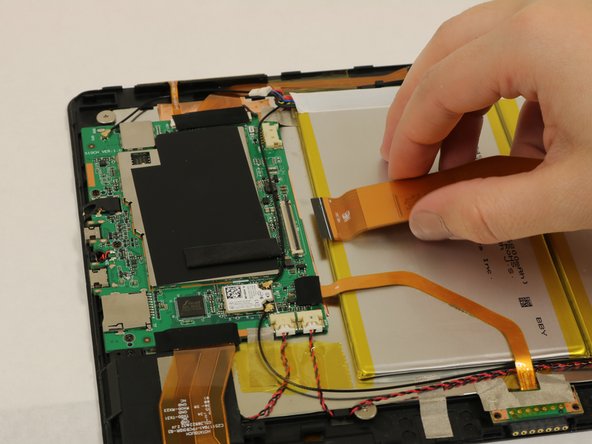
    • Carefully open the laptop and remove the keyboard by disconnecting it.

    • Place keyboard to the side as you will not need it.

    • Beware of plastic clips on the side of the device.

  2. Insignia Flex 10.1 NS-P10W8100 Battery Replacement: stap 2, afbeelding 1 van 2 Insignia Flex 10.1 NS-P10W8100 Battery Replacement: stap 2, afbeelding 2 van 2
    • Lay the screen flat on its surface and use the iFixit opening tool to remove the cover by gently prying the back cover from the screen.

    • Apply the opening tool to the edge closest to the screen.

    • Apply the opening tool to each side which will help pry the back cover evenly.

    • Do not pry on the bottom side of the device. This is the side across from the camera.

  3. Insignia Flex 10.1 NS-P10W8100 Battery Replacement: stap 3, afbeelding 1 van 1
    • Use your fingers and pry the back cover from the screen. You may need to wiggle the cover a bit to separate the pieces.

    • If the back cover does not come off, work your fingers around the corners and slowly pry the cover off using your fingers.

    • Be careful with potential sharp edges and any exposed electrical components.

  4. Insignia Flex 10.1 NS-P10W8100 Battery Replacement: stap 4, afbeelding 1 van 2 Insignia Flex 10.1 NS-P10W8100 Battery Replacement: stap 4, afbeelding 2 van 2
    • Unplug the power supply by disconnecting the red and blue wires found on the motherboard.

  5. Insignia Flex 10.1 NS-P10W8100 Battery Replacement: stap 5, afbeelding 1 van 1
    • Remove the black tape from the Zero Insertion Force (ZIF) ribbon connector.

  6. Insignia Flex 10.1 NS-P10W8100 Battery Replacement: stap 6, afbeelding 1 van 2 Insignia Flex 10.1 NS-P10W8100 Battery Replacement: stap 6, afbeelding 2 van 2
    • Lift up on the black locking flap, being careful not to damage the surrounding hardware parts.

    • Remove the ZIF ribbon wire by pulling horizontally towards the battery.

  7. Insignia Flex 10.1 NS-P10W8100 Battery Replacement: stap 7, afbeelding 1 van 1
    • Remove the black tape from the small ribbon wire connector.

    • Pull the ribbon connector out of the plug the same way that was mentioned in step 4.

  8. Insignia Flex 10.1 NS-P10W8100 Battery Replacement: stap 8, afbeelding 1 van 1
    • Use the spudger to separate the battery from the base.

    • The battery can be difficult to remove as it is held in with double sided tape.

    • Be sure not to pry on the battery too hard because damage to the screen and/or the battery can occur.

Conclusie

To reassemble your device, follow these instructions in reverse order.

Één andere persoon heeft deze handleiding voltooid.

2 opmerkingen

Very concise and helpful. Thank you

Frank Schaffer - Antwoord

where can i buy the replacement battery?

José Porras - Antwoord

Voeg opmerking toe

Weergavestatistieken:

Afgelopen 24 uren: 0

Afgelopen 7 dagen: 5

Afgelopen 30 dagen: 15

Altijd: 1,041