Ga door naar hoofdinhoud

India Mark II Water Tank Replacement

Gearchiveerde handleiding
Deze handleiding wordt enkel nog bijgehouden voor historische doeleinden. Gebruik de laatste versie van deze gids om uw reparatie uit te voeren.

Wat je nodig hebt

  1. India Mark II Water Tank Replacement, Cover Plate: stap 1, afbeelding 1 van 1
    • Use a wrench to remove the bolt on the top of the cover plate.

    • When replacing the cover plate, this bolt only needs to be hand tight.

  2. India Mark II Water Tank Replacement: stap 2, afbeelding 1 van 1
    • Remove the top cover by pulling it straight off the pump.

    • Store the top cover in a sanitary place, preferably above ground, to prevent contamination.

  3. India Mark II Water Tank Replacement, Head Section: stap 3, afbeelding 1 van 3 India Mark II Water Tank Replacement, Head Section: stap 3, afbeelding 2 van 3 India Mark II Water Tank Replacement, Head Section: stap 3, afbeelding 3 van 3
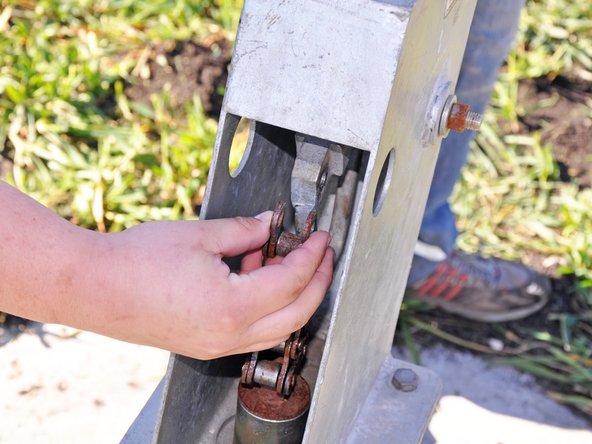
    • Pull the pump handle all the way down and hold it in this position, exposing the pump rod.

    • Place the spacer around the pump rod and under the chain attachment point.

    • Make sure the spacer is beveled side down, and flat side up.

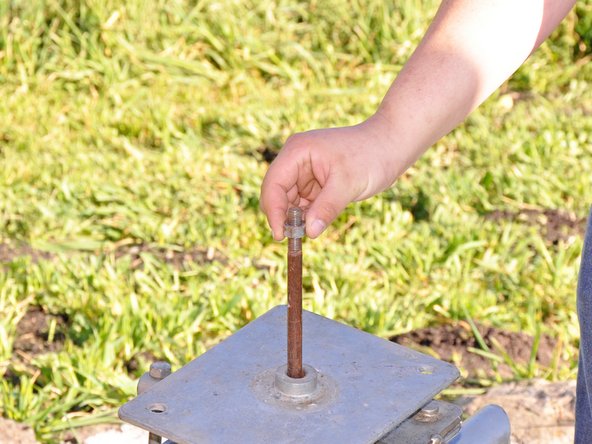
    • Lift the pump lever until there is no tension in the chain and hold it in this position.

  4. India Mark II Water Tank Replacement: stap 4, afbeelding 1 van 2 India Mark II Water Tank Replacement: stap 4, afbeelding 2 van 2
    • Remove the bolt connecting the chain to the pump handle.

    • Remove the chain from the handle.

  5. India Mark II Water Tank Replacement: stap 5, afbeelding 1 van 3 India Mark II Water Tank Replacement: stap 5, afbeelding 2 van 3 India Mark II Water Tank Replacement: stap 5, afbeelding 3 van 3
    • There are 4 bolts securing the head section to the water tank, located at the corners of head section base.

    • Continue supporting the pump handle so the pump head doesn't fall off when all the bolts are removed.

    • Remove the 4 bolts on the base of the water tank.

  6. India Mark II Water Tank Replacement: stap 6, afbeelding 1 van 1
    • Lift the pump head off of the water tank and place in a sanitary place, preferably above ground, to prevent contamination.

  7. India Mark II Water Tank Replacement, Water Tank: stap 7, afbeelding 1 van 3 India Mark II Water Tank Replacement, Water Tank: stap 7, afbeelding 2 van 3 India Mark II Water Tank Replacement, Water Tank: stap 7, afbeelding 3 van 3
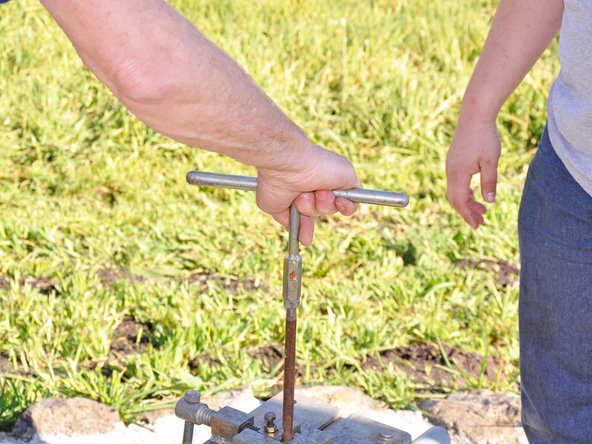
    • Lift the plunger assembly and separator plate and place a rod clamp below the separator plate.

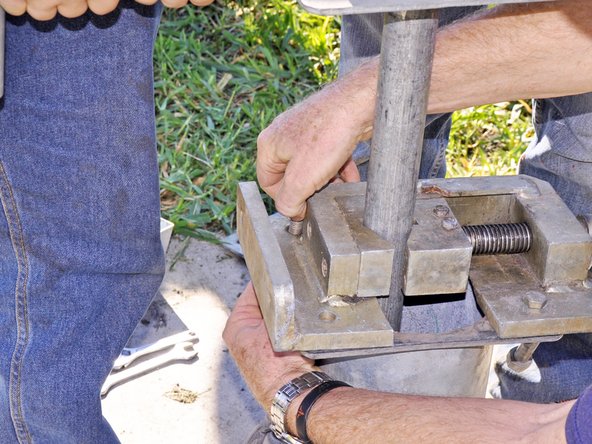
    • Tighten the rod clamp and gently set the separator plate on top of it.

    • Remove the spacer.

  8. India Mark II Water Tank Replacement: stap 8, afbeelding 1 van 3 India Mark II Water Tank Replacement: stap 8, afbeelding 2 van 3 India Mark II Water Tank Replacement: stap 8, afbeelding 3 van 3
    • Hold the rod clamp steady while removing the chain from the pump rod. Check the chain for signs of damage.

    • Extend the chain sideways and use it as a lever as demonstrated in the first picture.

    • Remove the lock nut by turning it counterclockwise.

    • Remove the separator plate.

  9. India Mark II Water Tank Replacement: stap 9, afbeelding 1 van 2 India Mark II Water Tank Replacement: stap 9, afbeelding 2 van 2
    • Reinstall the lock nut.

    • Install a T-handle, screwing it down against the lock nut.

  10. India Mark II Water Tank Replacement: stap 10, afbeelding 1 van 2 India Mark II Water Tank Replacement: stap 10, afbeelding 2 van 2
    • Lift up on the T-handle to take pressure off the rod clamp.

    • Remove the rod clamp and slowly lower the T-handle.

    • The pump rod will rest on the end cap, located below the cylinder of the pump. It is important to lower the T-handle slowly to prevent damage to the pump.

  11. India Mark II Water Tank Replacement: stap 11, afbeelding 1 van 1
    • There are 4 bolts securing the water tank to the pump base. They are located at the bottom corners of the water tank.

    • Remove the 4 bolts on the base of the water tank.

  12. India Mark II Water Tank Replacement: stap 12, afbeelding 1 van 3 India Mark II Water Tank Replacement: stap 12, afbeelding 2 van 3 India Mark II Water Tank Replacement: stap 12, afbeelding 3 van 3
    • Lift the water tank up approximately 1 foot.

    • Place a base clamp around the exposed pipe and tighten it against the riser main.

  13. India Mark II Water Tank Replacement: stap 13, afbeelding 1 van 2 India Mark II Water Tank Replacement: stap 13, afbeelding 2 van 2
    • Secure the base clamp to the pump base with two bolt and nut sets installed on opposite sides of each other.

    • Hand tight will be sufficient for securing the base clamp.

    • Use the nuts and bolts removed from the water tank base or head section base.

  14. India Mark II Water Tank Replacement: stap 14, afbeelding 1 van 2 India Mark II Water Tank Replacement: stap 14, afbeelding 2 van 2
    • Turn the water tank counterclockwise until it comes free from the pipe.

    • Make sure to keep the tank level to prevent cross threading.

    • Lift the water tank up against the T-handle and secure the rod clamp to the pump rod.

  15. India Mark II Water Tank Replacement: stap 15, afbeelding 1 van 2 India Mark II Water Tank Replacement: stap 15, afbeelding 2 van 2
    • Remove the T-handle.

    • Remove the water tank and check for signs of blockage.

    • Store in a sanitary place to prevent contamination.

Conclusie

To reassemble your device, follow these instructions in reverse order.

Phillip Takahashi

Lid sinds: 08/22/11

86.704 Reputatie

87 handleidingen geschreven

0 opmerkingen

Voeg opmerking toe

Weergavestatistieken:

Afgelopen 24 uren: 0

Afgelopen 7 dagen: 0

Afgelopen 30 dagen: 0

Altijd: 1,020