Ga door naar hoofdinhoud

InFocus Screenplay 4805 Lens Replacement

Wat je nodig hebt

  1. InFocus Screenplay 4805 Lens Replacement, Top Panel: stap 1, afbeelding 1 van 3 InFocus Screenplay 4805 Lens Replacement, Top Panel: stap 1, afbeelding 2 van 3 InFocus Screenplay 4805 Lens Replacement, Top Panel: stap 1, afbeelding 3 van 3
    • Flip the projector on its back.

    • Use the Phillips #2 screwdriver to remove the (4) four 2 cm gold screws.

    • Use the Phillips #2 screwdriver to remove the (3) three 1 cm silver screws.

  2. InFocus Screenplay 4805 Lens Replacement: stap 2, afbeelding 1 van 2 InFocus Screenplay 4805 Lens Replacement: stap 2, afbeelding 2 van 2
    • Turn the projector, facing the back cable board towards you.

    • Using the Phillips #0 screwdriver, remove the (3) three 1.0 cm silver screws on the back panel.

    • Gently take off back cable panel.

  3. InFocus Screenplay 4805 Lens Replacement: stap 3, afbeelding 1 van 3 InFocus Screenplay 4805 Lens Replacement: stap 3, afbeelding 2 van 3 InFocus Screenplay 4805 Lens Replacement: stap 3, afbeelding 3 van 3
    • Turn the projector so the front side with the lens is facing you.

    • Gently pry the both of the grey lens rings using the metal spudger.

  4. InFocus Screenplay 4805 Lens Replacement: stap 4, afbeelding 1 van 1
    • Now that the screws have been removed, proceed with the removal of the outer panel.

    • Gently remove the front lens panel.

    • Be forewarned, the panel will resist. Be careful not to break the lens.

  5. InFocus Screenplay 4805 Lens Replacement: stap 5, afbeelding 1 van 1
    • Being careful not to pull the wires inside the projector, gently lift the top panel off the projector.

    • Rest the lid behind the projector so the insides are exposed and undamaged.

  6. InFocus Screenplay 4805 Lens Replacement, Lens: stap 6, afbeelding 1 van 3 InFocus Screenplay 4805 Lens Replacement, Lens: stap 6, afbeelding 2 van 3 InFocus Screenplay 4805 Lens Replacement, Lens: stap 6, afbeelding 3 van 3
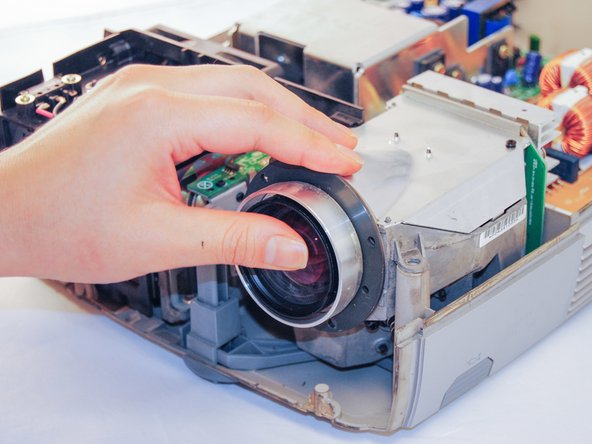
    • Using the Phillips #1 screwdriver, remove the (3) three 1cm black screws on the face of the lens.

    • Gently pull out the lens.

Conclusie

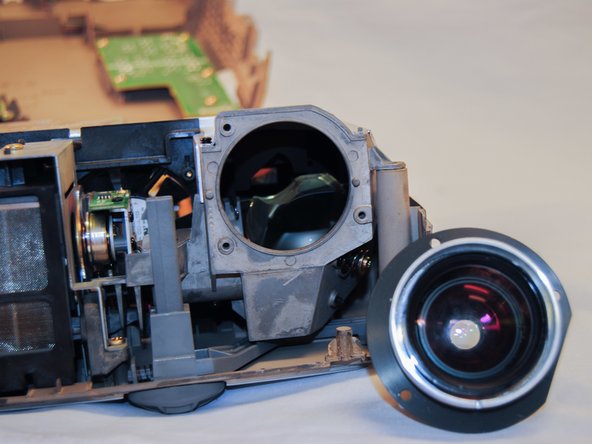
To reassemble the device, follow these instructions in reverse order.

Één andere persoon heeft deze handleiding voltooid.

0 opmerkingen

Voeg opmerking toe

Weergavestatistieken:

Afgelopen 24 uren: 0

Afgelopen 7 dagen: 0

Afgelopen 30 dagen: 0

Altijd: 655