Deze versie kan foutieve bewerkingen bevatten. Schakel over naar de recentste gecontroleerde momentopname.
Wat je nodig hebt
-
Deze stap is niet vertaald. Help het te vertalen
-
Turn the peg in the direction of less resistance. The string should become more slacked or droopy.
-
-
Deze stap is niet vertaald. Help het te vertalen
-
When the string is very loose and is no longer coiled around the peg, slide it through the hole in the peg to remove it from the head.
-
-
Deze stap is niet vertaald. Help het te vertalen
-
Using the all-in-one tool, slide the peg between the groove and gently lift up until the peg comes out.
-
-
-
Deze stap is niet vertaald. Help het te vertalen
-
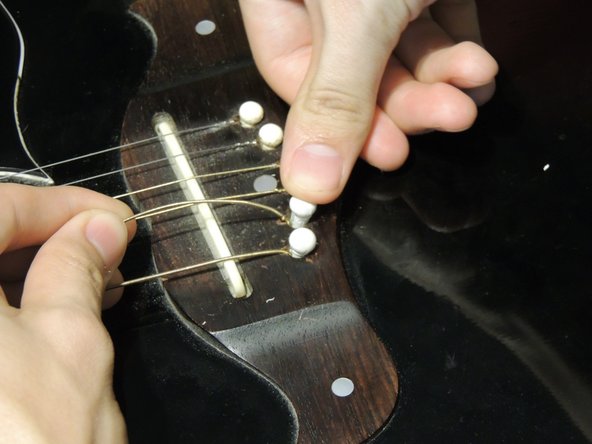
With your new string, align the nut end with the groove in the bridge pin so that the nut is at the opposite side of the head of the pin.
-
-
Deze stap is niet vertaald. Help het te vertalen
-
Slide both the string and the bridge pin back into the hole,(make sure the groove is facing the string) and then when in place, apply a small amount of force with your thumb until you hear it click into place.
-
-
Deze stap is niet vertaald. Help het te vertalen
-
Thread the end of the new string through the hole of the peg, but don't pull it all the way tight, leave the string loose on the neck.
-
-
Deze stap is niet vertaald. Help het te vertalen
-
With the new string loose on the neck, tighten the peg so the string winds in the same direction as the other strings and wind it until it is tight and does not wobble. Make sure the string is aligned with the groove in the neck.
-
-
Deze stap is niet vertaald. Help het te vertalen
-
Using guitar string cutters, leave between a quarter inch to half of an inch of string so the excess string does not get in the way.
-
Annuleren: ik heb deze handleiding niet afgemaakt.
Één andere persoon heeft deze handleiding voltooid.


