Inleiding
Thinking about replacing the cells in your Thinkpad 700C? Can't figure out how to open the battery pack? This guide will tell you how to take it apart.
Wat je nodig hebt
-
-
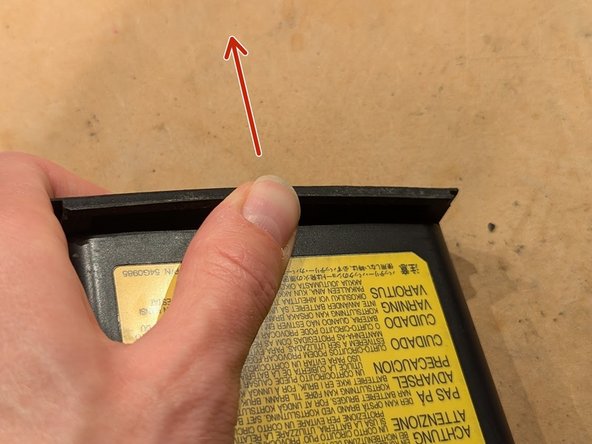
Remove the locking battery front faceplate by pushing it from the middle away from the battery pack until it bends a few mm.
-
While still applying forward pressure, slide the faceplate up and away from the battery.
-
-
-
On the faceplate end of the battery, locate the seam between the two plastic halves. Slowly work a sharp knife between the two halves exactly as shown here.
-
The plastic tab that projects here has not been ultrasonically bonded like the rest of the case. You're using this to gain leverage on the parts that are bonded.
-
-
-
Once you've opened up a small gap, insert a larger tool and continue to work it around, widening the gap even more. You might hear the case halves starting to crack apart.
-
With a thicker tool, you can twist it side to side to put more pressure on the case.
-
Repeat this with the other side of the faceplate end of the battery.
-
-
-
-
Using progressively thicker and stronger tools, keep prying until the faceplate end of the battery cracks into two halves.
-
-
-
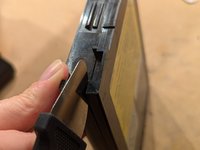
Using a metal spudger (left), chase the side seam with a Jimmy device (right). The spudger puts pressure on the seam and the Jimmy device gives it the final push to crack open.
-
Do this to the other side as well.
-
-
-
To break apart the corner seams at the rear, twist the two halves as shown. Go in both directions to work both the corner seams and crack them apart.
-
-
-
Jam a spudger in the newly opened rear corners and crack the seam going up to the battery connector.
-
You might also try lifting the top cover from the faceplate end while doing this to apply more pressure to the rear seam.
-
-
-
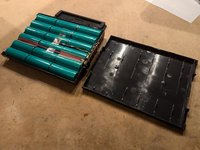
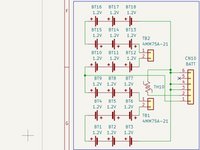
The cover lifts off, exposing the eighteen 3/4A NiMH cells inside.
-
The device on top, with the black and white wires, is a thermistor for sensing the temperature of the pack.
-
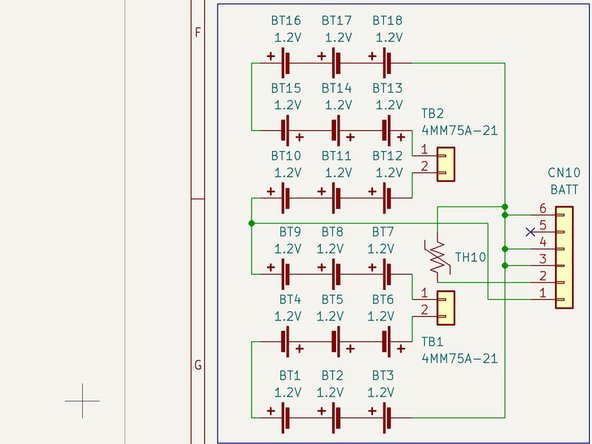
There are two safety devices (not shown) which connect in series with each of the two series strings of cells. They are Klixon 4MM75A-21 overcurrent/overtemperature protection devices which use a bimetallic strip to break the circuit.
-