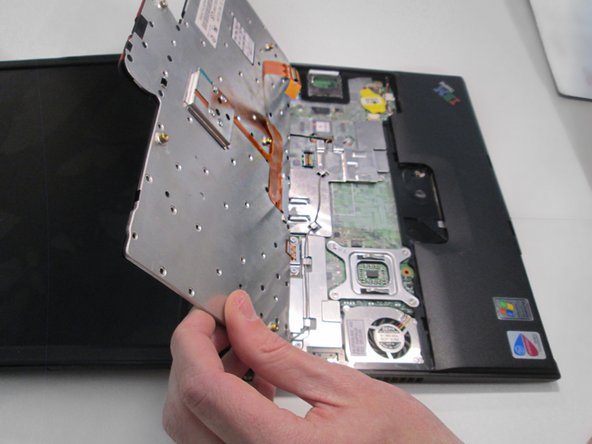
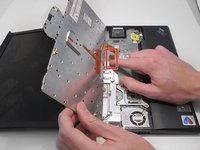
Ga door naar hoofdinhoud

IBM ThinkPad X41 Fan and Heat Sink Replacement

Wat je nodig hebt

  1. IBM ThinkPad X41 Fan and Heat Sink Replacement, Battery: stap 1, afbeelding 1 van 1
    • Turn laptop over, make sure lid side is faced down.

  2. IBM ThinkPad X41 Fan and Heat Sink Replacement: stap 2, afbeelding 1 van 1
    • Locate battery release button lock on laptop, and press down.

  3. IBM ThinkPad X41 Fan and Heat Sink Replacement: stap 3, afbeelding 1 van 1
    • Hold laptop battery release button and gently pull battery away from laptop.

  4. IBM ThinkPad X41 Fan and Heat Sink Replacement, Keyboard: stap 4, afbeelding 1 van 3 IBM ThinkPad X41 Fan and Heat Sink Replacement, Keyboard: stap 4, afbeelding 2 van 3 IBM ThinkPad X41 Fan and Heat Sink Replacement, Keyboard: stap 4, afbeelding 3 van 3
    • Slide outward to unlock and lift battery up to remove.

    • Remove battery before keyboard to avoid damage to battery.

  5. IBM ThinkPad X41 Fan and Heat Sink Replacement: stap 5, afbeelding 1 van 1
    • With a Phillips PH000 to remove all six 6 mm screws identified for the keyboard as shown.

  6. IBM ThinkPad X41 Fan and Heat Sink Replacement: stap 6, afbeelding 1 van 3 IBM ThinkPad X41 Fan and Heat Sink Replacement: stap 6, afbeelding 2 van 3 IBM ThinkPad X41 Fan and Heat Sink Replacement: stap 6, afbeelding 3 van 3
    • Flip the laptop over once more returning it to its upright position and open laptop .

  7. IBM ThinkPad X41 Fan and Heat Sink Replacement: stap 7, afbeelding 1 van 2 IBM ThinkPad X41 Fan and Heat Sink Replacement: stap 7, afbeelding 2 van 2
    • Using your left hand, place thumb on the upper part of the keyboard and place your other thumb on the bottom part of the keyboard.

    • Push firmly upward with both thumbs. This will detach keyboard from base.

    • Be cautious when lifting as there is an orange connection cable still attached to the bottom side.

  8. IBM ThinkPad X41 Fan and Heat Sink Replacement: stap 8, afbeelding 1 van 2 IBM ThinkPad X41 Fan and Heat Sink Replacement: stap 8, afbeelding 2 van 2
    • Detach the connection to the motherboard by first sliding it towards you, then pulling upward away from your body.

    • This step's directions are based on the angle shown .

  9. IBM ThinkPad X41 Fan and Heat Sink Replacement: stap 9, afbeelding 1 van 1
    • Lift the entire keyboard off the laptop.

  10. IBM ThinkPad X41 Fan and Heat Sink Replacement, Fan and Heat Sink: stap 10, afbeelding 1 van 2 IBM ThinkPad X41 Fan and Heat Sink Replacement, Fan and Heat Sink: stap 10, afbeelding 2 van 2
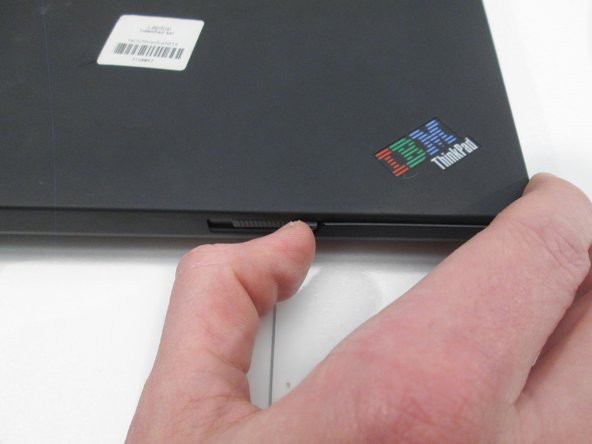
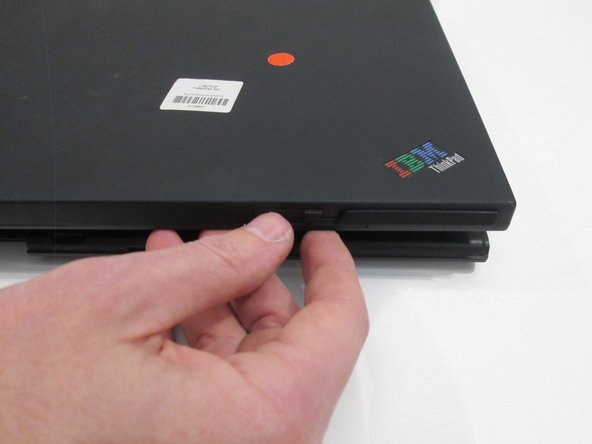
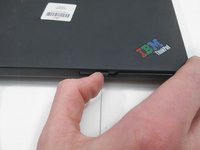
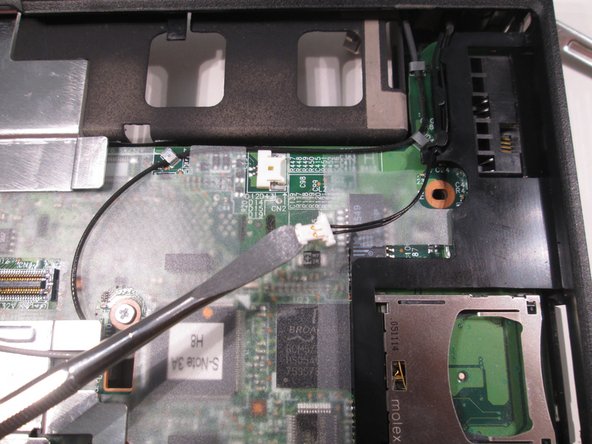
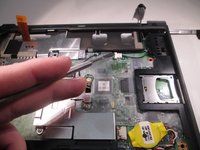
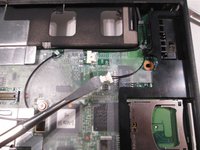
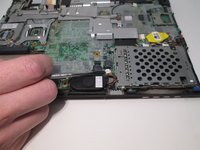
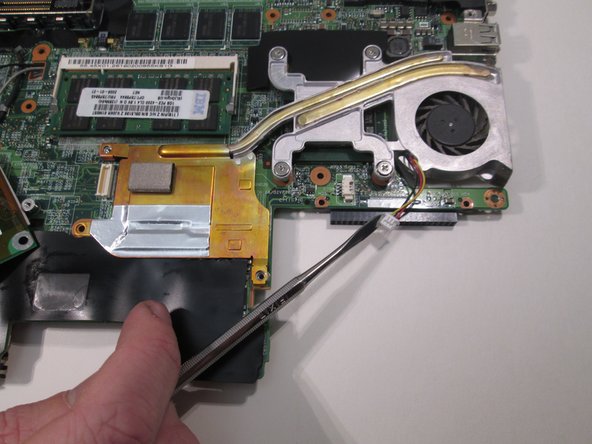
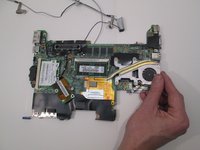
    • At the top right of the laptop remove the white tab connected to the motherboard by pulling it to the right.

    • The regular black nylon spudger should be used whenever possible, especially around sensitive internal components.

    • The display was already removed from another guide.

  11. IBM ThinkPad X41 Fan and Heat Sink Replacement: stap 11, afbeelding 1 van 2 IBM ThinkPad X41 Fan and Heat Sink Replacement: stap 11, afbeelding 2 van 2
    • At the bottom right of the laptop remove the black cylinder by lifting it up and out of the depression.

  12. IBM ThinkPad X41 Fan and Heat Sink Replacement: stap 12, afbeelding 1 van 1
    • Move to the back of the laptop.

    • Remove the two 5mm screws holding the monitor and cover to the case using a phillips head screwdriver.

  13. IBM ThinkPad X41 Fan and Heat Sink Replacement: stap 13, afbeelding 1 van 1
    • Pull up on the metal hinges to remove the display that is held in on the two sides of the laptop.

  14. IBM ThinkPad X41 Fan and Heat Sink Replacement: stap 14, afbeelding 1 van 1
    • Flip the laptop upside down.

    • Remove the indicated 5mm screws with a phillips head screwdriver.

  15. IBM ThinkPad X41 Fan and Heat Sink Replacement: stap 15, afbeelding 1 van 1
    • With the laptop right side up facing you lift from the sides and pull the cover toward you.

  16. IBM ThinkPad X41 Fan and Heat Sink Replacement: stap 16, afbeelding 1 van 1
    • Remove the indicated 4mm screws with a philips head screwdriver.

  17. IBM ThinkPad X41 Fan and Heat Sink Replacement: stap 17, afbeelding 1 van 2 IBM ThinkPad X41 Fan and Heat Sink Replacement: stap 17, afbeelding 2 van 2
    • Remove the white tab at the bottom connected to the speaker by sliding it to the right.

  18. IBM ThinkPad X41 Fan and Heat Sink Replacement: stap 18, afbeelding 1 van 1
    • Remove the metal bracket by pulling it up.

  19. IBM ThinkPad X41 Fan and Heat Sink Replacement: stap 19, afbeelding 1 van 1
    • Remove the display connection by pulling it up.

  20. IBM ThinkPad X41 Fan and Heat Sink Replacement: stap 20, afbeelding 1 van 1
    • Remove the metal plate covering the motherboard by removing the gray wire from the indicated hooks and pulling the plate up. While you are here remove the other black wire from the indicated hooks as well.

  21. IBM ThinkPad X41 Fan and Heat Sink Replacement: stap 21, afbeelding 1 van 1
    • The motherboard can then be removed by pulling it up from the left side.

  22. IBM ThinkPad X41 Fan and Heat Sink Replacement: stap 22, afbeelding 1 van 1
    • Flip the motherboard over.

    • Remove the indicated 5mm and 4mm screws with a phillips head screwdriver.

  23. IBM ThinkPad X41 Fan and Heat Sink Replacement: stap 23, afbeelding 1 van 1
    • Pull the chip attached to the top of the heat sink and move it to the left.

  24. IBM ThinkPad X41 Fan and Heat Sink Replacement: stap 24, afbeelding 1 van 2 IBM ThinkPad X41 Fan and Heat Sink Replacement: stap 24, afbeelding 2 van 2
    • Remove the white tab below the fan by pulling it to the right.

  25. IBM ThinkPad X41 Fan and Heat Sink Replacement: stap 25, afbeelding 1 van 1
    • Holding the fan move the whole assembly to the left past the notch holding it in.

  26. IBM ThinkPad X41 Fan and Heat Sink Replacement: stap 26, afbeelding 1 van 2 IBM ThinkPad X41 Fan and Heat Sink Replacement: stap 26, afbeelding 2 van 2
    • The assembly is no longer attached and can be removed by pulling it out.

Conclusie

To reassemble your device, follow these instructions in reverse order.

Één andere persoon heeft deze handleiding voltooid.

Brian Giolli

Lid sinds: 09/12/16

234 Reputatie

1 Handleiding geschreven

Team

CSU Fullerton, Team 2-4, Bruce Fall 2016 Lid van CSU Fullerton, Team 2-4, Bruce Fall 2016

CSUF-BRUCE-F16S2G4

4 Leden

8 handleidingen geschreven

0 opmerkingen

Voeg opmerking toe

Weergavestatistieken:

Afgelopen 24 uren: 1

Afgelopen 7 dagen: 8

Afgelopen 30 dagen: 22

Altijd: 1,488