Deze versie kan foutieve bewerkingen bevatten. Schakel over naar de recentste gecontroleerde momentopname.
Wat je nodig hebt
-
Deze stap is niet vertaald. Help het te vertalen
-
Remove the rear cover at the back by pulling the gap located at the bottom of the phone.
-
Lift up and remove the battery.
-
-
Deze stap is niet vertaald. Help het te vertalen
-
Leave the phone down on a table.
-
8 screws are what we need to remove next. There is one hiding below a white sticker.
-
-
Deze stap is niet vertaald. Help het te vertalen
-
Use a screwdriver (T4 if you are using the 54 bit driver kit) to remove the 8 screws along the edges of the phone. There are four in each corner and four in the middle on the sides.
-
-
Deze stap is niet vertaald. Help het te vertalen
-
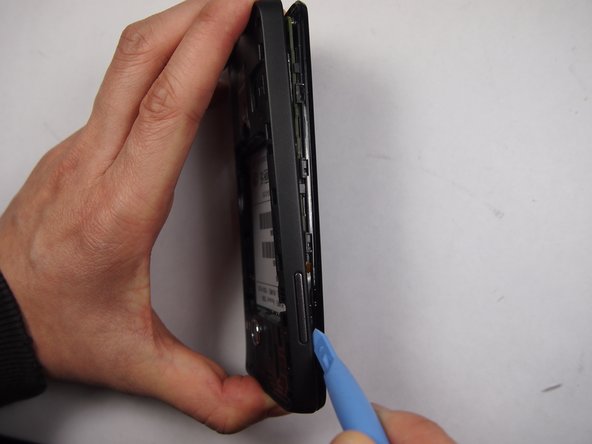
Use the plastic opening tool by fitting it into the gaps to pull back the frame.
-
-
Deze stap is niet vertaald. Help het te vertalen
-
On the left of the motherboard there is a ribbon cable that connects the volume rocker to the motherboard, we need to disconnect it.
-
Next using the tweezers carefully pull the ribbon cable away from the socket it was in until it is completely clear of the connector.
-
-
Deze stap is niet vertaald. Help het te vertalen
-
There are two more ribbon cables at the top that must also be disconnected, to do this simply lift them up from their connecter with the tweezers or with the spudger.
-
-
Deze stap is niet vertaald. Help het te vertalen
-
Pull back the orange tab. Carefully disconnect this.
-
-
Deze stap is niet vertaald. Help het te vertalen
-
Once the orange tabs are pulled back, use a plastic wedge to detach the LCD screen.
-
Carefully pull the screen away from the cover and replace the LCD with a new one
-


Annuleren: ik heb deze handleiding niet afgemaakt.
44 andere personen hebben deze handleiding voltooid.
Team

UMass Dartmouth, Team 5-3, Vijaybhaskar Fall 2014 Lid van UMass Dartmouth, Team 5-3, Vijaybhaskar Fall 2014
UMASSD-VIJAYBHASKAR-F14S5G3
4 Leden
8 handleidingen geschreven
2 opmerkingen
good
it a good advise and easy
Its really helpful and so easy ... thanks