Deze handleiding heeft recentere wijzigingen. Schakel over naar de nieuwste niet-geverifieerde versie.
Inleiding
In this guide we are going to replace the LCD display on the Huawei ascend Y300 android smartphone. Before we start it is a good idea to prepare an organised area to carry out the repair, it is also a good Idea to get a small bowl or parts tray to put the small screws in so that they aren't lost.
Wat je nodig hebt
-
-
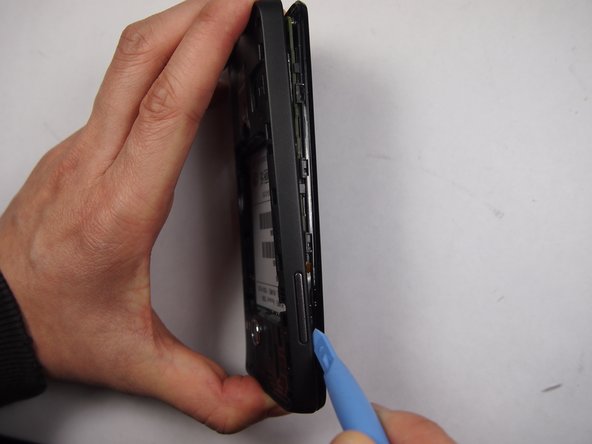
Remove the rear cover at the back by pulling the gap located at the bottom of the phone.
-
Lift up and remove the battery.
-
-
-
-
On the left of the motherboard there is a ribbon cable that connects the volume rocker to the motherboard, we need to disconnect it.
-
To do this, using either the spudger or tweezers lift up the retention flap holding the cable down.
-
Next using the tweezers carefully pull the ribbon cable away from the socket it was in until it is completely clear of the connector.
-
-
-
There are two more ribbon cables at the top that must also be disconnected, to do this simply lift them up from their connecter with the tweezers or with the spudger.
it's important to add that lateral flat cable can be lift up only after turning up the rotating switch which is on the lower side.
just did some edits to this repair guide fixing that issue, the edits are just waiting to be verified, sorry about the poor image quality in the new step 6 best I could do with only 2 hands and a OnePlus One camera.
-


To reassemble your device, follow these instructions in reverse order.
To reassemble your device, follow these instructions in reverse order.
Annuleren: ik heb deze handleiding niet afgemaakt.
44 andere personen hebben deze handleiding voltooid.
Team

UMass Dartmouth, Team 5-3, Vijaybhaskar Fall 2014 Lid van UMass Dartmouth, Team 5-3, Vijaybhaskar Fall 2014
UMASSD-VIJAYBHASKAR-F14S5G3
4 Leden
8 handleidingen geschreven
2 opmerkingen
good
it a good advise and easy
Its really helpful and so easy ... thanks