Inleiding
Use this guide to replace the charging board in your Huawei P10 Lite smartphone. When reassembling your phone apply new adhesive where it is necessary.
Wat je nodig hebt
-
-
Insert the tip of an opening pick between the back cover and the mid frame and slide it around the phone, to cut the adhesive.
-
Using a suction handle to lift the back cover may help to get an initial gap for the opening pick to put in.
-
-
Gereedschap gebruikt in deze stap:Tweezers$4.99
-
Use a pair of tweezers to remove the sticker.
-
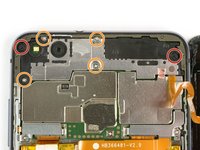
Remove the two Phillips #00 screws.
-
Remove the four 2.5 mm Phillips #00 screws.
Schritt 3 und 4 kann man sich komplett sparen. Wozu auch. Kann gleich mit Schritt 5 weitergemacht werden, zuvor einfach das Flachbandkabel vom Fingerabdrucksensor an der Rückabdeckung abklemmen und fertig.
Translate what Bobby mcgee said:
Step 3 and 4 can be completely ignored. What for? You can continue with step 5, just disconnect the ribbon cable from the fingerprint sensor on the back cover and you're done.
However, the reason step 3 and 4 should not be skipped is Step 6 — Use an iOpener to loosen the adhesive beneath the battery. I.e., the adhesive cannot be easily removed without heat, however, that heat might damage the electric chips. Thus they’d better be removed first.
-
-
-
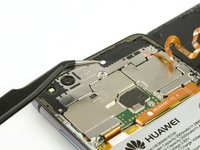
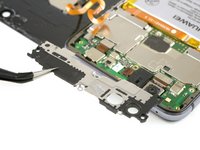
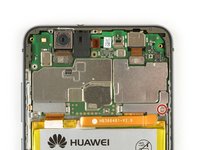
Use tweezers to remove the mainboard shield.
-
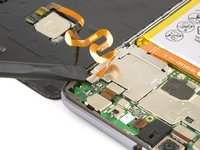
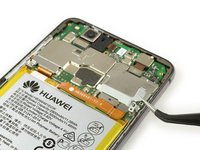
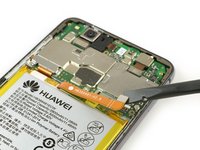
Use the flat end of a spudger to disconnect the finger print sensor flex cable.
Welchen Klebstoff soll man verwenden?
Hallo Josef,
sollte bei deinem Ersatzteil kein Klebstoff oder Klebeband dabei gewesen sein, kannst du dünne Streifen Doppelseitiges Klebeband verwenden. Es gibt für das Huawei P10 Lite auch schon zugeschnittene Klebestreifen zu erwerben, hierbei gilt aber je nach Händler Rezessionen zu lesen, ob die Klebestreifen auch wirklich halten.
Hi darren,
pre-cut adhesive would be the best solution if you can source it. Otherwise a two-sided adhesive tape or carefully used E6000 adhesive glue will be your friend. -
-
-
-
Remove the Phillips screw holding the battery connector plate in place.
-
Remove the battery connector plate.
-
Use the flat end of a spudger to disconnect the battery flex cable.
-
-
-
Use an iOpener to loosen the glue under the vibration motor.
-
Remove the vibration motor.
-
-
Gereedschap gebruikt in deze stap:Tweezers$4.99
-
Use the flat end of a spudger to disconnect the interconnect cable.
-
Use tweezers to disconnect the antenna cable.
-
-
-
Use an iOpener to loosen the adhesive under the charging board.
-
Remove the charging board.
-


To reassemble your device, follow these instructions in reverse order. When reassembling your phone apply new adhesive where it is necessary.
To reassemble your device, follow these instructions in reverse order. When reassembling your phone apply new adhesive where it is necessary.
Annuleren: ik heb deze handleiding niet afgemaakt.
6 andere personen hebben deze handleiding voltooid.


Mit dem Saugnapf die Rückseite anheben hilft ungemein…
Matthias Eberle - Antwoord
Had to use blue wedge tool to wedge open bottom plate from the rim part in order to then use the tip of the blue opening pick under the back plate to then cut the glue. It’s like placing a pie server or knife under the plate once there’s a gap between the rim and the back plate.
Jane - Antwoord
Be careful, there’s a cable to fingerprint sensor, very close to the edge (see pictures below)… It’s very easy to cut it through with the pick, as I just learned :)
dambig - Antwoord