Ga door naar hoofdinhoud

How to unclog the Keurig Mini B-31 Drain

Wat je nodig hebt

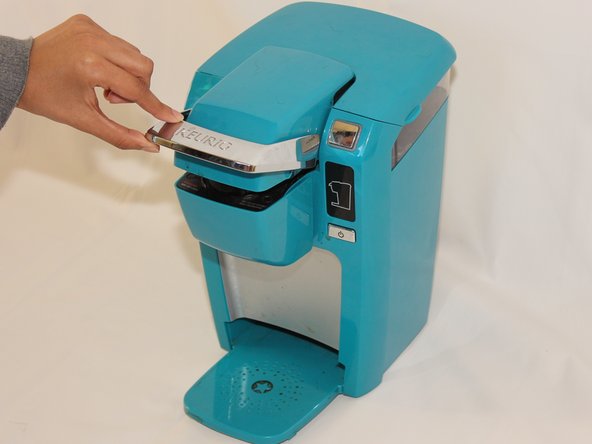
  1. How to unclog the Keurig Mini B-31 Drain, K-cup holder: stap 1, afbeelding 1 van 1
    • Lift up the handle of the Keurig Mini.

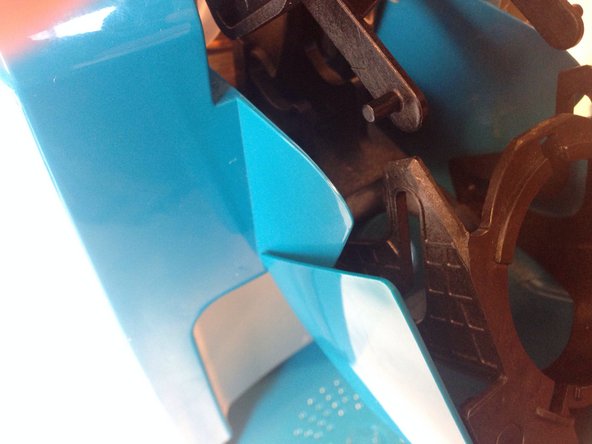
  2. How to unclog the Keurig Mini B-31 Drain: stap 2, afbeelding 1 van 2 How to unclog the Keurig Mini B-31 Drain: stap 2, afbeelding 2 van 2
    • Make sure to avoid the needles above and inside the K-cup because may puncture your hand

    • Firmly place a finger on each one of the three tabs that hold the K-cup holder into place, pushing in lightly. The tabs are difficult to see, but they are there and will make the removal easier. The top tab is located in the same location as the white triangle and the bottom two are located under the plastic bumps highlighted in the picture.

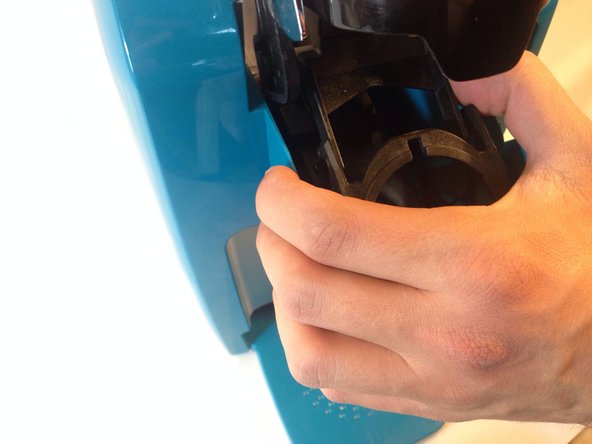
  3. How to unclog the Keurig Mini B-31 Drain: stap 3, afbeelding 1 van 2 How to unclog the Keurig Mini B-31 Drain: stap 3, afbeelding 2 van 2
    • Firmly rock the K-cup holder from side to side, loosening the K-cup holder from its seat.

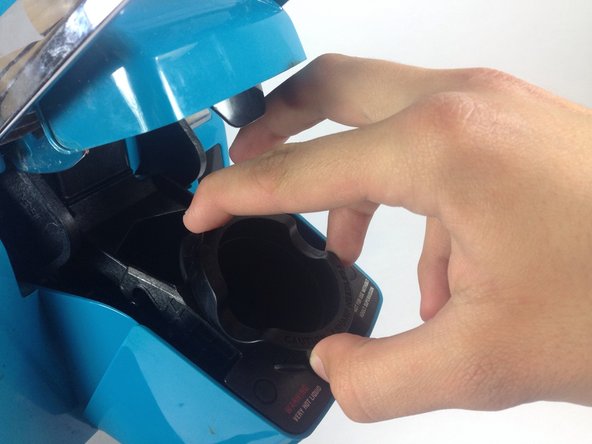
  4. How to unclog the Keurig Mini B-31 Drain: stap 4, afbeelding 1 van 1
    • Pull the K-cup holder straight out.

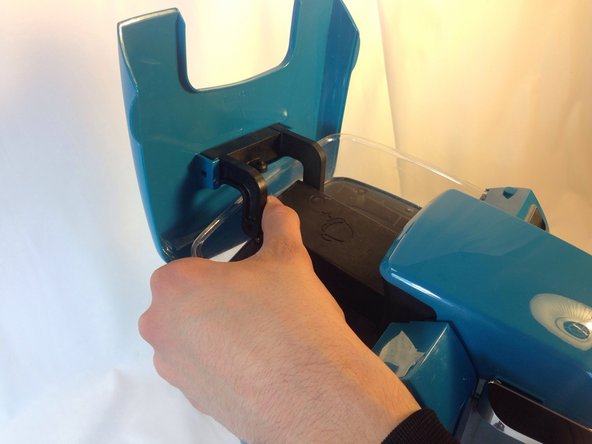
  5. How to unclog the Keurig Mini B-31 Drain, Top: stap 5, afbeelding 1 van 3 How to unclog the Keurig Mini B-31 Drain, Top: stap 5, afbeelding 2 van 3 How to unclog the Keurig Mini B-31 Drain, Top: stap 5, afbeelding 3 van 3
    • Open the top lid of the Keurig.

    • Pull directly outwards on one of the arms that holds the top lid in place. It will take some force to get the arm off the peg. Once one side is off, repeat the process on the second arm.

  6. How to unclog the Keurig Mini B-31 Drain: stap 6, afbeelding 1 van 1
    • Lay the Keurig on its back with the water reservoir pointing away from you.

  7. How to unclog the Keurig Mini B-31 Drain: stap 7, afbeelding 1 van 1
    • Avoid the top needle as it may puncture your hand.

    • Unscrew the two 9mm #1 Philips screws that hold the top plastic cover in place.

  8. How to unclog the Keurig Mini B-31 Drain: stap 8, afbeelding 1 van 1
    • Set the Keurig in an upright position with the front side facing you.

    • Pull the cover off the top of the Keurig. It should come off easily with little force.

  9. How to unclog the Keurig Mini B-31 Drain: stap 9, afbeelding 1 van 1
    • Firmly grasp the hose and pull it off of the plastic nozzle.

  10. How to unclog the Keurig Mini B-31 Drain, Top Needle: stap 10, afbeelding 1 van 1
    • Unscrew the two 9 mm #1 Philips screws at the top of the device.

  11. How to unclog the Keurig Mini B-31 Drain: stap 11, afbeelding 1 van 1
    • Push down lightly on the nozzle that the hose was attached to. The plastic housing along with the needle should pop off without much force.

  12. How to unclog the Keurig Mini B-31 Drain, Arm: stap 12, afbeelding 1 van 1
    • With the needle removed, open the device by pulling up on the handle.

  13. How to unclog the Keurig Mini B-31 Drain: stap 13, afbeelding 1 van 3 How to unclog the Keurig Mini B-31 Drain: stap 13, afbeelding 2 van 3 How to unclog the Keurig Mini B-31 Drain: stap 13, afbeelding 3 van 3
    • Push in on one of the arms attached to the K-cup holder plastic housing to remove it from its rails. The arms are identical for both sides so once one side is free repeat the process for the second side.

    • The plastic is flexible and will not snap with the force applied.

    • Once the arms are removed, the configuration should look like the picture. The K-cup holder housing should be separated from the arms.

  14. How to unclog the Keurig Mini B-31 Drain: stap 14, afbeelding 1 van 1
    • Use a Phillips #1 screw driver to remove the four 12 mm screws that hold the arm assembly in place.

  15. How to unclog the Keurig Mini B-31 Drain: stap 15, afbeelding 1 van 2 How to unclog the Keurig Mini B-31 Drain: stap 15, afbeelding 2 van 2
    • Lift up the arm and pull up the handle assembly. It should easily come off.

    • This white tab falls off easily, remove it and set it aside to ensure it is not lost.

  16. How to unclog the Keurig Mini B-31 Drain, How to unclog the Keurig Mini B-31 Drain: stap 16, afbeelding 1 van 1
    • Lift up the top arm assembly to get it out of the way. Once it is out of the way, clear out any obstructions in the drain.

    • Use your finger or a slender object to clean the drain. Avoid pushing material further down the drain as that may cause obstructions deeper in the system.

    This tutorial was wonderful. However, it did not address what turned out to be my problem. After ascertaining that there was no obstruction in the drain, decided to suck and blow on the tube. Voila! There was some kind of obstruction there. After putting it back together, it works like a charm.

    Charles Sowder - Antwoord

Conclusie

To reassemble your device, follow these instructions in reverse order.

13 andere personen hebben deze handleiding voltooid.

Andrew Adriance

Lid sinds: 01/14/14

1.914 Reputatie

7 handleidingen geschreven

Team

Cal Poly, Team 17-1, Forte Winter 2014 Lid van Cal Poly, Team 17-1, Forte Winter 2014

CPSU-FORTE-W14S17G1

5 Leden

17 handleidingen geschreven

10 opmerkingen

I wish i would have checked the needle first because that is where mine was clogged...then i wouldn't have had to do all those steps...but the instructions here were very good..thank you...

sue allen - Antwoord

For me too the problem was that the needle that punctures the pod was clogged. Maybe add to check that first and avoid taking everything apart. Great instructions though.

janpini - Antwoord

This helped a lot. I used a large syringe. We used to raise birds & had a variety of sizes. Put the syringe on the tube & pulled several times.Seemed to free any clog at the very bottom. Put back together & it's working now.but I notice sprinkles of water as is heats up now. Just need to figure what could be causing this.

lauragriffin76 - Antwoord

So my keurig was not clogged. BUT. After taking it apart and putting it back together, it works now! #sweetcaffeinatedvictory

godschapis - Antwoord

This was very helpful. My Keurig is working again. Thanks.

ebelaine52 - Antwoord

How do I get to the bottom of the reservoir. I think something is in there at the bottom blocking the tube.

harlan.tj - Antwoord

I followed all the instructions and realized it was my needle that was clogged. Thank you! You saved me…had gotten it as a gift and didnt want to tell I had “broken" it. Again THANK YOU!

Dottie Bridgewater - Antwoord

I want to know what that rubber circular thing under the top arm assembly and where you would get another one. Mine stopped pumping water through and after taking it apart, I realized that it was because that part wasn’t creating a good enough seal to make it able to form a vacuum. I wiped at it with my finger on both the main hole and the rubbery part and it works again. But who knows for how long. I tried asking Keurig about it and they just want to keep giving me the run around. First they said there were no user serviceable parts. Challenge accepted. Now they won’t give me a straight answer about how to replace this one simple part. They want to talk to me on the phone about it. I don’t get why it is so hard!!!

Steven Kendel - Antwoord

I was able to open everything and put back in place. Not sure what was clogged, I know I cleaned many things and now it’s working and saved a few $ :) Thanks.
Elie Zoghby - Antwoord

I have keurig mini plus- can’t find screws near k cup holder- how to I repair? Lights blink but water doesn’t drain from reservoir, then lights turn off

LWEO - Antwoord

Voeg opmerking toe

Weergavestatistieken:

Afgelopen 24 uren: 1

Afgelopen 7 dagen: 6

Afgelopen 30 dagen: 66

Altijd: 56,114