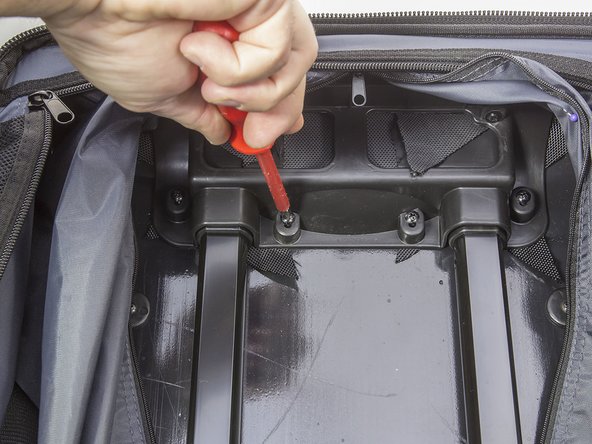
Ga door naar hoofdinhoud

How to replace the extension handle on my trolley?

Wat je nodig hebt

  1. How to replace the extension handle on my trolley?, Trolley handle: stap 1, afbeelding 1 van 1
    • Open the zip inside the trolley to expose the handle.

  2. How to replace the extension handle on my trolley?: stap 2, afbeelding 1 van 2 How to replace the extension handle on my trolley?: stap 2, afbeelding 2 van 2
    • Unscrew the two screws in the lower section on the handle assembly using a Phillips screwdriver.

  3. How to replace the extension handle on my trolley?: stap 3, afbeelding 1 van 3 How to replace the extension handle on my trolley?: stap 3, afbeelding 2 van 3 How to replace the extension handle on my trolley?: stap 3, afbeelding 3 van 3
    • Using a Phillips screwdriver, unscrew the 6 marked screws attaching the handle to the upper section.

  4. How to replace the extension handle on my trolley?: stap 4, afbeelding 1 van 2 How to replace the extension handle on my trolley?: stap 4, afbeelding 2 van 2
    • After unscrewing all screws, it is easy to remove the entire handle assembly.

Conclusie

Follow the instructions in reverse order, to complete the repair/replacement.

Met dank aan deze vertalers:

de en

100%

Deze vertalers helpen ons de wereld te repareren! Wil je bijdragen?
Begin met vertalen ›

VAUDE Reparaturteam

Lid sinds: 02/22/16

6.255 Reputatie

32 handleidingen geschreven

Team

Vaudesport Lid van Vaudesport

Community

3 Leden

96 handleidingen geschreven

Één opmerking

so I take it from this that we’re screwed if the top bit is riveted (which is quite common by the way!)

Steven Moschidis - Antwoord

Voeg opmerking toe

Weergavestatistieken:

Afgelopen 24 uren: 10

Afgelopen 7 dagen: 85

Afgelopen 30 dagen: 295

Altijd: 10,857