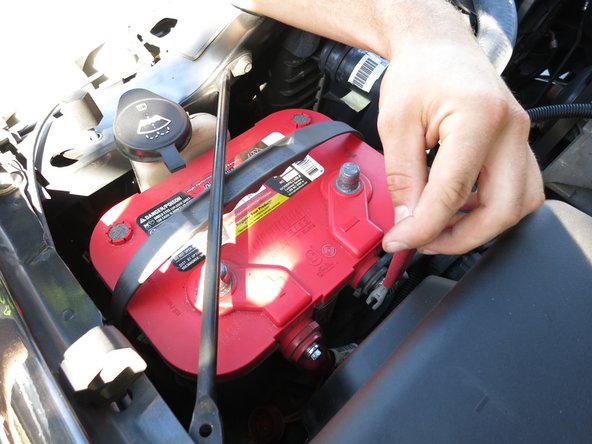
Ga door naar hoofdinhoud

How to remove FHX-720bt head unit in a 1999-2007 Chevrolet Silverado

Wat je nodig hebt

  1. How to remove  FHX-720bt head unit in a 1999-2007 Chevrolet Silverado, How to remove  FHX-720bt head unit in a 1999-2007 Chevrolet Silverado: stap 1, afbeelding 1 van 2 How to remove  FHX-720bt head unit in a 1999-2007 Chevrolet Silverado, How to remove  FHX-720bt head unit in a 1999-2007 Chevrolet Silverado: stap 1, afbeelding 2 van 2
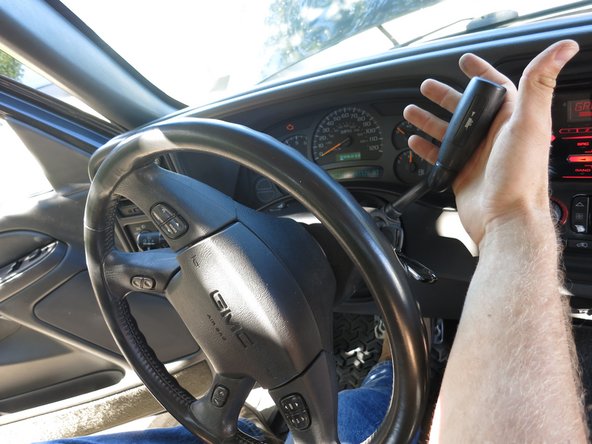
    • Locate the hood latch in your vehicle found on the drivers side under the dashboard to the left of the parking brake pedal.

    • Pull the latch to release hood.

  2. How to remove  FHX-720bt head unit in a 1999-2007 Chevrolet Silverado: stap 2, afbeelding 1 van 3 How to remove  FHX-720bt head unit in a 1999-2007 Chevrolet Silverado: stap 2, afbeelding 2 van 3 How to remove  FHX-720bt head unit in a 1999-2007 Chevrolet Silverado: stap 2, afbeelding 3 van 3
    • Locate the release latch for the hood in between the grille and hood, directly above the "GMC" logo at the front of the car.

    • Lift up on the latch then raise the hood.

  3. How to remove  FHX-720bt head unit in a 1999-2007 Chevrolet Silverado: stap 3, afbeelding 1 van 2 How to remove  FHX-720bt head unit in a 1999-2007 Chevrolet Silverado: stap 3, afbeelding 2 van 2
    • Locate your battery in the front of the engine compartment near the headlight, on the driver's side.

    • Remove the black negative terminal with 5/16" socket or by using a 5/16" wrench.

    • BE CAREFUL. DO NOT CROSS POSITIVE AND NEGATIVE WIRES.

  4. How to remove  FHX-720bt head unit in a 1999-2007 Chevrolet Silverado: stap 4, afbeelding 1 van 2 How to remove  FHX-720bt head unit in a 1999-2007 Chevrolet Silverado: stap 4, afbeelding 2 van 2
    • Make sure the vehicle is on a flat surface, then use the parking brake.

    • Shift vehicle into 1st gear so the shifter will be out of the way for the next step.

  5. How to remove  FHX-720bt head unit in a 1999-2007 Chevrolet Silverado: stap 5, afbeelding 1 van 3 How to remove  FHX-720bt head unit in a 1999-2007 Chevrolet Silverado: stap 5, afbeelding 2 van 3 How to remove  FHX-720bt head unit in a 1999-2007 Chevrolet Silverado: stap 5, afbeelding 3 van 3
    • Firmly grasp the top of the dash trim and pull it towards you.

    • Once it is removed from its clips, pull up and the trim will come out the rest of the way.

    • Set the trim aside; you are ready for the next step.

  6. How to remove  FHX-720bt head unit in a 1999-2007 Chevrolet Silverado: stap 6, afbeelding 1 van 2 How to remove  FHX-720bt head unit in a 1999-2007 Chevrolet Silverado: stap 6, afbeelding 2 van 2
    • Remove the face plate from the head unit.

    • To do this, pull out on both the left and right sides to release the face plate from its clips.

    • After being released from the clips, set the face plate aside and continue to the next step.

  7. How to remove  FHX-720bt head unit in a 1999-2007 Chevrolet Silverado: stap 7, afbeelding 1 van 3 How to remove  FHX-720bt head unit in a 1999-2007 Chevrolet Silverado: stap 7, afbeelding 2 van 3 How to remove  FHX-720bt head unit in a 1999-2007 Chevrolet Silverado: stap 7, afbeelding 3 van 3
    • Remove three bolts using a 7mm socket wrench, two on the left and one on the right.

  8. How to remove  FHX-720bt head unit in a 1999-2007 Chevrolet Silverado: stap 8, afbeelding 1 van 3 How to remove  FHX-720bt head unit in a 1999-2007 Chevrolet Silverado: stap 8, afbeelding 2 van 3 How to remove  FHX-720bt head unit in a 1999-2007 Chevrolet Silverado: stap 8, afbeelding 3 van 3
    • Remove the head unit once the bolts have been taken out.

  9. How to remove  FHX-720bt head unit in a 1999-2007 Chevrolet Silverado: stap 9, afbeelding 1 van 2 How to remove  FHX-720bt head unit in a 1999-2007 Chevrolet Silverado: stap 9, afbeelding 2 van 2
    • Place the head unit face down to allow the wires on the back to be visible and more easily accessible.

    • Listed below are the wires coming connected to the head unit. The colors correspond to the same color of the wire.

    • RCA inputs

    • Microphone input/wire

    • Power/audio/assorted control wire harness

    • Antenna input/wire

    • Harness disconnect

Conclusie

To reassemble your device, follow these instructions in reverse order.

9 andere personen hebben deze handleiding voltooid.

Justin Reiner

Lid sinds: 09/29/15

317 Reputatie

1 Handleiding geschreven

Team

Cal Poly, Team 15-1, Green Fall 2015 Lid van Cal Poly, Team 15-1, Green Fall 2015

CPSU-GREEN-F15S15G1

5 Leden

6 handleidingen geschreven

0 opmerkingen

Voeg opmerking toe

Weergavestatistieken:

Afgelopen 24 uren: 0

Afgelopen 7 dagen: 5

Afgelopen 30 dagen: 25

Altijd: 1,725