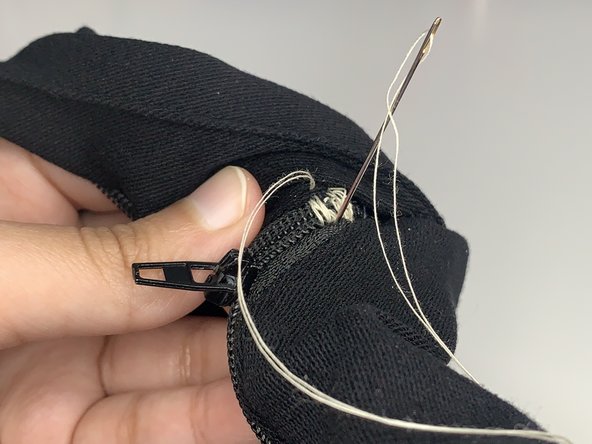
Ga door naar hoofdinhoud

How to Repair an Unhooked Zipper

Wat je nodig hebt

  1. How to Repair an Unhooked Zipper, How to Repair an Unhooked Zipper: stap 1, afbeelding 1 van 2 How to Repair an Unhooked Zipper, How to Repair an Unhooked Zipper: stap 1, afbeelding 2 van 2
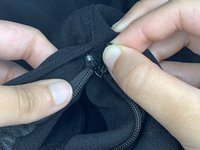
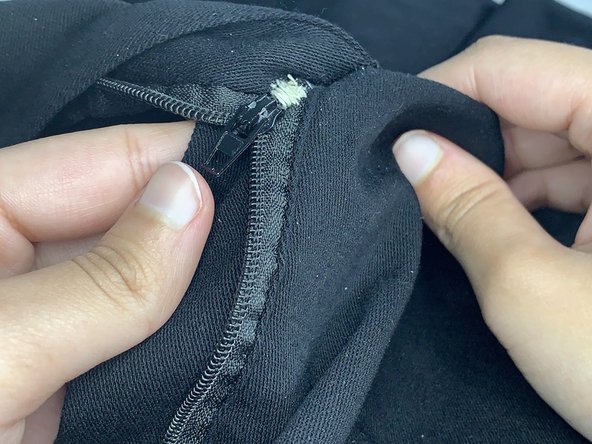
    • Check the opening of the slider to see if it is too wide.

    • When it is too wide, it does not latch on to the chains properly.

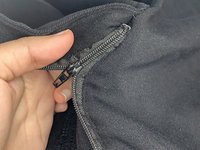
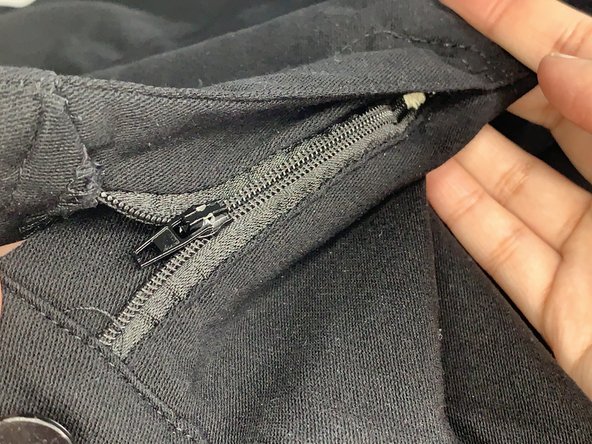
    • Use the pliers to lightly tighten the slider on each side.

  2. How to Repair an Unhooked Zipper: stap 2, afbeelding 1 van 2 How to Repair an Unhooked Zipper: stap 2, afbeelding 2 van 2
    • Place the scissors horizontally at the bottom of the chain that is not connected to the slider.

    • Make a small cut of about 3 millimetres.

  3. How to Repair an Unhooked Zipper: stap 3, afbeelding 1 van 2 How to Repair an Unhooked Zipper: stap 3, afbeelding 2 van 2
    • Pull the slider up gently through the opening to see if the zipper is now working.

  4. How to Repair an Unhooked Zipper: stap 4, afbeelding 1 van 3 How to Repair an Unhooked Zipper: stap 4, afbeelding 2 van 3 How to Repair an Unhooked Zipper: stap 4, afbeelding 3 van 3
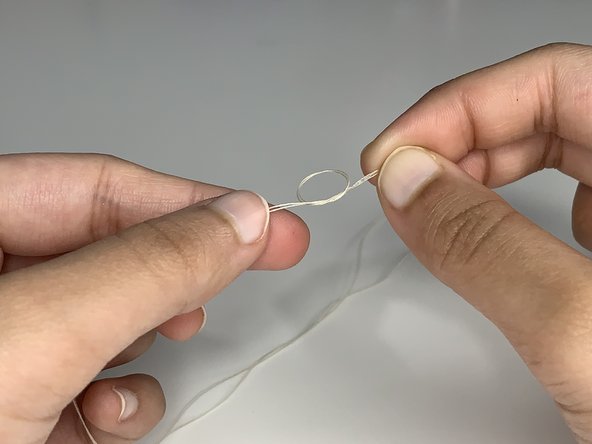
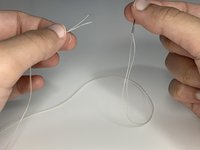
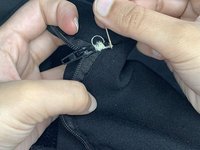
    • In order to set up the needle and thread, you will need to take about 70 centimetres of thread and pull it halfway through the hole at the bottom of the needle. Make sure both sides of the thread are equal lengths and bring them together.

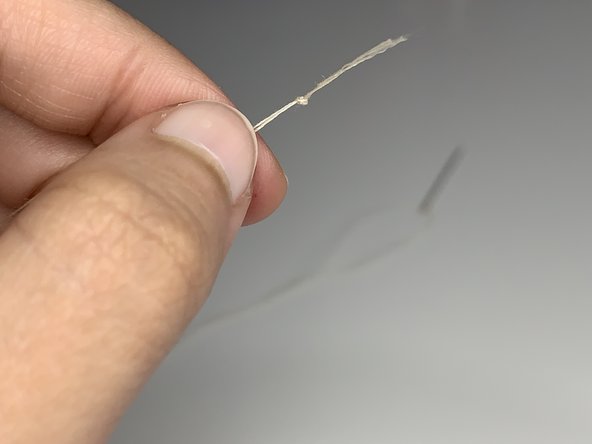
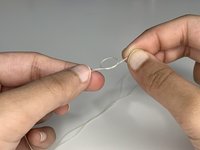
    • Tie the loose end of the thread into an overhand knot. This is where you make a loop and pull the thread through it.

    • Make sure to do this at least 2-3 times so it does not come undone during the sewing process.

    • For the purpose of this guide, I used a colour that is easy to see on the fabric. However, try to use thread that matches your zipper.

  5. How to Repair an Unhooked Zipper: stap 5, afbeelding 1 van 3 How to Repair an Unhooked Zipper: stap 5, afbeelding 2 van 3 How to Repair an Unhooked Zipper: stap 5, afbeelding 3 van 3
    • Starting at the opposite side of the cut, weave the thread under and over the zipper.

    • While staying in one spot, weave and tug at the thread to close the hole.

    • Closing this hole will ensure that over time the zipper does not wear out the part of the chain that was cut.

  6. How to Repair an Unhooked Zipper: stap 6, afbeelding 1 van 3 How to Repair an Unhooked Zipper: stap 6, afbeelding 2 van 3 How to Repair an Unhooked Zipper: stap 6, afbeelding 3 van 3
    • When the hole looks covered completely, loop the thread and sew the needle through it to finish sewing.

    • Cut off excess thread and check if the zipper is working.

    • Always do the loop and sew through it at least three times to make sure it is secure.

Conclusie

To reassemble your device, follow these instructions in reverse order.

Één andere persoon heeft deze handleiding voltooid.

Jannatul Khorshid

Lid sinds: 09/16/20

160 Reputatie

1 Handleiding geschreven

Team

0 opmerkingen

Voeg opmerking toe

Weergavestatistieken:

Afgelopen 24 uren: 6

Afgelopen 7 dagen: 39

Afgelopen 30 dagen: 164

Altijd: 2,691