Ga door naar hoofdinhoud
Word lid van de reparatiegemeenschap - Account aanmaken
How to Remove a Car Stereo in a Chevy Tracker

Wat je nodig hebt

    1. How to Remove a Car Stereo in a Chevy Tracker, How to Remove a Car Stereo in a Chevy Tracker: stap 1, afbeelding 1 van 2 How to Remove a Car Stereo in a Chevy Tracker, How to Remove a Car Stereo in a Chevy Tracker: stap 1, afbeelding 2 van 2
      • First, you must disconnect the negative end of the car battery.

      • You will potentially be shocked if you mishandle the battery. Make sure the car is off before inspecting the engine and grabbing the negative connector.

      • Open the hood of your car and locate the battery.

      • Look for the negative end of your battery. It is usually indicated with a minus sign next to it.

      • Disconnecting the negative connection prevents you from receiving any electrical shocks while removing the stereo.

      Vraag FixBot

      Voeg opmerking toe

    2. How to Remove a Car Stereo in a Chevy Tracker: stap 2, afbeelding 1 van 3 How to Remove a Car Stereo in a Chevy Tracker: stap 2, afbeelding 2 van 3 How to Remove a Car Stereo in a Chevy Tracker: stap 2, afbeelding 3 van 3
      • Use a socket wrench to remove the nut that holds the negative connector in place.

      • Place the negative connector away from the battery.

      Vraag FixBot

      Voeg opmerking toe

    3. How to Remove a Car Stereo in a Chevy Tracker: stap 3, afbeelding 1 van 3 How to Remove a Car Stereo in a Chevy Tracker: stap 3, afbeelding 2 van 3 How to Remove a Car Stereo in a Chevy Tracker: stap 3, afbeelding 3 van 3
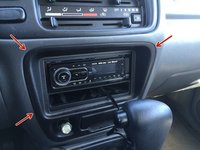
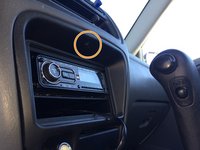
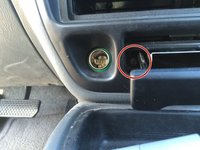
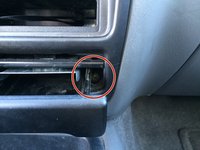
      • A Chevy Tracker will have a trim that surrounds the stereo.

      • The trim is the black plastic that encompasses the stereo and the small tray/compartment.

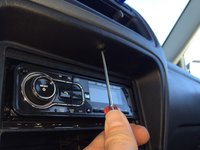
      • Remove the screw located on the underside of the trim above the car stereo.

      Vraag FixBot

      Voeg opmerking toe

    4. How to Remove a Car Stereo in a Chevy Tracker: stap 4, afbeelding 1 van 3 How to Remove a Car Stereo in a Chevy Tracker: stap 4, afbeelding 2 van 3 How to Remove a Car Stereo in a Chevy Tracker: stap 4, afbeelding 3 van 3
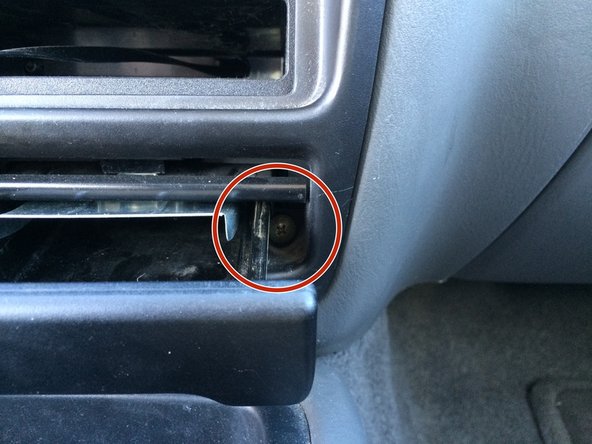
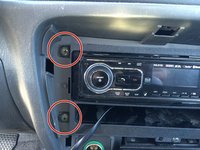
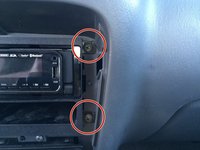
      • Unscrew the two screws hidden behind the tiny tray/compartment.

      • Afterwards, you can safely remove the trim.

      Vraag FixBot

      Voeg opmerking toe

    5. How to Remove a Car Stereo in a Chevy Tracker: stap 5, afbeelding 1 van 3 How to Remove a Car Stereo in a Chevy Tracker: stap 5, afbeelding 2 van 3 How to Remove a Car Stereo in a Chevy Tracker: stap 5, afbeelding 3 van 3
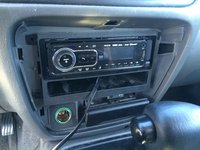
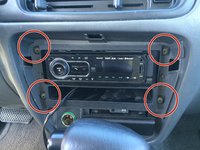
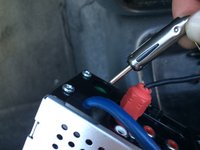
      • Once the trim is removed, remove the four screws found on each corner of the stereo.

      Vraag FixBot

      Voeg opmerking toe

    6. How to Remove a Car Stereo in a Chevy Tracker: stap 6, afbeelding 1 van 3 How to Remove a Car Stereo in a Chevy Tracker: stap 6, afbeelding 2 van 3 How to Remove a Car Stereo in a Chevy Tracker: stap 6, afbeelding 3 van 3
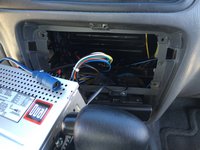
      • Carefully remove the stereo.

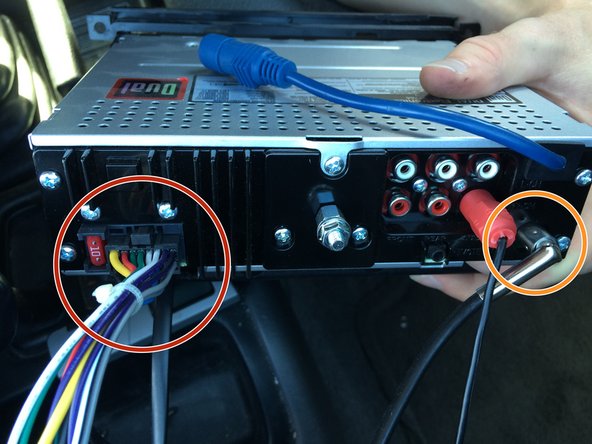
      • Look behind the stereo to see how it is connected.

      • The grouped up, different colored collection of wires connect to the speakers, amplifiers, and stereo buttons depending on the color.

      • The thick, metal wire connects to the car antennae.

      • Don't pull too hard! There are connections to the radio that we need to unplug.

      Vraag FixBot

      Voeg opmerking toe

    7. How to Remove a Car Stereo in a Chevy Tracker: stap 7, afbeelding 1 van 3 How to Remove a Car Stereo in a Chevy Tracker: stap 7, afbeelding 2 van 3 How to Remove a Car Stereo in a Chevy Tracker: stap 7, afbeelding 3 van 3
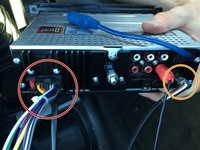
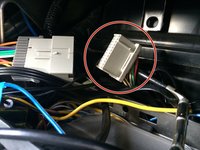
      • Unplugging the connections, except for the multicolored group of wires. All are located on the back of stereo should be as simple as pulling on them.

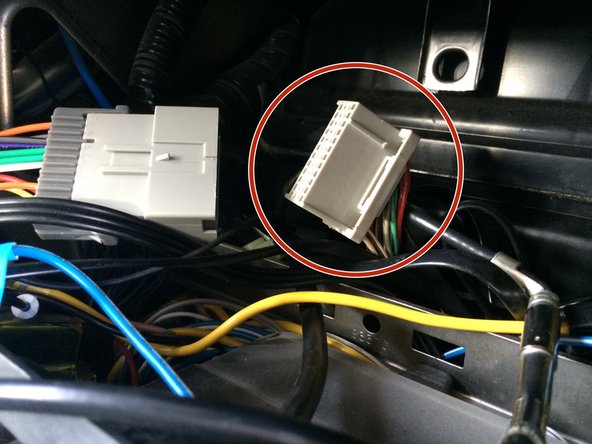
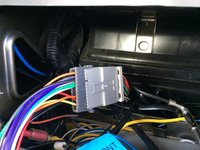
      • "To remove the group of wires", follow the wires until you reach a connector and unplug the connector.

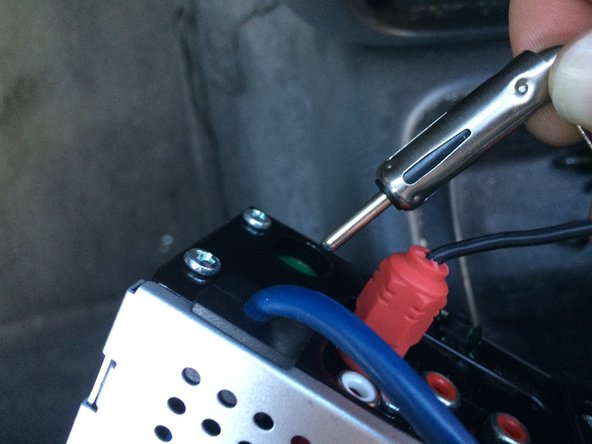
      • The thick, metal wire connecting to the radio antennae can be easily removed by pulling on it.

      • The harness (the grayish female connector circled in red) is what connects the wires to the various components of the car.

      Vraag FixBot

      Voeg opmerking toe

    8. How to Remove a Car Stereo in a Chevy Tracker: stap 8, afbeelding 1 van 2 How to Remove a Car Stereo in a Chevy Tracker: stap 8, afbeelding 2 van 2
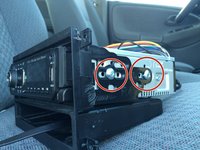
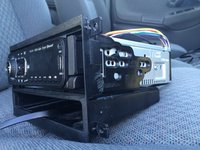
      • Some car stereos are attached to a mount.

      • Each mount is similarly installed as the image shows.

      • Remove the screws located on each side of the mount.

      Vraag FixBot

      Voeg opmerking toe

    9. How to Remove a Car Stereo in a Chevy Tracker: stap 9, afbeelding 1 van 1
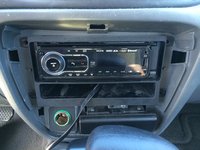
      • You have now successfully uninstalled a car stereo from a Chevy Tracker!

      • Do not forget to reconnect the negative connector to the battery when finished!

      Vraag FixBot

      Voeg opmerking toe

Conclusie

Following the steps in reverse will reinstall your car stereo. Different car stereos might require extra connections to be installed.

Annuleren: ik heb deze handleiding niet afgemaakt.

4 andere personen hebben deze handleiding voltooid.

Nick Eaton

Lid sinds: 09/29/15

211 Reputatie

1 Handleiding geschreven

Team

Cal Poly, Team 15-4, Green Fall 2015 Lid van Cal Poly, Team 15-4, Green Fall 2015

CPSU-GREEN-F15S15G4

4 Leden

48 handleidingen geschreven

1Gids Commentaar

Ended up blowing a fuse for my taillights and dash lights. I replaced fuse, however still not coming back on. Any suggestions as to why?

Brandy - Antwoord Deel
Voeg opmerking toe

Weergavestatistieken:

Afgelopen 24 uren: 7

Afgelopen 7 dagen: 44

Afgelopen 30 dagen: 110

Altijd: 8,341