Inleiding
Follow this guide to apply custom-cut adhesive to your device. The adhesive could be for a screen, back cover, battery, etc. Read through the entire guide before applying any adhesives to familiarize yourself with the process.
Note: If your device’s repair guide has specific adhesive instructions, use those during your repair instead.
Achieving guaranteed IP (ingress protection) ratings after opening a device requires large, specialized equipment. This guide offers tips and tricks to get the best seal possible in a household setting.
It's important to note that not all devices nor adhesives are the same. Some methods may work better or worse depending on your device and how well you reapply adhesive. In most cases, the seal won't be as good as the factory original, so take care not to expose your device to extreme conditions after a DIY repair.
For Samsung Galaxy S phones, follow this guide instead.
For iPhones, follow this guide instead.
For iPads, follow this guide instead.
If you are using general Tesa adhesives, follow this guide instead.
Wat je nodig hebt
-
-
Look over your pre-cut adhesive strips and figure out what they are used for.
-
Screen or back cover adhesives—usually the shape of the device
-
Back cover support adhesives—these will match the contours of components pressed against the back cover
-
Battery adhesives—normally a rectangular perimeter roughly the shape of the phone's battery
-
Component adhesives—they will be contoured to match the various components such as cameras and fingerprint sensors they are designed for
-
-
-
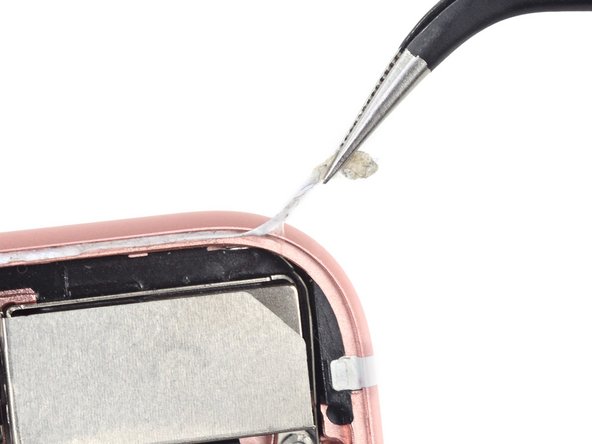
Remove large chunks of adhesives with your fingers, spudger, plastic opening tool, or tweezers.
-
Use adhesive remover or isopropyl alcohol (>70%) to remove residue from metal surfaces. Wipe in one direction with a lint-free cloth or coffee filter until all the adhesive residue is gone.
-
-
-
Cutouts for components or liner pull-tabs in the frame
-
Alignment markings outlining the desired position
-
Holes for spring contacts or cameras
-
-
-
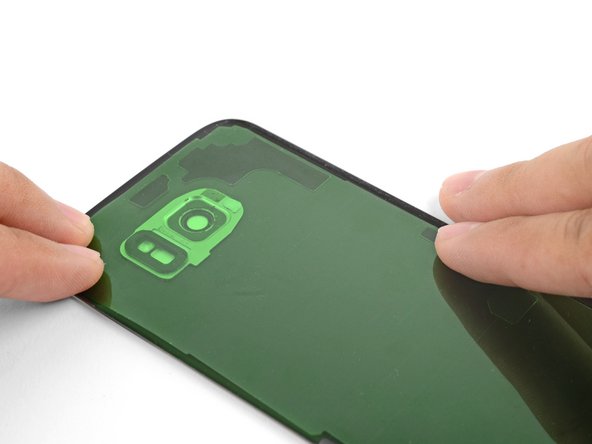
Once you have a good idea how the adhesive strip fits on the surface, peel the neutral/clear liner off.
-
Carefully peel away the center portion of both the liner and adhesive layers, starting with the cutout (if present).
-
Peel off and discard the remaining neutral/clear liner, exposing the adhesive underneath.
-
-
-
As you position the adhesive, look for alignment holes that line up with physical holes in the frame of your device.
-
Some adhesives feature unique cutouts in the corners that reflect holes or features in the frame.
-
-
-
-
Hold the exposed strip by its tabs and carefully line up a long edge of the adhesive to the edge of the device.
-
Set the adhesive onto the surface and press it firmly onto the surface with your fingers.
-
Peel away the colored liner from the adhesive strip to expose the remaining adhesive side.
-
-
-
Use a hair dryer, iOpener, or heat gun to lightly heat the part or closed device in the areas where the new adhesive was applied.
-
-
-
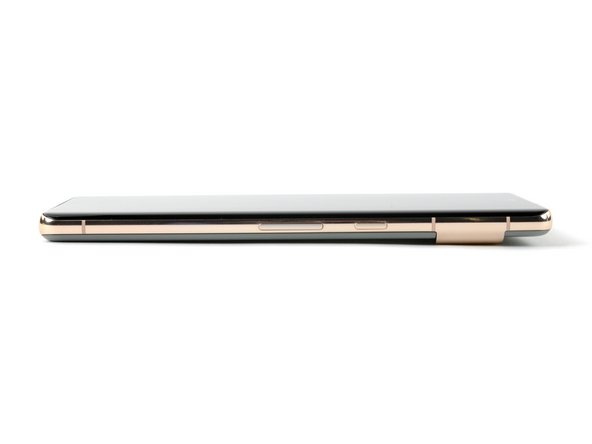
If your device came in a box that has cutouts for the protrusions in the back cover, use it to allow the device to sit flat.
-
Place your device in the box so it sits with even pressure all around the back cover.
-
Stack heavy objects on the device and leave them in place for at least a few hours to allow the adhesive to settle. Ideally, leave them in place overnight.
-
-
-
Lay strips of tape around the perimeter of your device to protect it from scratches.
-
Stack coins or similar objects around the perimeter so they're roughly equal to the height of the protrusions in the back cover.
-
Place heavy objects, such as multiple books, on top of the coins and leave them for a few hours. Don't use any valuable books, as the coins might leave an impression.
-
-
-
Lastly, screen vise clamps are a great way to secure screens and back covers. Follow this guide to use them on your device.
-


If properly applied, the adhesive should work reliably for a long time.
The repair may not restore the device’s water resistance. Be careful not to expose the device to liquids.
If properly applied, the adhesive should work reliably for a long time.
The repair may not restore the device’s water resistance. Be careful not to expose the device to liquids.
Annuleren: ik heb deze handleiding niet afgemaakt.
97 andere personen hebben deze handleiding voltooid.


8 opmerkingen
Diese Anleitung sollte im Akku-Tausch Tutorial verlinkt sein und auch in der Produktbeschreibung. Ich habe diesen Artikel erst gefunden, nachdem ich die Rückseite schon befestigt hatte (zum Glück richtig).
Although obvious to anyone who has used this type of strip, I didn't realize it until my first experience gluing a screen into my phone: the adhesive is ONLY the black goo attached to the strips. Once you peel off the clear side, place the strip and then peel off the coloured side, all that's left is the black goo, hopefully exactly where it needs to be. Mine could be carefully re-aligned with tweezers as necessary before setting the screen into place.
What's the popular recommendation regarding how long to leave weight on these pre-cut adhesive strips?
It merely says 'a few hours'?
Is it okay to check on it or is it like opening the oven door?
It's okay to check, and 2 hours is usualy plenty enough.
If you have any OLED display, DO NOT put books on it!!! Unlike LCDs, some Hard OLEDs cannot handle the pressure. If you have bought a display from ifixit they will also not warranty it and consider it user damage!!! That last section need to put in a warning for OLEDs.
Great point, wished i would have read this earlier... :(
Ruined a pixel 3a screen after replacing a battery and placing some books on the screen for the adhesive as instructed.
Screen now has to be replaced since it's leaking / purple as a result of the books pressure.
MHacking -
i'm replacing a front screen and wondering about the order of putting the adhesive strip on the screen back, attaching ribbon cable from new screen to phone, then taking off coloured side of the adhesive strip, or should i take of coloured side, then attach ribbon cable, then place screen with glue onto phone frame?
obviosuly if one puts the ribbon cable on before taking off coloured side of adhesive, then one would be stuck with fiddly job of manouevering the coloured paper around the screen (or cutting the coloured thing, whereas if one takes of coloured paper, then one has to try and attach ribbon cable without messing up the adhesive now on the edges of the screen....
oh wait, it also isn't obvious whether one puts first side on phone or on new screen....help! (this is pixel 3a screen replacement with ifixit template)
endlich wieder freie Luft zum atmen hatte mir samsung flip angeschafft und damit in die Android Falle geraten.
vor lauter schreck hab ich mir ein neues z2bestellt 348,00€
und meinen 4 moto´s ein fünftes hinzugefügt
meist sind es ja Kleinigkeiten z.B ist bei einem der SD slot kaputt iss ja nicht schlimm mit dem Elleful Stick hat man auch sensible Daten
u.a. weg wenn internetzugang läuft bei der Werkseinstellung um rauszukriegen was nicht klappt
wer was braucht kann über mail belezebub10.jul@gmail.com kommunizieren.
hans
If you're installing a screen, you might need to cut out a hole on the backing so that you can attach the first side, and attach the screen ribbon connector through the hole before removing the second backing.
Asela Gunawardana - Antwoord