Ga door naar hoofdinhoud

Hover-1 XLS Brake Replacement

Wat je nodig hebt

  1. Hover-1 XLS Brake Replacement, Front Brake: stap 1, afbeelding 1 van 3 Hover-1 XLS Brake Replacement, Front Brake: stap 1, afbeelding 2 van 3 Hover-1 XLS Brake Replacement, Front Brake: stap 1, afbeelding 3 van 3
    • Remove the two, 23 mm Hex #5 screws holding the brake to the bike.

    • Slide the brake mechanism off and turn it upside down to reveal the screw holding the brake wire.

  2. Hover-1 XLS Brake Replacement: stap 2, afbeelding 1 van 1
    • Remove the one, 14 mm Hex #4 screw pushing down the brake wire to the brake mechanism on the bottom.

  3. Hover-1 XLS Brake Replacement: stap 3, afbeelding 1 van 2 Hover-1 XLS Brake Replacement: stap 3, afbeelding 2 van 2
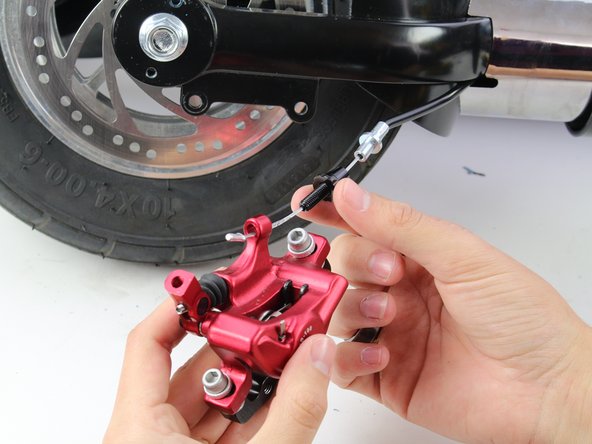
    • Remove the side screw holding the brake wire and mechanism together with your hands.

    • Slide the brake mechanism off from the brake wire.

Conclusie

To reassemble your device, follow these instructions in reverse order.

Één andere persoon heeft deze handleiding voltooid.

Jonathan Hidalgo

Lid sinds: 01/24/19

575 Reputatie

5 handleidingen geschreven

Team

Cal Poly, Team S1-G2, White Winter 2019 Lid van Cal Poly, Team S1-G2, White Winter 2019

CPSU-WHITE-W19S1G2

3 Leden

6 handleidingen geschreven

0 opmerkingen

Voeg opmerking toe

Weergavestatistieken:

Afgelopen 24 uren: 0

Afgelopen 7 dagen: 7

Afgelopen 30 dagen: 19

Altijd: 771