Deze versie kan foutieve bewerkingen bevatten. Schakel over naar de recentste gecontroleerde momentopname.
Wat je nodig hebt
-
Deze stap is niet vertaald. Help het te vertalen
-
Remove the ten 9mm machine screws by using a long Phillips #2 screwdriver to rotate the screws counterclockwise.
-
Remove the twelve 9mm sheet metal screws by using a long Phillips #2 screwdriver to rotate the screws counterclockwise.
-
-
Deze stap is niet vertaald. Help het te vertalen
-
Puncture the two black stickers by using the tip of a screwdriver.
-
Remove the two 9mm machine screws by using a long Phillips #2 screwdriver to rotate the screws counterclockwise.
-
-
-
Deze stap is niet vertaald. Help het te vertalen
-
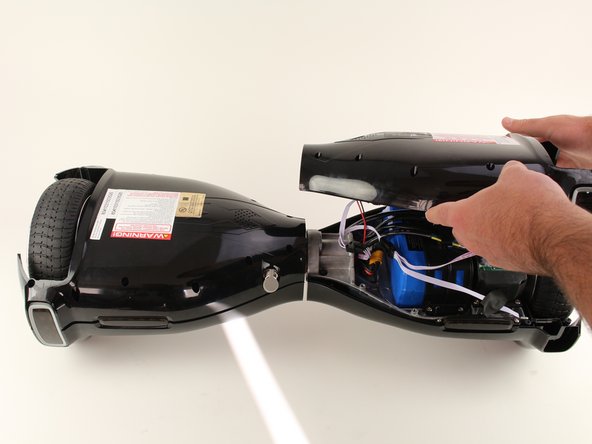
Unplug the battery by pulling gently on both sides of the orange connector.
-
-
Deze stap is niet vertaald. Help het te vertalen
-
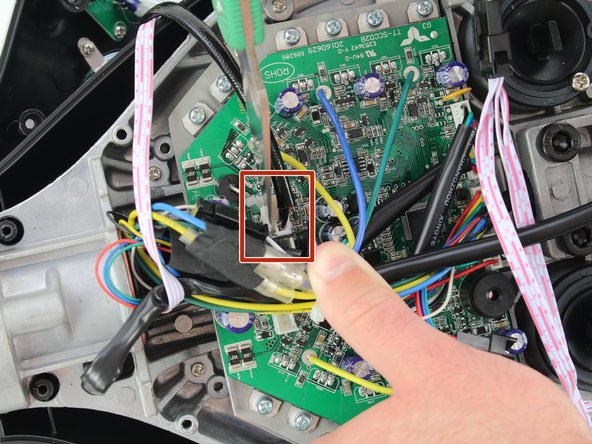
Using a utility knife, scratch off the hot glue from the connector attaching the red and black wires to the motherboard.
-
-
Deze stap is niet vertaald. Help het te vertalen
-
Remove the charging port connector from the motherboard by squeezing the connector and pulling the connector up.
-
-
Deze stap is niet vertaald. Help het te vertalen
-
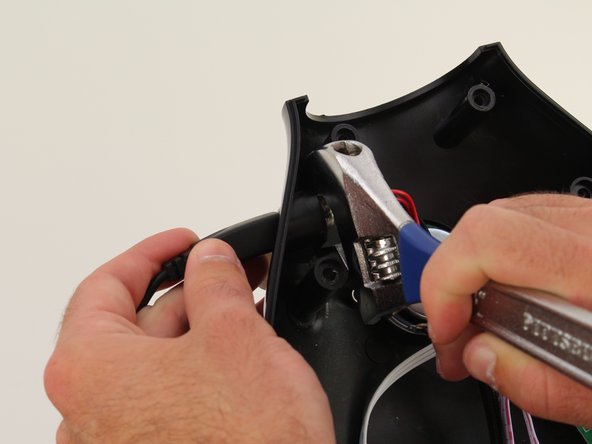
Using an adjustable wrench, unscrew the nut that is attaching the charging port to the bottom shell.
-
-
Deze stap is niet vertaald. Help het te vertalen
-
Pull the charging port to the left through the shell.
-


Team

Cal Poly, Team S17-G6, White Fall 2018 Lid van Cal Poly, Team S17-G6, White Fall 2018
CPSU-WHITE-F18S17G6
4 Leden
7 handleidingen geschreven