Ga door naar hoofdinhoud

Honeywell HY-204 Fan Motor Replacement

Wat je nodig hebt

  1. Honeywell HY-204 Fan Motor Replacement, Case: stap 1, afbeelding 1 van 2 Honeywell HY-204 Fan Motor Replacement, Case: stap 1, afbeelding 2 van 2
    • Before you begin, be sure to unplug the fan.

    • Remove the four 14 mm screws from the back of the device using the Phillips #0 Screwdriver.

  2. Honeywell HY-204 Fan Motor Replacement: stap 2, afbeelding 1 van 2 Honeywell HY-204 Fan Motor Replacement: stap 2, afbeelding 2 van 2
    • Pull the front and back parts of the case away from each other until the back is free from the front. This may require a large amount of force.

  3. Honeywell HY-204 Fan Motor Replacement, Fan Blades: stap 3, afbeelding 1 van 2 Honeywell HY-204 Fan Motor Replacement, Fan Blades: stap 3, afbeelding 2 van 2
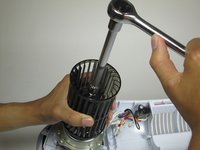
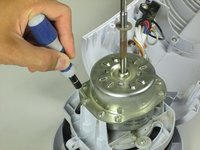
    • Remove the hex nut from the fan motor with a 10mm hexagonal ratcheting socket wrench.

    • The nut uses a left-handed thread.

  4. Honeywell HY-204 Fan Motor Replacement: stap 4, afbeelding 1 van 2 Honeywell HY-204 Fan Motor Replacement: stap 4, afbeelding 2 van 2
    • Grasp the fan blade firmly and pull upward to remove it from the center column of the fan.

    • The slots on the fan blades and center column need to be aligned for reassembly.

  5. Honeywell HY-204 Fan Motor Replacement, Fan Motor: stap 5, afbeelding 1 van 2 Honeywell HY-204 Fan Motor Replacement, Fan Motor: stap 5, afbeelding 2 van 2
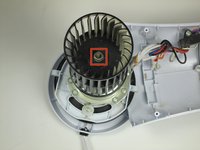
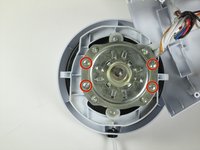
    • Remove the four 12.7mm screws using the Phillips #0 Screwdriver.

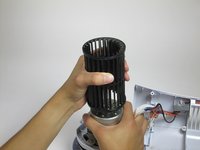
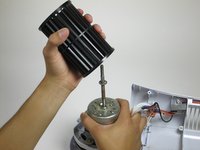
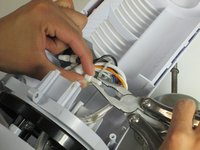
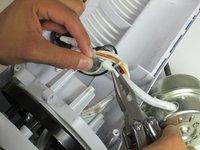
    • Once the screws are removed, lift the motor off its base.

  6. Honeywell HY-204 Fan Motor Replacement: stap 6, afbeelding 1 van 2 Honeywell HY-204 Fan Motor Replacement: stap 6, afbeelding 2 van 2
    • Remove the wire connectors from the black, brown, red, blue, white, grey, and green wires. To do this, grip each wire with your hand and use the pliers to de-crimp the heads of each wire connector by applying pressure to the wider ends of the connector until it falls free.

    • While reassembling, apply pressure to the more narrow ends of the wire connectors to re-crimp them onto the wires.

Conclusie

To reassemble your device, follow these instructions in reverse order.

2 andere personen hebben deze handleiding voltooid.

Armando Jacob Espinoza

Lid sinds: 10/14/14

500 Reputatie

3 handleidingen geschreven

Team

Cal Poly, Team 10-40, Amido Fall 2014 Lid van Cal Poly, Team 10-40, Amido Fall 2014

CPSU-AMIDO-F14S10G40

3 Leden

7 handleidingen geschreven

2 opmerkingen

Where do you purchase the replacement fan motors from?

mattb - Antwoord

Do you know where I can find the fan motor replacement?

Dave Smith - Antwoord

Voeg opmerking toe

Weergavestatistieken:

Afgelopen 24 uren: 2

Afgelopen 7 dagen: 7

Afgelopen 30 dagen: 21

Altijd: 6,389