Ga door naar hoofdinhoud

Honda Lawn Mower HRS216K6 PKAA Crankshaft Replacement

Wat je nodig hebt

  1. Honda Lawn Mower HRS216K6 PKAA Crankshaft Replacement, Disconnect the spark plug: stap 1, afbeelding 1 van 2 Honda Lawn Mower HRS216K6 PKAA Crankshaft Replacement, Disconnect the spark plug: stap 1, afbeelding 2 van 2
    • Before you begin, make sure the engine is switched off and cool to the touch.

    • Grab the plastic housing at the end of the spark plug wire and pull firmly to disconnect it.

  2. Honda Lawn Mower HRS216K6 PKAA Crankshaft Replacement, Restrict fuel flow: stap 2, afbeelding 1 van 1
    • Turn the fuel cutoff valve to the off position to restrict fuel flow during disassembly.

    • Turn the fuel cutoff valve clockwise so the handle becomes vertical.

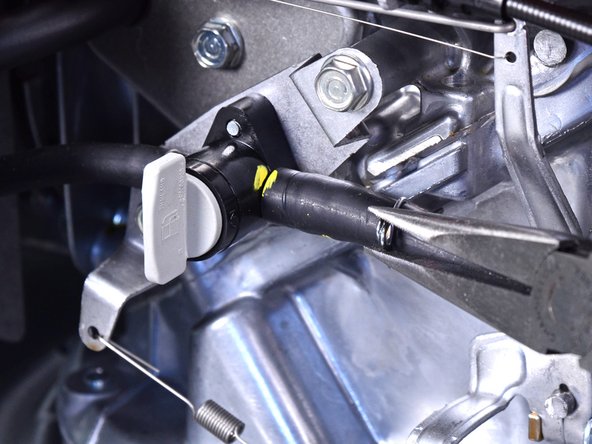
  3. Honda Lawn Mower HRS216K6 PKAA Crankshaft Replacement, Disconnect the fuel tank: stap 3, afbeelding 1 van 3 Honda Lawn Mower HRS216K6 PKAA Crankshaft Replacement, Disconnect the fuel tank: stap 3, afbeelding 2 van 3 Honda Lawn Mower HRS216K6 PKAA Crankshaft Replacement, Disconnect the fuel tank: stap 3, afbeelding 3 van 3
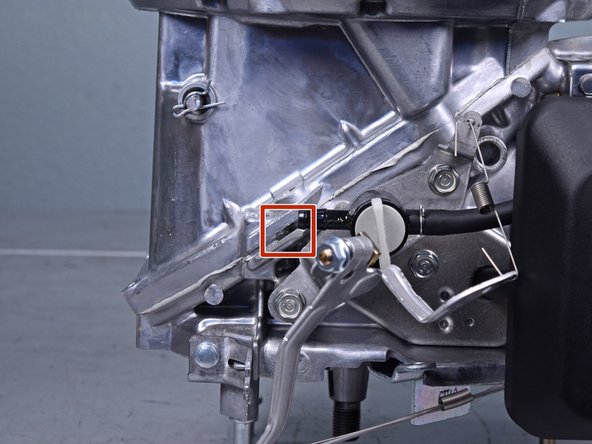
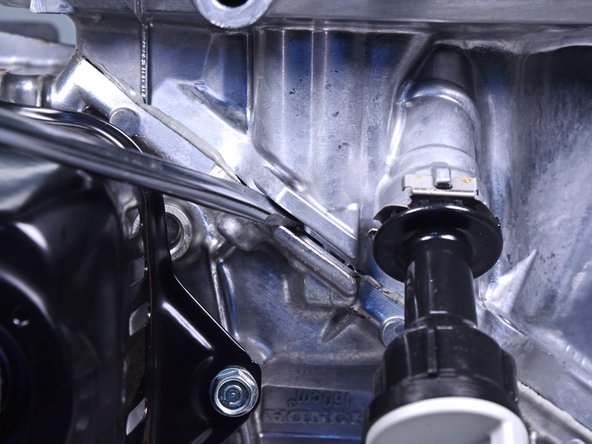
    • Use needle nose pliers to compress and slide the tube clamp away from the cutoff valve's fitting.

  4. Honda Lawn Mower HRS216K6 PKAA Crankshaft Replacement: stap 4, afbeelding 1 van 2 Honda Lawn Mower HRS216K6 PKAA Crankshaft Replacement: stap 4, afbeelding 2 van 2
    • Residual fuel may leak out of this hose. Be ready to catch any spillage.

    • Disconnect the fuel line from the cutoff valve.

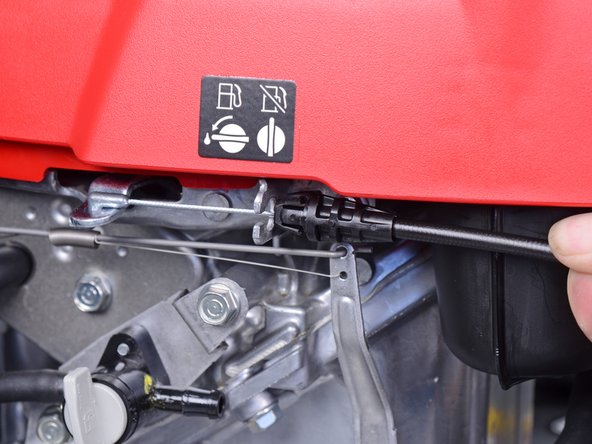
  5. Honda Lawn Mower HRS216K6 PKAA Crankshaft Replacement, Disconnect the brake cable: stap 5, afbeelding 1 van 1
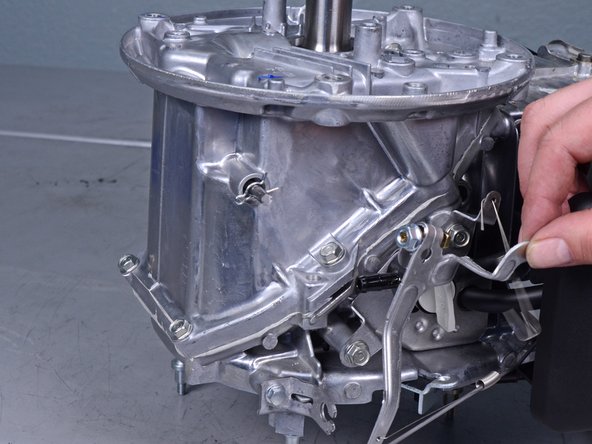
    • Use needle nose pliers to squeeze the two locking tabs on the brake cable latch.

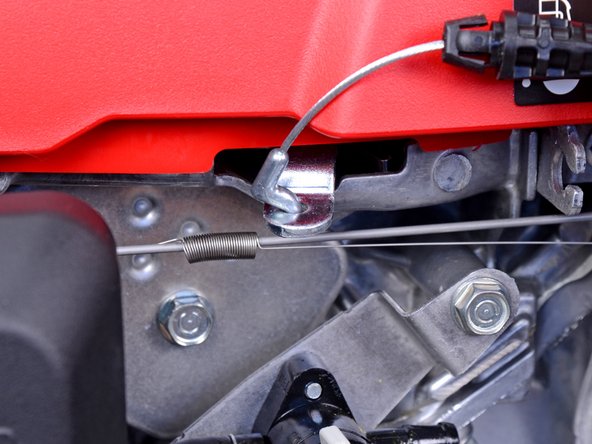
  6. Honda Lawn Mower HRS216K6 PKAA Crankshaft Replacement: stap 6, afbeelding 1 van 3 Honda Lawn Mower HRS216K6 PKAA Crankshaft Replacement: stap 6, afbeelding 2 van 3 Honda Lawn Mower HRS216K6 PKAA Crankshaft Replacement: stap 6, afbeelding 3 van 3
    • Pull to unlatch the cable sheath.

    • Pull the brake cable away from the motor.

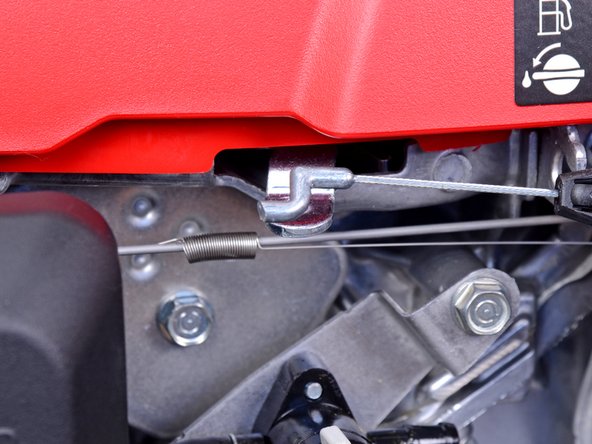
  7. Honda Lawn Mower HRS216K6 PKAA Crankshaft Replacement: stap 7, afbeelding 1 van 3 Honda Lawn Mower HRS216K6 PKAA Crankshaft Replacement: stap 7, afbeelding 2 van 3 Honda Lawn Mower HRS216K6 PKAA Crankshaft Replacement: stap 7, afbeelding 3 van 3
    • Push the cable towards the cable anchor to give it enough slack to be removed.

    • Remove the brake cable from the motor.

  8. Honda Lawn Mower HRS216K6 PKAA Crankshaft Replacement, Disconnect the pull start cord: stap 8, afbeelding 1 van 3 Honda Lawn Mower HRS216K6 PKAA Crankshaft Replacement, Disconnect the pull start cord: stap 8, afbeelding 2 van 3 Honda Lawn Mower HRS216K6 PKAA Crankshaft Replacement, Disconnect the pull start cord: stap 8, afbeelding 3 van 3
    • Pull the pull start cord out of the small opening on the handle post and remove it.

  9. Honda Lawn Mower HRS216K6 PKAA Crankshaft Replacement, Remove the fan cover: stap 9, afbeelding 1 van 1
    • Remove the three 10 mm nuts securing the fan cover.

  10. Honda Lawn Mower HRS216K6 PKAA Crankshaft Replacement: stap 10, afbeelding 1 van 2 Honda Lawn Mower HRS216K6 PKAA Crankshaft Replacement: stap 10, afbeelding 2 van 2
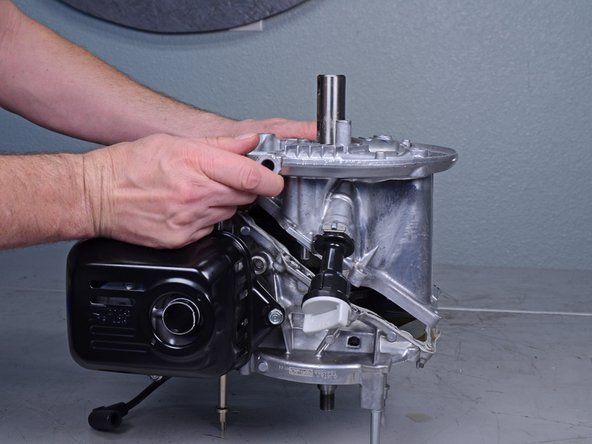
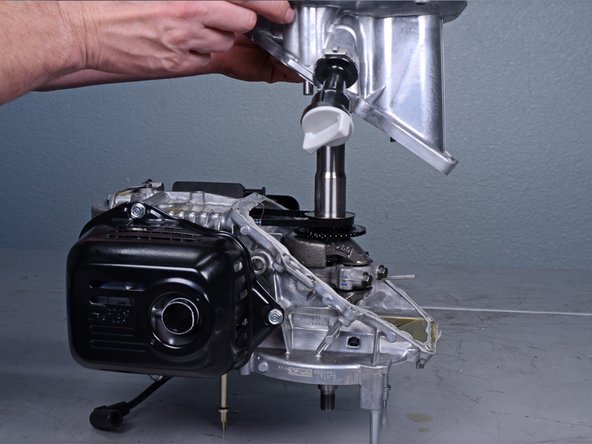
    • Remove the fan cover.

    • The fuel tank is connected to the fan cover. They will both come out as one unit.

  11. Honda Lawn Mower HRS216K6 PKAA Crankshaft Replacement, Remove the cooling fan: stap 11, afbeelding 1 van 1
    • Remove the 19 mm nut securing the flywheel and cooling fan to the motor.

  12. Honda Lawn Mower HRS216K6 PKAA Crankshaft Replacement: stap 12, afbeelding 1 van 2 Honda Lawn Mower HRS216K6 PKAA Crankshaft Replacement: stap 12, afbeelding 2 van 2
    • Remove the washer on top of the cooling fan.

    • Remove the cooling fan.

  13. Honda Lawn Mower HRS216K6 PKAA Crankshaft Replacement, Loosen the flywheel: stap 13, afbeelding 1 van 2 Honda Lawn Mower HRS216K6 PKAA Crankshaft Replacement, Loosen the flywheel: stap 13, afbeelding 2 van 2
    • Caution: The flywheel may come loose at any time during this step, potentially sending itself and the puller into the air. Before you begin this step, be sure to wear PPE.

    • Use a universal puller to loosen the flywheel from the tapered pressure fit on the end of the crankshaft.

    • Attach the universal puller arms underneath the denoted "puller" sections on the flywheel.

    • Use a wrench to torque down the puller to slowly loosen the flywheel.

    • This may take a lot of force.

    • If the flywheel seems to become stuck after significant pressure is applied with the universal puller, use a blowtorch to slowly apply heat where the flywheel contacts the crankshaft.

    • The flywheel will "pop" off the crankshaft once loose.

  14. Honda Lawn Mower HRS216K6 PKAA Crankshaft Replacement, Remove the flywheel: stap 14, afbeelding 1 van 3 Honda Lawn Mower HRS216K6 PKAA Crankshaft Replacement, Remove the flywheel: stap 14, afbeelding 2 van 3 Honda Lawn Mower HRS216K6 PKAA Crankshaft Replacement, Remove the flywheel: stap 14, afbeelding 3 van 3
    • Remove the flywheel.

    • If the flywheel became deformed at all during the last step, it will need to be replaced before reinstallation.

    • During reassembly, make sure to align the flywheel with the flywheel key.

  15. Honda Lawn Mower HRS216K6 PKAA Crankshaft Replacement, Remove the flywheel key: stap 15, afbeelding 1 van 2 Honda Lawn Mower HRS216K6 PKAA Crankshaft Replacement, Remove the flywheel key: stap 15, afbeelding 2 van 2
    • Use needle nose pliers to remove the flywheel key from its slot in the crankshaft.

    • During reinstallation, make sure the key is fully seated in the slot. Otherwise the flywheel will not fit correctly.

  16. Honda Lawn Mower HRS216K6 PKAA Crankshaft Replacement, Remove the blade: stap 16, afbeelding 1 van 1
    • Loosen, but don't remove, the shiny 14 mm blade holder bolt.

    • Remove the two matte 14 mm bolts securing the blade to the blade holder.

  17. Honda Lawn Mower HRS216K6 PKAA Crankshaft Replacement: stap 17, afbeelding 1 van 2 Honda Lawn Mower HRS216K6 PKAA Crankshaft Replacement: stap 17, afbeelding 2 van 2
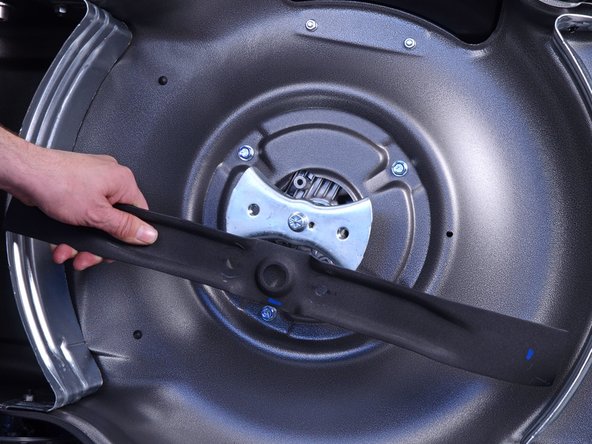
    • Remove the blade.

    • If the blade is heavily used, it may be sharp in some areas. If this is the case, use gloves to remove it.

  18. Honda Lawn Mower HRS216K6 PKAA Crankshaft Replacement, Remove the blade holder: stap 18, afbeelding 1 van 1
    • Fully remove the 14 mm bolt securing the blade holder to the crankshaft.

  19. Honda Lawn Mower HRS216K6 PKAA Crankshaft Replacement: stap 19, afbeelding 1 van 2 Honda Lawn Mower HRS216K6 PKAA Crankshaft Replacement: stap 19, afbeelding 2 van 2
    • Remove the blade holder.

    • If the blade holder is difficult to remove by hand, use a pry bar for more leverage.

    • The blade holder will come out with its accompanying shaft key.

  20. Honda Lawn Mower HRS216K6 PKAA Crankshaft Replacement, Remove the motor: stap 20, afbeelding 1 van 1
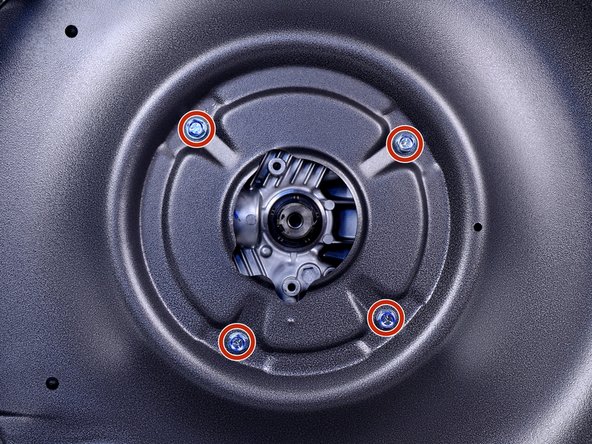
    • Remove the four 12 mm bolts securing the motor to the frame.

    • Once these bolts are removed, the engine will be free to fall off the mower frame. If you are removing the bolts while the mower is on its side, you may need another person to steady the motor.

  21. Honda Lawn Mower HRS216K6 PKAA Crankshaft Replacement: stap 21, afbeelding 1 van 2 Honda Lawn Mower HRS216K6 PKAA Crankshaft Replacement: stap 21, afbeelding 2 van 2
    • Lift the engine off of the mower frame and remove it.

  22. Honda Lawn Mower HRS216K6 PKAA Crankshaft Replacement, Flip the motor over: stap 22, afbeelding 1 van 1
    • Flip the motor over such that it's resting on the three mounting posts for the fan cover.

  23. Honda Lawn Mower HRS216K6 PKAA Crankshaft Replacement, Remove the governor arm: stap 23, afbeelding 1 van 1
    • Loosen, but don't remove, the 10 mm bolt securing the governor arm to the motor.

  24. Honda Lawn Mower HRS216K6 PKAA Crankshaft Replacement: stap 24, afbeelding 1 van 3 Honda Lawn Mower HRS216K6 PKAA Crankshaft Replacement: stap 24, afbeelding 2 van 3 Honda Lawn Mower HRS216K6 PKAA Crankshaft Replacement: stap 24, afbeelding 3 van 3
    • Remove the governor arm from the mounting post.

    • Don't completely remove the governor arm. It's still connected to the motor with some springs.

    • Set the governor arm aside.

  25. Honda Lawn Mower HRS216K6 PKAA Crankshaft Replacement, Remove oil pan: stap 25, afbeelding 1 van 1
    • Remove the eight 10 mm flange bolts securing the oil pan to the engine block.

  26. Honda Lawn Mower HRS216K6 PKAA Crankshaft Replacement: stap 26, afbeelding 1 van 2 Honda Lawn Mower HRS216K6 PKAA Crankshaft Replacement: stap 26, afbeelding 2 van 2
    • Loosen the oil pan by inserting a flathead screwdriver in the two recessed access points on either side of the engine block.

  27. Honda Lawn Mower HRS216K6 PKAA Crankshaft Replacement: stap 27, afbeelding 1 van 2 Honda Lawn Mower HRS216K6 PKAA Crankshaft Replacement: stap 27, afbeelding 2 van 2
    • Use a flathead screwdriver to pry the case apart.

    • Work your way around the entire mating surface to loosen the oil pan.

    • Any residual engine oil may start to leak out. Be ready to contain any spillage.

  28. Honda Lawn Mower HRS216K6 PKAA Crankshaft Replacement: stap 28, afbeelding 1 van 3 Honda Lawn Mower HRS216K6 PKAA Crankshaft Replacement: stap 28, afbeelding 2 van 3 Honda Lawn Mower HRS216K6 PKAA Crankshaft Replacement: stap 28, afbeelding 3 van 3
    • Lift the oil pan straight up and remove it.

    • Any residual engine oil may leak out. Be ready to contain any spillage.

    • Before reassembly, clean off old liquid gasket from the engine block mating surfaces thoroughly before applying new HondaBond or equivalent liquid gasket.

    • During reassembly, loosely tighten each flange bolt and then tighten center-out to 9 ft-lb (12 N-m).

    • Wait at least 20 minutes after reassembly before adding oil to the engine.

  29. Honda Lawn Mower HRS216K6 PKAA Crankshaft Replacement, Position the piston: stap 29, afbeelding 1 van 2 Honda Lawn Mower HRS216K6 PKAA Crankshaft Replacement, Position the piston: stap 29, afbeelding 2 van 2
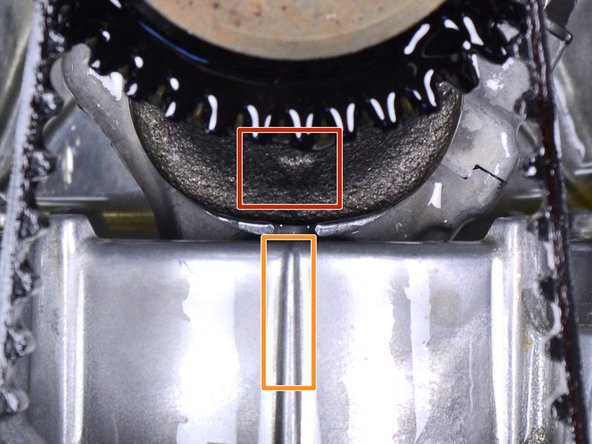
    • Rotate the crankshaft by hand to position the piston at top dead center (TDC) by aligning the two marks:

    • The arrow on the crankshaft

    • The seam on the cylinder block

  30. Honda Lawn Mower HRS216K6 PKAA Crankshaft Replacement, Remove the crankshaft: stap 30, afbeelding 1 van 2 Honda Lawn Mower HRS216K6 PKAA Crankshaft Replacement, Remove the crankshaft: stap 30, afbeelding 2 van 2
    • Remove the thrust washer.

    • Note the orientation of the washerā€”it only goes on one way.

  31. Honda Lawn Mower HRS216K6 PKAA Crankshaft Replacement: stap 31, afbeelding 1 van 1
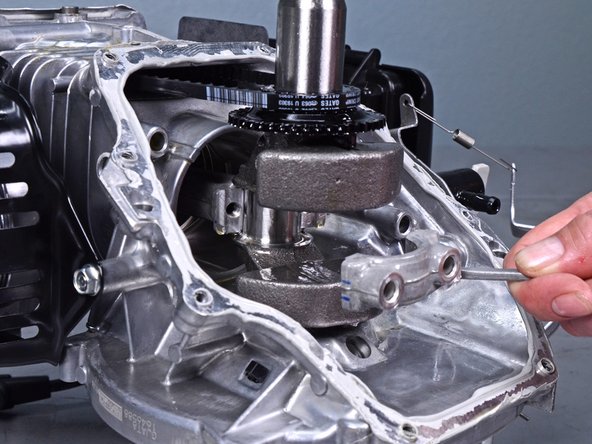
    • Remove the two 10 mm bolts securing the end cap to the connecting rod.

  32. Honda Lawn Mower HRS216K6 PKAA Crankshaft Replacement: stap 32, afbeelding 1 van 2 Honda Lawn Mower HRS216K6 PKAA Crankshaft Replacement: stap 32, afbeelding 2 van 2
    • Remove the connecting rod end cap.

  33. Honda Lawn Mower HRS216K6 PKAA Crankshaft Replacement: stap 33, afbeelding 1 van 2 Honda Lawn Mower HRS216K6 PKAA Crankshaft Replacement: stap 33, afbeelding 2 van 2
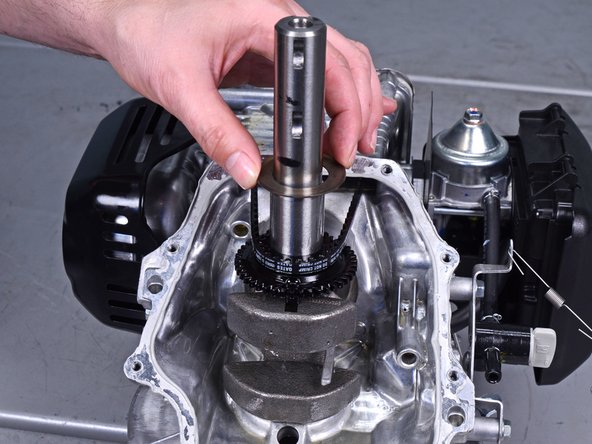
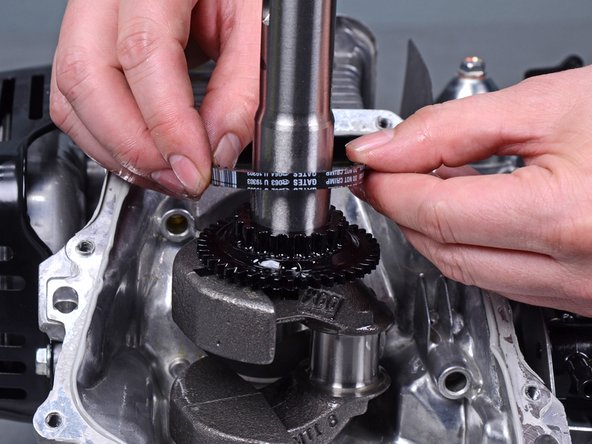
    • Slip the timing belt off of the timing pulley on the crankshaft.

  34. Honda Lawn Mower HRS216K6 PKAA Crankshaft Replacement: stap 34, afbeelding 1 van 2 Honda Lawn Mower HRS216K6 PKAA Crankshaft Replacement: stap 34, afbeelding 2 van 2
    • Pull the crankshaft directly up and out until it's restricted by the timing belt.

    • This shouldn't require much forceā€”don't stretch the timing belt.

  35. Honda Lawn Mower HRS216K6 PKAA Crankshaft Replacement: stap 35, afbeelding 1 van 3 Honda Lawn Mower HRS216K6 PKAA Crankshaft Replacement: stap 35, afbeelding 2 van 3 Honda Lawn Mower HRS216K6 PKAA Crankshaft Replacement: stap 35, afbeelding 3 van 3
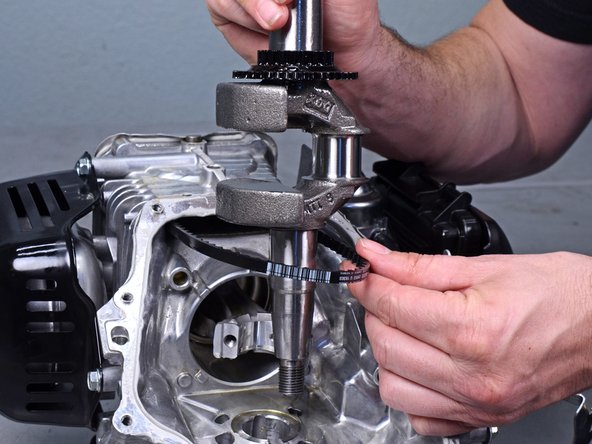
    • Slip the timing belt around the counterweights on the crankshaft.

    • The other side of the timing belt is connected to the cam pulley inside of the cylinder head. It can slip off during this step. If it does, peer up into the cylinder head and reseat the timing belt on the cam pulley.

  36. Honda Lawn Mower HRS216K6 PKAA Crankshaft Replacement: stap 36, afbeelding 1 van 1
    • With the crankshaft free of the timing belt, remove it from the motor.

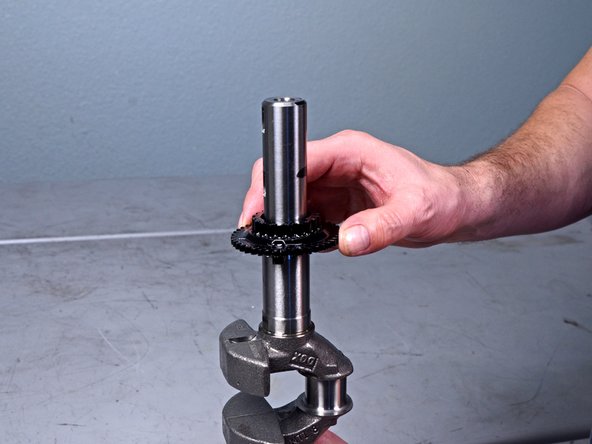
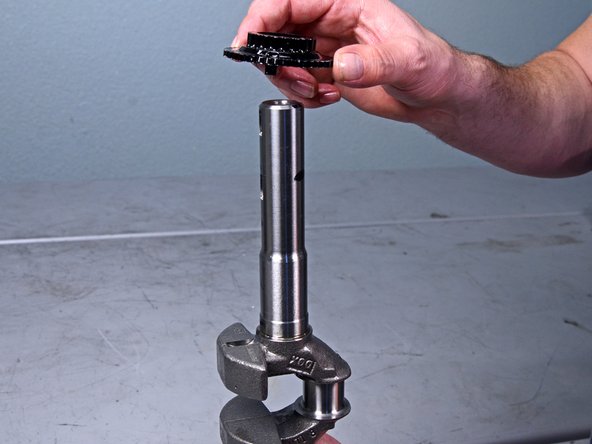
  37. Honda Lawn Mower HRS216K6 PKAA Crankshaft Replacement, Remove the timing pulley: stap 37, afbeelding 1 van 3 Honda Lawn Mower HRS216K6 PKAA Crankshaft Replacement, Remove the timing pulley: stap 37, afbeelding 2 van 3 Honda Lawn Mower HRS216K6 PKAA Crankshaft Replacement, Remove the timing pulley: stap 37, afbeelding 3 van 3
    • Remove the timing pulley from the crankshaft.

Conclusie

To reassemble your device, follow these instructions in reverse order.

6 andere personen hebben deze handleiding voltooid.

Carsten Frauenheim

Lid sinds: 03/10/20

113.712 Reputatie

338 handleidingen geschreven

Team

iFixit Lid van iFixit

Staff

135 Leden

16.817 handleidingen geschreven

0 opmerkingen

Voeg opmerking toe

Weergavestatistieken:

Afgelopen 24 uren: 3

Afgelopen 7 dagen: 28

Afgelopen 30 dagen: 171

Altijd: 7,520