Ga door naar hoofdinhoud

Hasee Z7M-i78172D1 Graphic Card Fan Replacement

Wat je nodig hebt

  1. Hasee Z7M-i78172D1 Graphic Card Fan Replacement, Rear Panel: stap 1, afbeelding 1 van 1
    • Use a #0 Phillips head screwdriver and unscrew the sixteen 7mm screws on the back of the device.

  2. Hasee Z7M-i78172D1 Graphic Card Fan Replacement: stap 2, afbeelding 1 van 3 Hasee Z7M-i78172D1 Graphic Card Fan Replacement: stap 2, afbeelding 2 van 3 Hasee Z7M-i78172D1 Graphic Card Fan Replacement: stap 2, afbeelding 3 van 3
    • Use a plastic opening tool to take off the back plastic panel.

  3. Hasee Z7M-i78172D1 Graphic Card Fan Replacement, Graphic Card Fan: stap 3, afbeelding 1 van 3 Hasee Z7M-i78172D1 Graphic Card Fan Replacement, Graphic Card Fan: stap 3, afbeelding 2 van 3 Hasee Z7M-i78172D1 Graphic Card Fan Replacement, Graphic Card Fan: stap 3, afbeelding 3 van 3
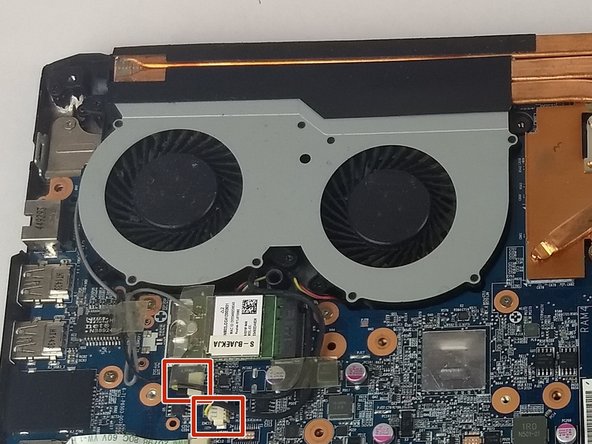
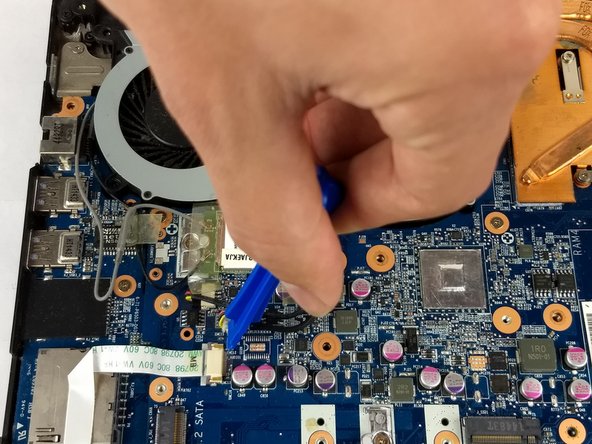
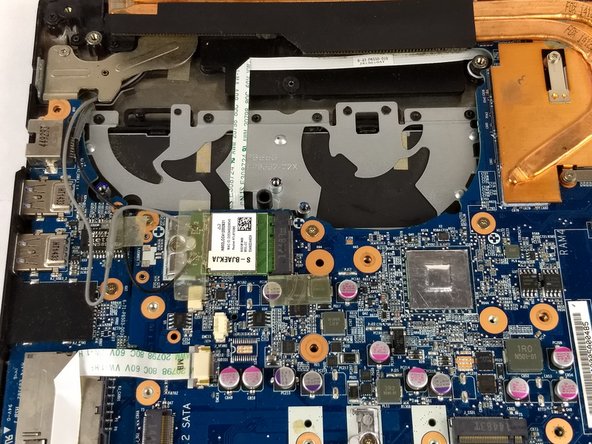
    • To take out the Graphics card fan it is necessary to disconnect the two Graphic card fan cables. Use a plastic opening tool to remove the cable.

  4. Hasee Z7M-i78172D1 Graphic Card Fan Replacement: stap 4, afbeelding 1 van 1
    • Use a #0 Phillips head screwdriver and unscrew the five 7mm screws holding the fan in place.

  5. Hasee Z7M-i78172D1 Graphic Card Fan Replacement: stap 5, afbeelding 1 van 2 Hasee Z7M-i78172D1 Graphic Card Fan Replacement: stap 5, afbeelding 2 van 2
    • Lift the Graphics card fan out and replace with the replacement fan.

Conclusie

To reassemble your device, follow these instructions in reverse order.

Één andere persoon heeft deze handleiding voltooid.

Zachary Gay

Lid sinds: 02/14/18

124 Reputatie

1 Handleiding geschreven

Team

USF Tampa, Team S6-G6, Eyestone Spring 2018 Lid van USF Tampa, Team S6-G6, Eyestone Spring 2018

USFT-EYESTONE-S18S6G6

3 Leden

12 handleidingen geschreven

0 opmerkingen

Voeg opmerking toe

Weergavestatistieken:

Afgelopen 24 uren: 1

Afgelopen 7 dagen: 2

Afgelopen 30 dagen: 11

Altijd: 375