Ga door naar hoofdinhoud

Deze handleiding heeft recentere wijzigingen. Schakel over naar de nieuwste niet-geverifieerde versie.

HTC Touch Pro CDMA Keyboard Replacement

Wat je nodig hebt

  1. HTC Touch Pro CDMA Keyboard Replacement, Battery: stap 1, afbeelding 1 van 2 HTC Touch Pro CDMA Keyboard Replacement, Battery: stap 1, afbeelding 2 van 2
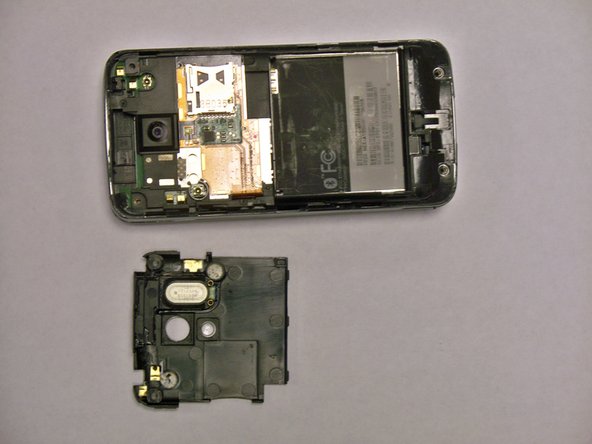
    • First, gently press on the back plate and push down toward the camera.

  2. HTC Touch Pro CDMA Keyboard Replacement: stap 2, afbeelding 1 van 2 HTC Touch Pro CDMA Keyboard Replacement: stap 2, afbeelding 2 van 2
    • Use your finger to lift up the edge of the battery.

  3. HTC Touch Pro CDMA Keyboard Replacement, USB Logic Board: stap 3, afbeelding 1 van 1
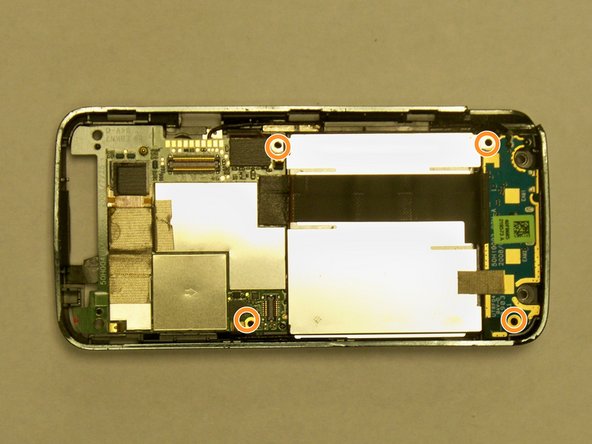
    • Remove the 4 screws using the T6 screw driver.

  4. HTC Touch Pro CDMA Keyboard Replacement: stap 4, afbeelding 1 van 2 HTC Touch Pro CDMA Keyboard Replacement: stap 4, afbeelding 2 van 2
    • Lift the plastic cover near the memory card slot.

  5. HTC Touch Pro CDMA Keyboard Replacement: stap 5, afbeelding 1 van 1
    • Remove the two Phillips #00 screws from the backside of the screen.

  6. HTC Touch Pro CDMA Keyboard Replacement: stap 6, afbeelding 1 van 2 HTC Touch Pro CDMA Keyboard Replacement: stap 6, afbeelding 2 van 2
    • Insert a spudger or a plastic opening tool into the seam on the side of the phone.

    • Gently pry apart the two halves of the phone.

  7. HTC Touch Pro CDMA Keyboard Replacement: stap 7, afbeelding 1 van 2 HTC Touch Pro CDMA Keyboard Replacement: stap 7, afbeelding 2 van 2
    • Gently unplug the connectors.

    • Remove the screws with a 00 Phillips-head screwdriver.

  8. HTC Touch Pro CDMA Keyboard Replacement: stap 8, afbeelding 1 van 2 HTC Touch Pro CDMA Keyboard Replacement: stap 8, afbeelding 2 van 2
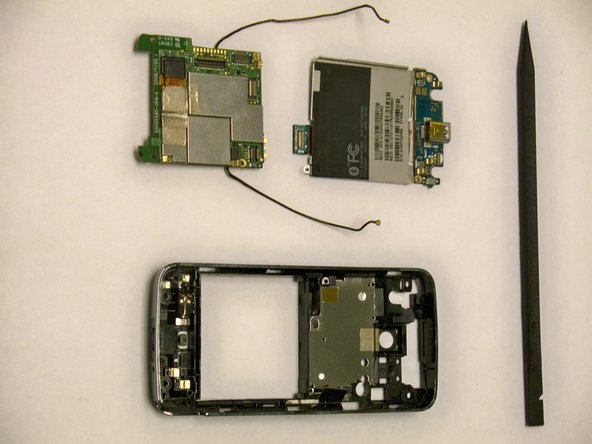
    • Gently lift the motherboard up using a nylon spudger.

    • BE AWARE OF THE ANTENNA.

  9. HTC Touch Pro CDMA Keyboard Replacement, Keyboard: stap 9, afbeelding 1 van 2 HTC Touch Pro CDMA Keyboard Replacement, Keyboard: stap 9, afbeelding 2 van 2
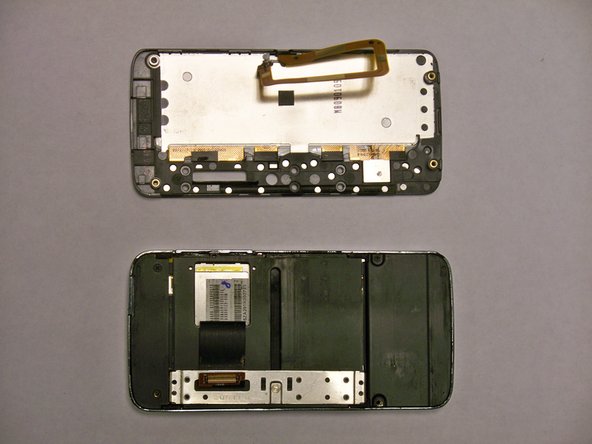
    • Remove the 4 screws circled in red using a 00 Phillips-head screwdriver.

Conclusie

To reassemble your device, follow these instructions in reverse order.

Zhaowei Zhang

Lid sinds: 04/28/11

133 Reputatie

4 handleidingen geschreven

Team

CSU Los Angeles, Team 1-6, Nelson Spring 2011 Lid van CSU Los Angeles, Team 1-6, Nelson Spring 2011

CSULA-NELSON-S11S1G6

3 Leden

8 handleidingen geschreven

0 opmerkingen

Voeg opmerking toe

Weergavestatistieken:

Afgelopen 24 uren: 0

Afgelopen 7 dagen: 1

Afgelopen 30 dagen: 2

Altijd: 2,059