Wat je nodig hebt
-
-
Remove the back cover of the device to access the internal components of the HTC 7 Surround.
-
To remove the back cover, use the circular hole to lift up the cover while holding the front of the device down.
-
-
-
-
Look at the bottom right hand corner of the device and remove the silver tape covering the SD card slot with your fingers.
-
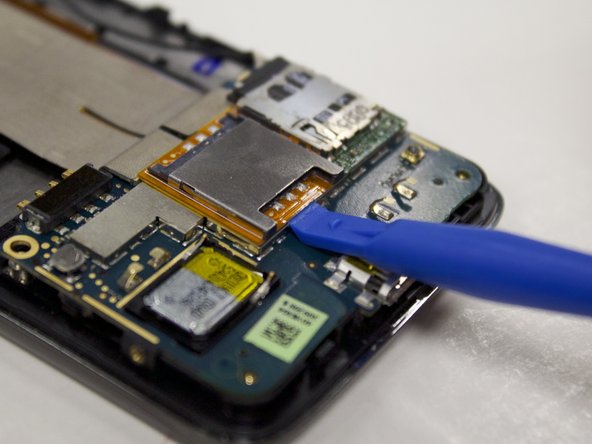
Insert the plastic opening tool directly underneath the orange surface below the SIM card until its removed from the surface of the device.
-
-
-
To get to the attachment that the SD/SIM card is attached to; insert the plastic opening tool underneath the lower motherboard until it is removed from the bottom half of the device.
-
You will notice the SD/SIM card is attached to the lower motherboard by a yellow piece of tape. Remove the tape from the back of motherboard with your fingers.
-


To reassemble your device, follow these instructions in reverse order.
To reassemble your device, follow these instructions in reverse order.
Team

University of North Texas, Team S2-G5, Riccardelli Fall 2018 Lid van University of North Texas, Team S2-G5, Riccardelli Fall 2018
UNT-RICCARDELLI-F18S2G5
3 Leden
5 handleidingen geschreven