Inleiding
IMPORTANT NOTE FOR FIXING CAPACITIVE BUTTONS
Repairing your phone's capacitive buttons may require replacement of your phone's digitizer, which may be very difficult, but is outlined in the screen replacement guide. There's a simple software work around for unresponsive capacitive buttons via an app called Button Savior which can be found here.
Wat je nodig hebt
-
-
Insert a safety pin, or other small object in the small opening next to the Sim card slot to remove the SIM card.
 Vraag FixBot
-
-
-
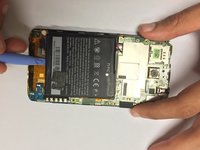
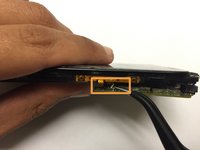
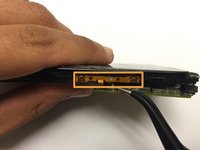
Using a plastic opening tool, carefully separate the display screen from the rear panel.
-
Set aside the rear panel.
-
-
-
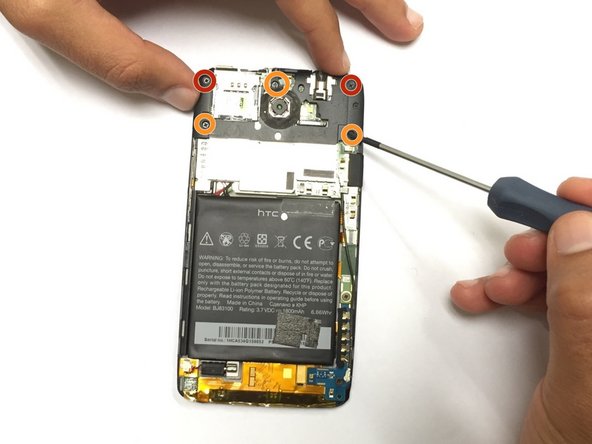
Remove the five screws at the top of the panel using a Phillips head screwdriver.
-
Two 2.05mm Philips head screws
-
Three 2.44mm Philips head screws
-
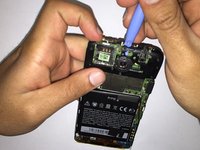
Once the screws are removed, gently remove the plastic cover using a plastic opening tool to detach the edges from the front panel.
-
-
-
Gereedschap gebruikt in deze stap:Tweezers$4.99
-
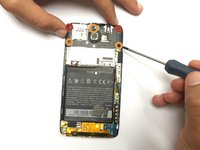
Remove the two screws at the bottom right corner of the front panel using a Phillips head screwdriver, as shown in the image.
-
Two 3.35mm Philips head screws
-
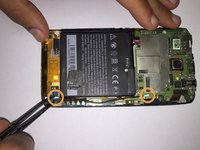
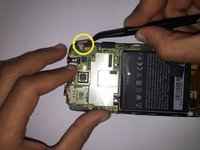
Use tweezers to disconnect the antenna from the logic board to the PCB board.
-
Remove the tape connected to the motherboard.
-
-
-
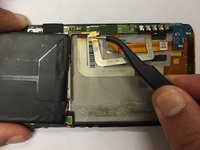
Remove the tape holding the battery in place.
-
Gently lift the battery from the bottom using a plastic opening tool.
-
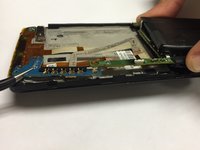
You can now disconnect the flex cable holding the PCB board place. Gently open the gates using tweezers or a plastic opening tool and use tweezers to slide the flex cable out.
-
Now that it's separated, remove and set aside the PCB board.
-
-
-
Place the battery back into its original position once the PCB board has been removed
-
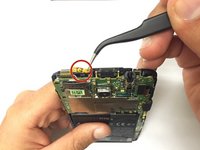
Use tweezers to disconnect the power button flex cables.
-
Disconnect the volume flex cable by opening the gate and then sliding the cable out using tweezers.
-
Disconnect the touchscreen flex cable
-
-
-
Disconnect the remaining two flex cables in a similar manner before completely removing the logic board.
-
You may now remove the board safely
-
-
-
Ensure that the power button flex cable from Step 6 is connected securely with its base.
-
Ensure that the volume flex cable from Step 6 is connected securely with its base.
-
Follow these steps in reverse and specifically check the power and volume buttons as they're placed into the phone.
-


To reassemble your device, follow these instructions in reverse order.
Annuleren: ik heb deze handleiding niet afgemaakt.
4 andere personen hebben deze handleiding voltooid.
Team

USF Tampa, Team 4-3, Brown Fall 2014 Lid van USF Tampa, Team 4-3, Brown Fall 2014
USFT-BROWN-F14S4G3
3 Leden
26 handleidingen geschreven
1Gids Commentaar
Mera phone htc one x hi jo chalu nahi ho raha hi ab mi kya karu mene phone ko pura khola tha