Deze versie kan foutieve bewerkingen bevatten. Schakel over naar de recentste gecontroleerde momentopname.
Wat je nodig hebt
-
-
Vul een pan met genoeg water om de iOpener volledig in onder te dompelen.
-
Verwarm het water tot het kookt. Zet het vuur uit.
-
Leg je iOpener gedurende 2-3 minuten in het hete water. Zorg dat de iOpener volledig in het water ligt.
-
Gebruik een tang om de iOpener uit de pan te halen.
-
Droog je iOpener grondig met een handdoek.
-
Je iOpener is gereed om te worden gebruikt! als je je iOpener opnieuw op wilt warmen, verwarm je het water weer tot het kookt, zet je het vuur uit en plaats je de iOpener gedurende 2-3 minuten in het water.
-
-
Deze stap is niet vertaald. Help het te vertalen
-
Handling it by the tag, place the heated iOpener across the bottom casing.
-
-
Deze stap is niet vertaald. Help het te vertalen
-
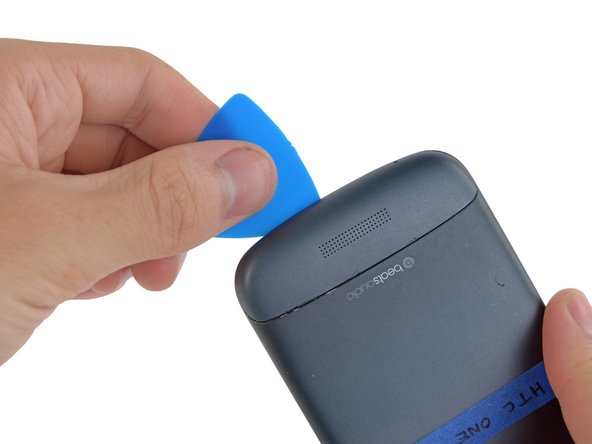
Gently place an opening pick in the corner of the gap between the bottom casing and rear case.
-
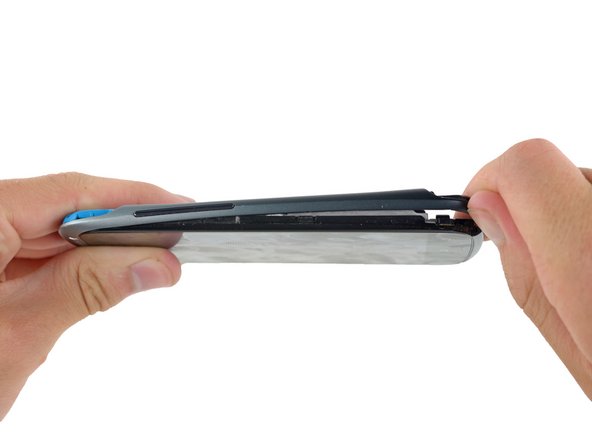
Slide the opening pick along the side of the casing, prying it away from the adhesive as you go.
-
-
Deze stap is niet vertaald. Help het te vertalen
-
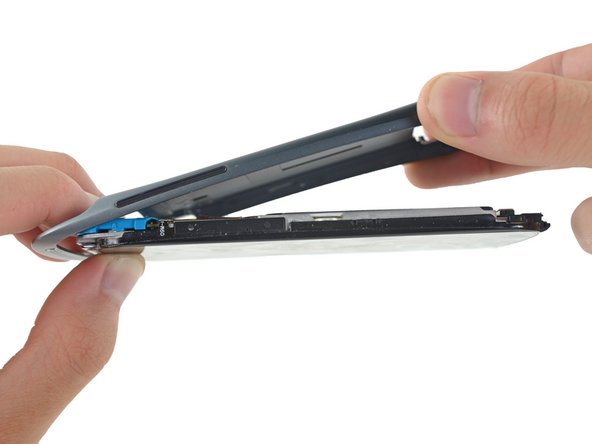
Use your fingers to pull the bottom casing off the rest of the phone.
-
-
Deze stap is niet vertaald. Help het te vertalen
-
Starting at the groove near the headphone jack, use a plastic opening tool to lift the top casing.
-
-
Deze stap is niet vertaald. Help het te vertalen
-
Use your fingers to pull the top casing off of the rest of the phone.
-
-
Deze stap is niet vertaald. Help het te vertalen
-
Remove the following screws holding the rear case to the rest of the phone:
-
Two 3.15 mm Phillips #00 screws
-
One 4.15 Torx T5 screw
-
One 4 mm Torx T5 screw
-
-
-
Deze stap is niet vertaald. Help het te vertalen
-
Place your fingers on either side of the phone and gently push up on the rear case.
-
-
Deze stap is niet vertaald. Help het te vertalen
-
Pull the rear case away from the rest of the phone with your hands.
-
-
Deze stap is niet vertaald. Help het te vertalen
-
Using the pointed end of a spudger, lift the battery cable and release the connector.
-
-
Deze stap is niet vertaald. Help het te vertalen
-
Switching to the flat end of the spudger, work your way underneath the battery and peel it away from the adhesive.
-
-
Deze stap is niet vertaald. Help het te vertalen
-
Remove the three 3.15mm Phillips #00 screws from the turquoise case.
-
-
Deze stap is niet vertaald. Help het te vertalen
-
Using a plastic opening tool, lift the turquoise case from the end near the headphone jack.
-
-
Deze stap is niet vertaald. Help het te vertalen
-
A camera filter is now free to move, so remove it using tweezers.
-
-
Deze stap is niet vertaald. Help het te vertalen
-
Use tweezers to lift the yellow polyimide tape that covers the ZIF connectors.
-
-
Deze stap is niet vertaald. Help het te vertalen
-
Use the pointed end of a spudger to lift the white tab on the largest ZIF connector opposite the USB connector.
-
-
Deze stap is niet vertaald. Help het te vertalen
-
Use the pointed edge of a spudger to work the ZIF cable out of its connector.
-
-
Deze stap is niet vertaald. Help het te vertalen
-
Repeat the procedure from steps 19 and 20 to remove the cables from the remaining ZIF connectors.
-
-
Deze stap is niet vertaald. Help het te vertalen
-
Using the pointed end of the spudger, pop the antenna cable from its connector on the motherboard.
-
-
Deze stap is niet vertaald. Help het te vertalen
-
Remove the 3.15 mm Phillips #00 screw from the motherboard.
-
-
Deze stap is niet vertaald. Help het te vertalen
-
Using the nylon spudger, remove the circuit board from the phone.
-
-
Deze stap is niet vertaald. Help het te vertalen
-
The component denoted in the red box is the vibration motor. Remove the component by desoldering the surface-mount joints.
-


Team

IUPUI, Team S4-G3, Harley Spring 2017 Lid van IUPUI, Team S4-G3, Harley Spring 2017
IUPUI-HARLEY-S17S4G3
3 Leden
5 handleidingen geschreven