Ga door naar hoofdinhoud

HTC One Mini 2 Power and Volume Buttons Replacement

Wat je nodig hebt

  1. HTC One Mini 2 Power and Volume Buttons Replacement, Sim and MicroSD Card: stap 1, afbeelding 1 van 3 HTC One Mini 2 Power and Volume Buttons Replacement, Sim and MicroSD Card: stap 1, afbeelding 2 van 3 HTC One Mini 2 Power and Volume Buttons Replacement, Sim and MicroSD Card: stap 1, afbeelding 3 van 3
    • Insert the end of a paper clip into the holes on each side of the phone to eject the SIM card and Micro SD card.

    • Set the cardholders aside.

  2. HTC One Mini 2 Power and Volume Buttons Replacement: stap 2, afbeelding 1 van 1
    • Heat up the top grey speaker plate with the iFixit iOpener for two minutes.

  3. HTC One Mini 2 Power and Volume Buttons Replacement, Front Plate: stap 3, afbeelding 1 van 3 HTC One Mini 2 Power and Volume Buttons Replacement, Front Plate: stap 3, afbeelding 2 van 3 HTC One Mini 2 Power and Volume Buttons Replacement, Front Plate: stap 3, afbeelding 3 van 3
    • Use a metal spudger to pry up the left edge of the upper grey front plate.

    • Place the spudger between the inside white plastic edge and the grey plate. Do not pry between the two white plastic frames.

    • Don’t pry against the glass. Pry against only the left side as there is a delicate antenna under the plate.

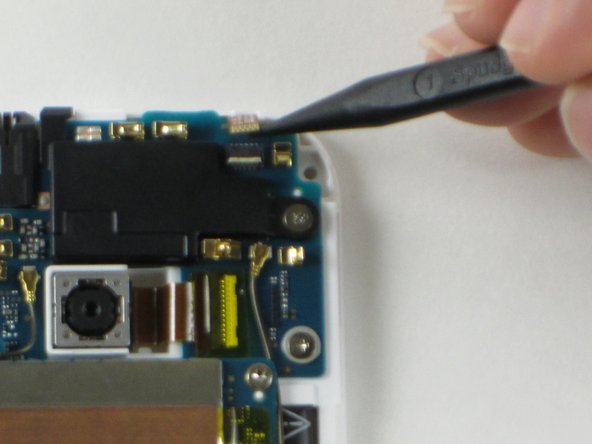
    • Use the narrow plastic pry tool to carefully separate the black ribbon antenna from the grey plate.

  4. HTC One Mini 2 Power and Volume Buttons Replacement: stap 4, afbeelding 1 van 2 HTC One Mini 2 Power and Volume Buttons Replacement: stap 4, afbeelding 2 van 2
    • Remove the 2mm screw with a T5 torx screwdriver head from the iFixit tool kit.

  5. HTC One Mini 2 Power and Volume Buttons Replacement: stap 5, afbeelding 1 van 2 HTC One Mini 2 Power and Volume Buttons Replacement: stap 5, afbeelding 2 van 2
    • Use the plastic pry tool to pry around the edge of the phone.

    • Pry carefully around the card slots.

    • Slowly pull up from the right side of the screen like opening a book.

    • The plastic piece for the power button may fall out. Set it aside for reassembly.

    • Use the plastic spudger to peel the foam adhesive around the camera away from the back plate.

  6. HTC One Mini 2 Power and Volume Buttons Replacement, Power and Volume Buttons: stap 6, afbeelding 1 van 2 HTC One Mini 2 Power and Volume Buttons Replacement, Power and Volume Buttons: stap 6, afbeelding 2 van 2
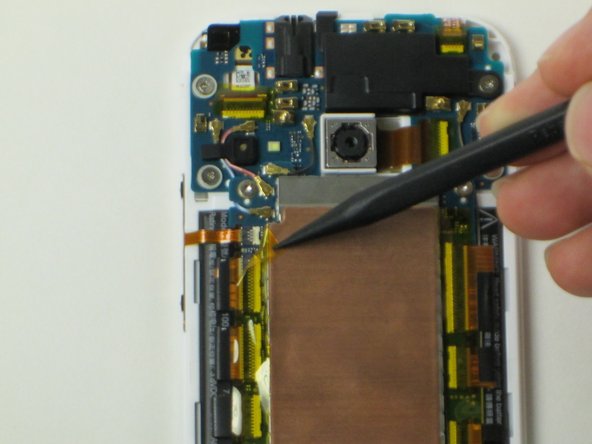
    • Use the pointed end of a spudger to peel the yellow tape off of the power button connector.

  7. HTC One Mini 2 Power and Volume Buttons Replacement: stap 7, afbeelding 1 van 2 HTC One Mini 2 Power and Volume Buttons Replacement: stap 7, afbeelding 2 van 2
    • Using the pointed end of the spudger, pop up the small white tab on the power button connector.

    • Gently pull the ribbon cable out of the connector.

  8. HTC One Mini 2 Power and Volume Buttons Replacement: stap 8, afbeelding 1 van 1
    • Use a plastic opening tool to pry under the green mini circuit board to peel off the power button.

    • There is light adhesive holding the button on. This should be relatively easy to take off.

  9. HTC One Mini 2 Power and Volume Buttons Replacement: stap 9, afbeelding 1 van 2 HTC One Mini 2 Power and Volume Buttons Replacement: stap 9, afbeelding 2 van 2
    • Use the pointed end of a spudger to peel off the yellow tape from the volume button connector.

    • The connector is found at the top left corner of the copper plate.

  10. HTC One Mini 2 Power and Volume Buttons Replacement: stap 10, afbeelding 1 van 2 HTC One Mini 2 Power and Volume Buttons Replacement: stap 10, afbeelding 2 van 2
    • Use the pointed end of the spudger to pop up the white tab to the left.

  11. HTC One Mini 2 Power and Volume Buttons Replacement: stap 11, afbeelding 1 van 1
    • Gently pull the ribbon cable for the volume buttons out of the connector.

  12. HTC One Mini 2 Power and Volume Buttons Replacement: stap 12, afbeelding 1 van 1
    • Use a plastic opening tool to peel off the volume buttons.

    • The buttons are held on with light adhesive. No heavy prying needed here.

Conclusie

To reassemble your device, follow these instructions in reverse order.

6 andere personen hebben deze handleiding voltooid.

Victoria Engle

Lid sinds: 10/14/14

342 Reputatie

1 Handleiding geschreven

Team

Cal Poly, Team 4-48, Amido Fall 2014 Lid van Cal Poly, Team 4-48, Amido Fall 2014

CPSU-AMIDO-F14S4G48

5 Leden

17 handleidingen geschreven

Één opmerking

HTC One Mini (not Mini 2) doesn't have the zif connector for its power and volume flex cables but directly connected to board. can you suggest an easy way to replace them? I have found the replacement parts but don't know if I could do it in home or not. thanks

Khurram Ali - Antwoord

Voeg opmerking toe

Weergavestatistieken:

Afgelopen 24 uren: 0

Afgelopen 7 dagen: 1

Afgelopen 30 dagen: 1

Altijd: 8,779